
Quilt a Scrappy Star Block on Your Home Machine
My Scrappy Star Quilt Block is basted and ready to machine quilt! I decided to keep the quilting design very simple with this first block and quilted it with a combination of walking foot quilting and ruler foot quilting. Learn how this works in this quilting tutorial:
Click Here to find the Scrappy Star Pattern. This quilt pattern comes with everything you need to get started on the Friendship Sampler Quilt. What size is the quilt? How much fabric will you need? Learn all this and more with Block #1!
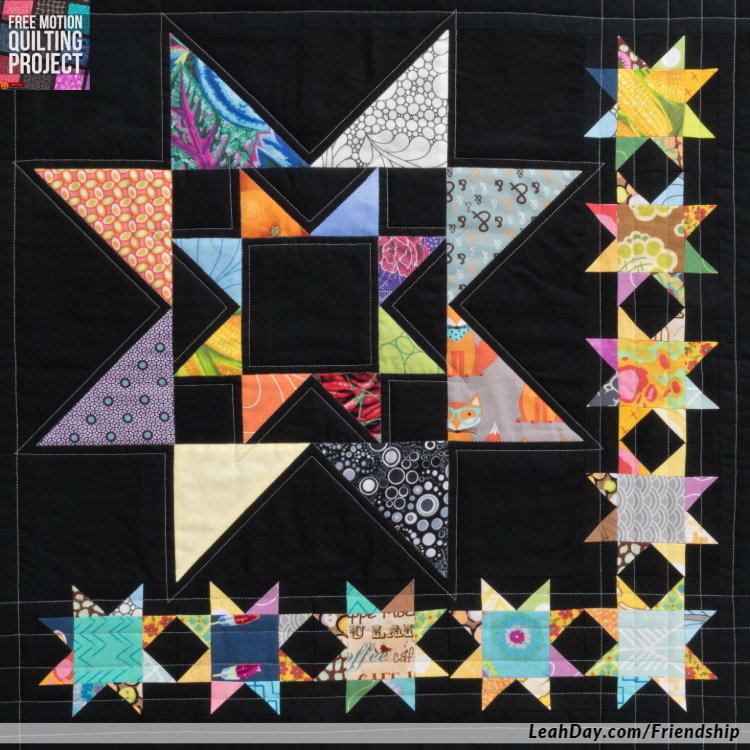
I love this simple, straight-line design over this Scrappy Star block
Click here to find a quilt basting tutorial. We’re quilting all the blocks for the Friendship Sampler separately with a quilt-as-you-go technique. This means each block will be quilted separately, then at the end when all the blocks are done, we’ll trim them down and connect them together using this method to make the finished quilt.
I quilted my block on my home sewing machine, the Eversewn Sparrow 20. I’m using an open toe walking foot, ruler foot and Slice Ruler. You can find both quilting feet in this Deluxe Foot Set.
How to Stitch in the Ditch
The first step to quilting this star block is to stitch in the ditch around colorful triangle shapes. I stitched from the center around the medium-sized star, then around the largest half square triangles.
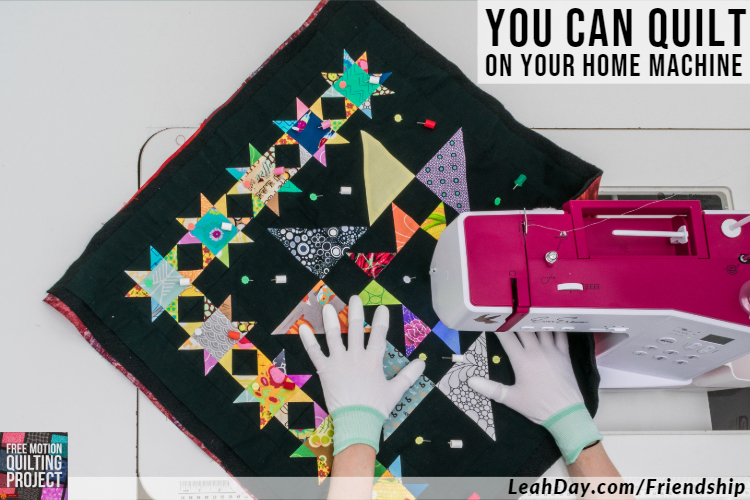
You can quilt this entire design with walking foot quilting on your home machine
The easiest way to stitch in the ditch is to use a walking foot. I set my stitch length to 1.5 mm to create a tight, secure stitch. I also place my Queen Supreme Slider to the left side of my machine, completely off the feed dogs.
We use the feed dogs for this style of quilting to help feed the quilt through the machine. Whatever stitch length you set on your machine will change the size of your stitch on your quilt.
Yes, my seam allowances are pressed open, and yes, I’m stitching right in the ditch! I’ve never had an issue with my seams being pressed open because I always piece with a very tight stitch length too.
The key to stitching in the ditch is to go slow. Let your walking foot walk and feed the layers of the quilt evenly through the machine. Take your time and remember to keep the pressure of your hands light on the quilt block.
If you notice your stitches is getting longer, you’re probably being too heavy-handed. You should only need to nudge the quilt in the right direction with your fingertips.
How to Begin and End Every Line of Quilting
Every time you start and stop a line of quilting, you’ll have two thread tails to tie off and bury in your quilt. Yes, you can build up thread by stitching in place, but I really don’t think that’s a good method to use and your stitches can start to unravel. Click Here to learn how to secure your thread tails properly.
Switching to Ruler Foot Quilting
To switch from walking foot quilting to ruler foot quilting, I changed my stitch length to 0.0 mm and moved my Queen Supreme Slider to cover the feed dogs.
Ruler foot quilting is a type of free motion quilting. It’s up to you to push the quilt through the machine and balance the speed of your hands moving with the speed of your needle bouncing up and down.

Ruler quilting can create perfectly spaced straight lines too
If you notice your stitches are too small, try speeding up your hands OR slowing down your machine speed.
If you notice your stitches are too big, try slowing down your hands OR speeding up your machine.
The size of your stitches is entirely up to you with free motion quilting and ruler foot quilting. This is a balancing ratio so you should only change either your hand speed or machine speed, not both at the same time or your stitches will remain the same.
One thing to be very careful about is to never drop your needle when the ruler foot is in the up position. Always make sure your foot is in the down position before rotating your hand wheel or pressing on your foot pedal.
Echo Ditching with Ruler Quilting
I used ruler foot quilting and the straight edges of the Slice Quilting Ruler to do echo ditching around the medium and large stars. This method uses the high base of the ruler foot and the straight edge of the ruler to help you quilt nice straight lines.
Echo ditching is a super simple way of emphasizing any pieced shape or design on your quilt. It’s very minimal quilting, but perfectly accents the patchwork shapes.
How to Quilt the Scrappy Star Border
I considered quilting the scrappy stars in the border the same way I quilted the medium and large stars. But I worried stitching in the ditch and echo ditching the small stars would make the quilt block feel too stiff.
I decided to take a risk and quilt straight lines through the middle of the pieces in the scrappy star border. This was a risk because the lines overlapped the piecing and basically ignored all those tiny half square triangles!

It was a risky choice to quilt lines over the mini stars, but I really like this effect!
But it’s good to experiment and try different ideas, even ideas you think might look bad. I really like how this turned out!
How would you have quilted this Scrappy Star quilt block? Did you like this simple straight-line design? Would you quilt this with ruler foot or your walking foot? Share your ideas in the comments below.
Next week I’ll share another tutorial on quilting this block on my longarm. I have idea for a very different quilting design, and I can’t wait to challenge myself to quilt over the stars the very different style quilting.
Click here to find a pattern for block 1 and join in the fun of the Friendship Quilt Along today!
Your Scrappy Star Quilt Blocks
I’d love to see your quilted Scrappy Star blocks! You can post a photo in the comments below. There seems to be a bug in this app for some quilters so if you get a 404 error, please send me a message here and I’ll post your photo for you.
Check out Donna’s Scrappy Star block!
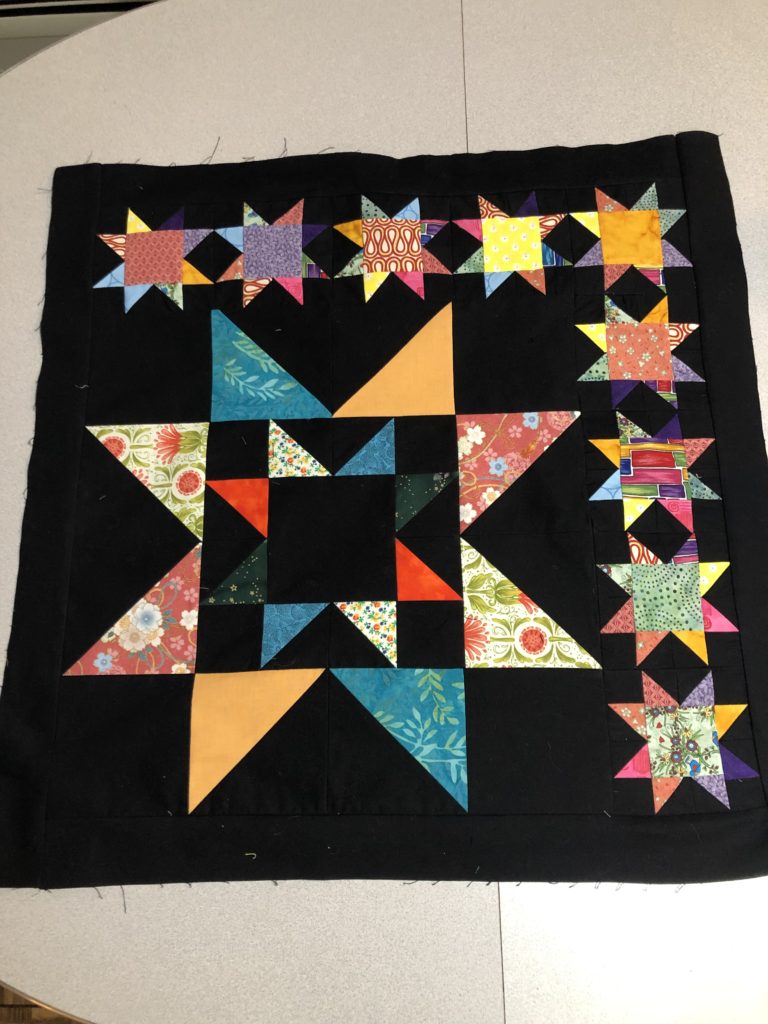
Donna said: This came out so pretty but let’s not look at the back of it! The more I had pieces the more messy my seams look.
Let’s go quilt,
Leah Day
P.S – What does the Scrappy Star block look like on the back? I think this turned out great with my crazy pieced backing!
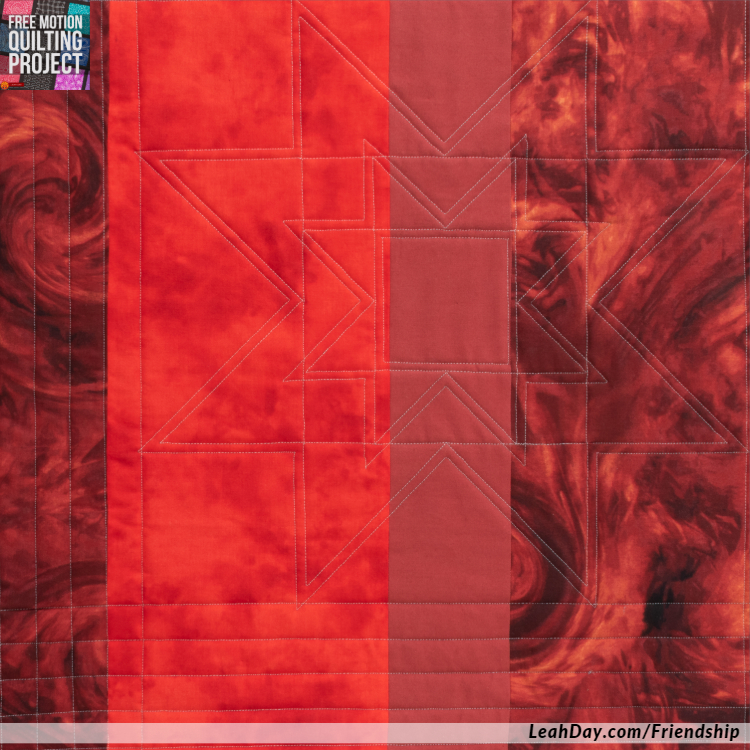
These orange fabrics really make the gray thread pop!
Find more Friendship Quilt Along Tutorials
Check out the other tutorials I shared for this Scrappy Star quilt block:
- How to cut scraps for the Friendship Quilt Along
- Piece two at a time half square triangles
- How to piece the Scrappy Star quilt block
- Baste a block for home machine quilting
- How to quilt a Scrappy Star on your home machine
- How to load a longarm with a single quilt block
- Quilt the Scrappy Star block on your longarm machine
I was impressed by your review of the JUKI 2010Q. Last fall I purchased one. You’ve been using a different machine & I am curious about the change.
I’ve been using the Eversewn Sparrow 20 for the last several months and been very pleased with it. I had too many thread breaks and tension issues with the 2010Q to keep it longer than a few months.
With the FaceBook page gone now will you have another location for us to post pictures of our blocks? I always enjoyed seeing others take one if your patterns and make it their own.
You can actually share a picture right here! If you click “choose file” you can share a picture of your scrappy star to this post, which is where quilters following along are most likely to see and enjoy it!
I also enjoyed viewing other people’s quilts. Sad that no one has shared here. I’m just about ready to sew block #1. I’m starting this quilt along late
We’ve had a few blocks posted! I’ve shared them on the piecing tutorial, but I’ll start sharing them to this quilting tutorial too: https://freemotionproject.com/2018/12/how-to-piece-a-scrappy-star-quilt-block.html
What color thread are you using? It looks like white.
It’s Isacord Sterling gray. It’s much lighter than the black background, but blends in a lot with the scrappy fabrics. You can find it here: https://leahday.com/collections/shop/products/isacord-thread