
How to Baste Your Quilt Blocks for Quilt-As-You-Go
Our Scrappy Star quilt block is pieced and ready to quilt-as-you-go! Let’s layer the block with batting and backing and baste the quilt sandwich securely together. Learn how I’m basting the blocks for this project in this quilting tutorial:
Click here to find the Block 1 pattern! This pattern includes everything you need to get started with the Friendship Sampler Quilt Along. It includes lots of tips for piecing and the four types of machine quilting we’re learning together this year. It also includes a detailed materials list and guide for five different sizes of the quilt: crib, throw, twin, Queen, or King.
Click Here to find Pinmoors, my favorite basting tool.
Prepare Your Backing Fabric
The first step to basting your quilt blocks is to prepare your backing fabric. Wash, starch, and press your backing so it’s slightly stiff before basting. This will minimize the chances the backing fabric will stretch on the back of your quilt.
As you can see in the quilting tutorial, I’ve pieced the quilt back for my blocks. After piecing the scraps together, I pressed all the seam allowances open so the backing would be nice and flat and easy to quilt over.
Learn how to baste your blocks so you’re ready to quilt!
The next step to basting is picking out a batting. I’m using Quilters Dream Midnight. I chose this batting because I love Quilters Dream Poly, and this Midnight is been dyed black so I will not have any chance of the batting showing through the dark background fabric I’m using.
I’ve also used wool in years past and have always loved that effect to. If you like to learn more about batting choices please check out my Basting Basics Workshop. I go into lots of detail about the different types of batting and why you should always keep the package and understand how much quilting your quilt needs.
How to Baste Your Quilt Blocks
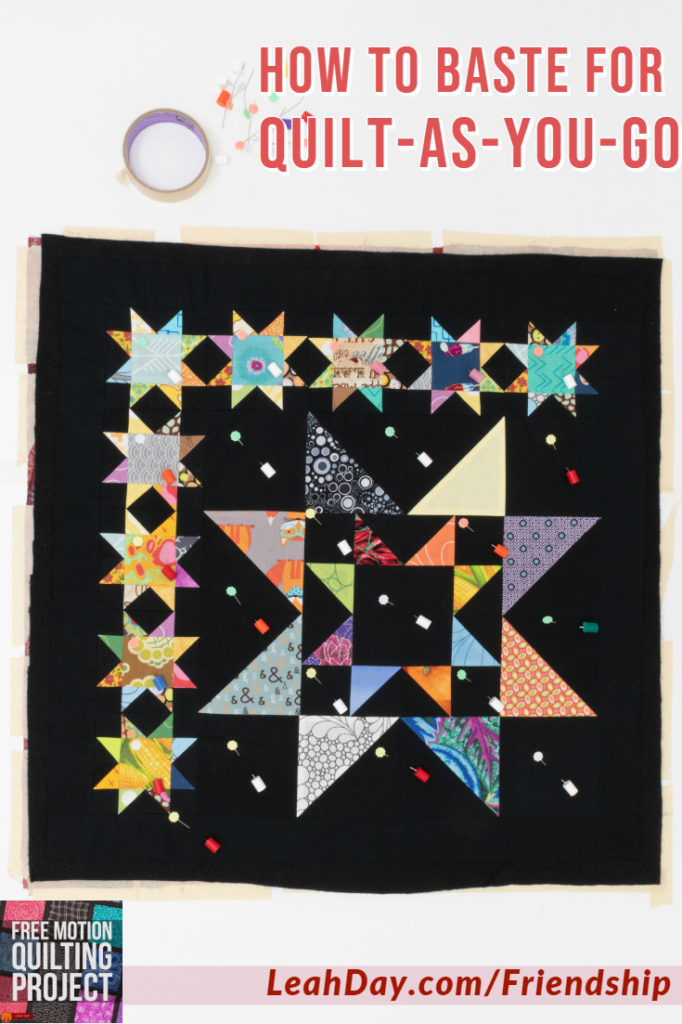
Because we’re doing quilt-as-you-go, each block will be basted and quilted separately. These are really BIG blocks so take your time layering and basting each one.
First tape down your backing fabric very securely to your tabletop. Next top it with your batting and spend some time smoothing out all the layers. Spread your pieced quilt block on top and smooth out everything one more time.
The last step is to secure the three layers together using some sort of temporary method. It doesn’t need to last forever because our quilting stitches will be what holds the block together permanently.
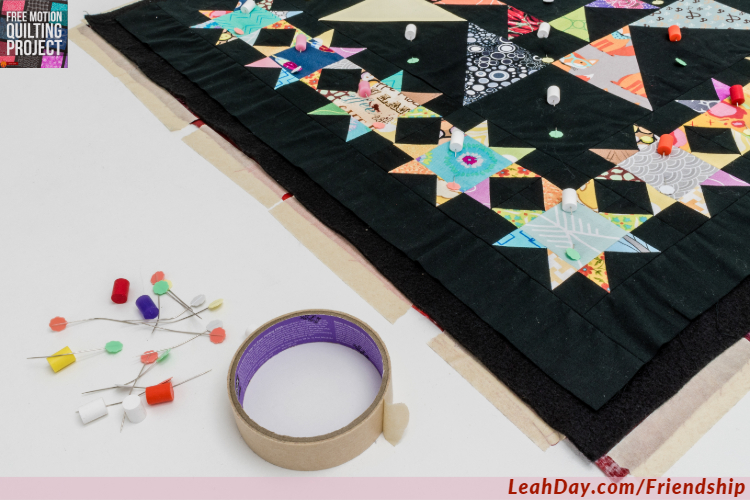
I like basting with Pinmoors and flower pins to hold my quilt blocks together.
I like to use straight flower head pins and Pinmoors for basting because they’re easy to install and also very easy to take out as you quilt the block. Click here to find both in the baste your quilt kit.
You don’t need tons of pins to secure the quilt block, but you do need to lock the layers together with something so the fabrics don’t shift as you quilt.
And speaking of quilting, the first quilting tutorial for the Friendship Quilt Along will be out tomorrow! I can’t wait to teach you how to quilt this cute Scrappy Star Block with a very simple straight line design.
Click here to find the quilt pattern for Block 1 and join the Friendship Quilt Along today!
Let’s go quilt,
Leah Day
Find more Friendship Quilt Along Tutorials
Check out the other tutorials I shared for this Scrappy Star quilt block:
- How to cut scraps for the Friendship Quilt Along
- Piece two at a time half square triangles
- How to piece the Scrappy Star quilt block
- Baste a block for home machine quilting
- How to quilt a Scrappy Star on your home machine
- How to load a longarm with a single quilt block
- Quilt the Scrappy Star block on your longarm machine
I’m looking for patterns for quilt as you go quilts to be donated to the local chapter of Binky Patrol. They need to be crib size or just a hair larger. Do you have suggestions for me? I don’t have a longarm. Am disabled. Have been crocheting blankets, but want to make more quilts. I normally purchase the material because I don’t like the quality of material that is donated. Thank you!
We have multiple quilt-as-you-go quilt patterns available at LeahDay.com Valerie. This video was for our newest QAYG project that only needs 4 blocks to make a baby quilt. You can find the blocks available so far right here: https://leahday.com/products/friendship-sampler-block-of-the-month-quilt