
Four Patch Quilt in a Day! Plus Quilting with Stencils
Are you ready to piece a Four Patch Quilt and quilt it with paper quilting stencils? This is one of our simplest, beginner quilting patterns. It’s also one of the fastest baby quilts I’ve ever made!
This is a baby quilt you can make in a day. We’re piecing this quilt using precut 5-inch squares and machine quilting with very fast, very simple quilting designs. Jump ahead using the links below to find the part of this quilting tutorial you most need to read:
- Four Patch Quilt Pattern Materials List
- Step 1 – Piece Two Precut Charm Packs Together
- Step 2 – Piece Four Patch Quilt Blocks Fast and Easy
- Step 3 – Piece Your Four Patch Quilt Top
- Step 4 – Turn Your Four Patch Top into a Real Quilt!
- Step 5 – Beginner Quilting Method – Paper Quilting Stencils
- Step 6 – Finish Your Four Patch Baby Quilt with Binding
Important: I have added links to quilting supplies I used in this quilt pattern. Clicking on the links helps support the Free Motion Quilting Project without any extra cost to you!
Four Patch Quilt Pattern Materials List
To create this simple Four Patch Quilt, you’ll need the following quilting materials:
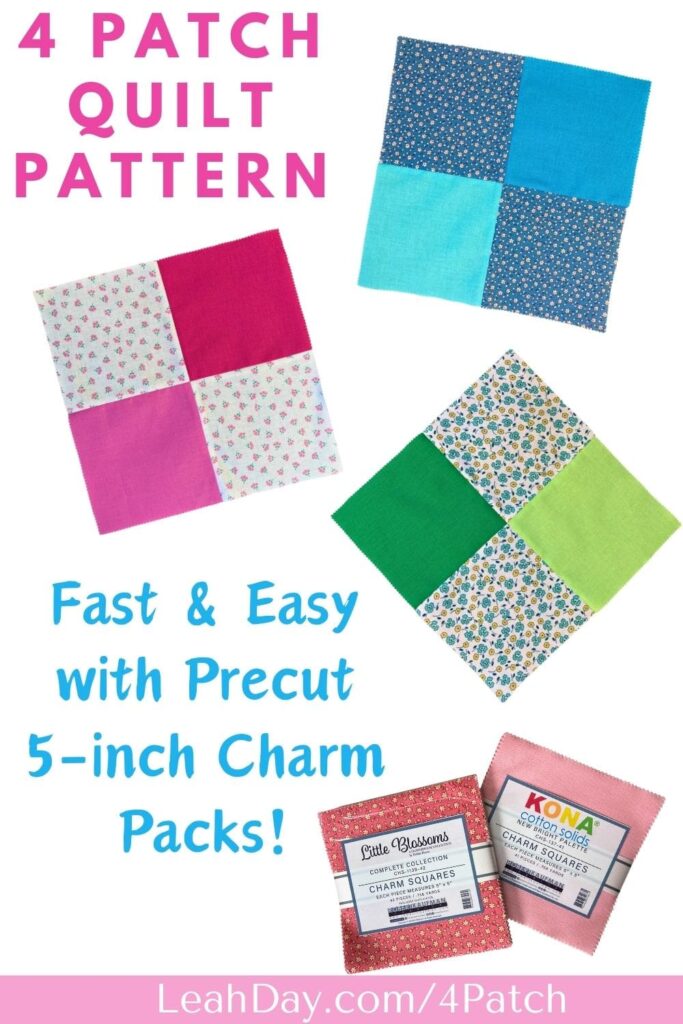
- 1 Precut Charm Pack (5-inch squares) in a mix of prints (at least 40 squares)
- 1 Precut Charm Pack (5-inch squares) in a mix of solids (at least 40 squares)
- 1 yard Backing Fabric
- Baby quilt sized batting (38 x 42-inch minimum)
- 1/4 yard Binding Fabric
- Sewing machine
- Piecing Thread
- Quilting thread
- Paper Quilting Stencils
These materials will make a baby sized quilt, around 36 x 45 inches. If you’d like a bigger quilt, simply buy more precut charm packs!
Step 1 – Piece Two Precut Charm Packs Together
We’re piecing with precut fabrics for this free quilt pattern and I’m using two charm packs for this quilt. I selected a pack of Kona Cotton Solids in bright colors. I also found a cheerful pack of Robert Kauffman prints for the second charm pack.
You’re welcome to use any charm packs you have, but I recommend using precuts made by the same manufacturer. I have found that fabric manufacturers can cut their precuts quite differently. Sometimes more than 1/8 inch different between the 5-inch charm squares.
For a fast and easy way to trim fabric to 5-inches square, use this Accu Quilt Die!
Open the charm packs side by side on your sewing machine bed. Working off the top of the stacks, line up two fabrics right sides together. Piece the 5-inch precut squares together in sets of two.
Nope, we’re not playing with the arrangement or fiddling with the fabric colors or prints. I decided to trust the pretty arrangement of fabrics as they were packaged. This resulted in a beautiful Four Patch Quilt with NO FIDDLING!
Video 1 – Piece Four Patch Quilt Blocks in 60 Seconds
If you’d like a super fast visual on how to piece your Four Patch Quilt Blocks, here’s a very quick quilting video:
Step 2 – Piece Four Patch Quilt Blocks Fast and Easy
You will need to make sure your precut charm packs have at least 40 squares each. Once you get them pieced together in sets of 2, you’ll have 40 sets of simple squares pieced together. Keep the pieces in color order for the easiest and fastest piecing process.
Take them to your pressing board and finger press the seams open and flat. Flattening the seam opens it up and ensures the finished block will rest flat as well. Once you press the seam open, you can then press the seam allowances to one side if desired.
Now stack 2 units together to create your Four Patch Quilt Blocks. Again, I didn’t play with the arrangement or get fiddly with the fabrics. I grabbed the first two pieced squares off the top of the stack and arranged them together to create a Four Patch block. I used these Clover clips to secure the pieces together at the center seam.
Sew all of the blocks together using a 1/4-inch seam allowance to create 20 – Four Patch Quilt Blocks. If your fabrics were cut 5 inches square exactly, you will have 9 1/2-inch square blocks.
BUT because precut fabrics aren’t cut exactly, I found mine measured around 9 3/4 inches.
Step 3 – Piece Your Four Patch Quilt Top
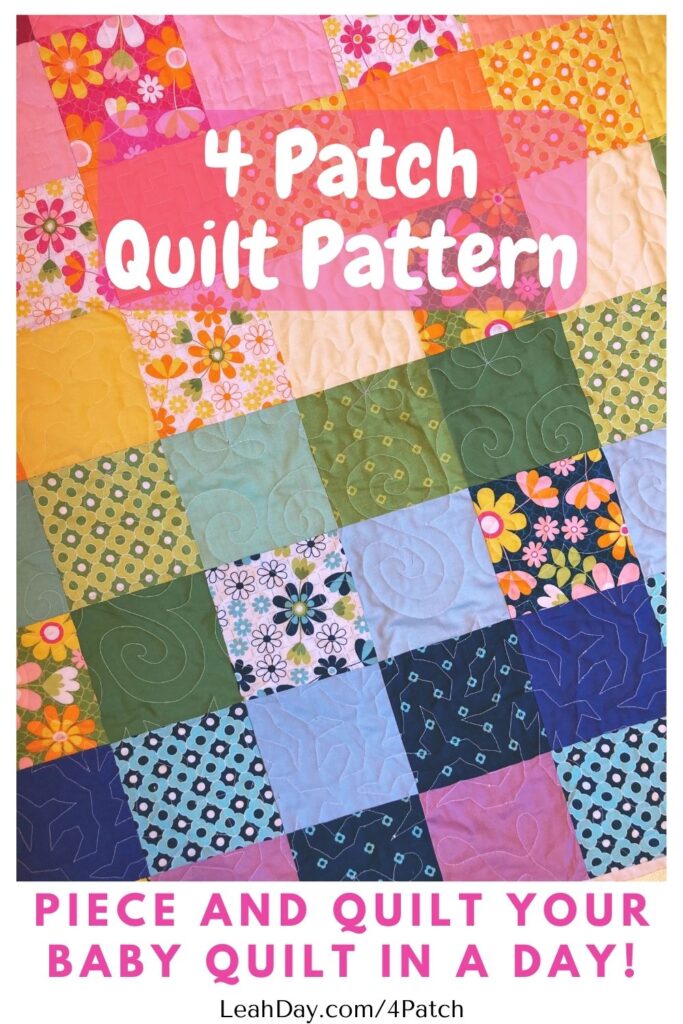
Piece your 20 – Four Patch Quilt Blocks together in 5 rows of 4 blocks. Then piece the rows together to create a 36 x 45-inch quilt top.
Because we’re piecing the blocks together in rows, it doesn’t matter if the Four Patch Blocks aren’t the right size. So long as all the quilt blocks are all roughly the same size. If you decided to set the blocks in another quilt top arrangement, you may want to trim each quilt block down to a set size.
Step 4 – Turn Your Four Patch Top into a Real Quilt!
Now it’s time to turn our Four Patch Quilt top into an actual quilt. We do this by layering the quilt top with batting and backing fabric and stitching through all the layers. This part of the quilting process is super important. We’re securing the three layers of the quilt together so the quilt can be drug around the house, cuddled under and washed.
If you need help with the layering or basting process, please check out my online class – Basting Basics. This workshop covers all the steps to layering and basting quilts in a variety of ways.
Step 5 – Beginner Quilting Method – Paper Quilting Stencils
I have a new style of quilting I can’t wait to share with you: Free motion quilting with paper quilt stencils. Since starting the Free Motion Quilting Project in 2009, I have been trying to help quilters begin free motion quilting. I’ve shared hundreds of quilting tutorials, quilt alongs, and different marking and stitching guides, but none of them seemed to help enough.
The fact is, this technique is hard to master because we’re doing so many things at once:
- Pushing the quilt with our hands – When free motion quilting, your sewing machine isn’t doing the work for you. You have to actively push the quilt to create the stitches with your hands. This feels really different from regular sewing or walking foot quilting.
- Running the sewing machine speed – We’re also controlling the speed of the machine with our foot on the foot pedal. We do have more options for controlling the machine speed such as using a Start / Stop Button, or a stitch regulator. But thinking about the speed and trying to match it with your hand movement is part of the free motion quilting process.
- Quilting a design – Pushing the quilt and forming a pretty design with your quilting stitches. This is the part of this process that just feels EXTRA! It’s common for quilters to feel completely out of control and get scared off from ugly stitches all beginners make with this technique.
Now with Paper Quilting Stencils, we’re taking the guess work out of quilting the design! These quilting templates are designed to give you a line to follow by quilting through the paper and your quilt at the same time. After you’re done quilting, tear the paper away to reveal your pretty quilting design.
Video 2 – How to Piece and Quilt a Four Patch Baby Quilt
Would you like to see these new quilting ideas in action? Watch this video to see all the steps to piece your Four Patch Quilt and quilt it with stencils:
I’m piecing these blocks on the Little Rebel sewing machine, which has a 13-inch throat space! That’s why it’s big enough to set both charm packs side by side within the arm of the sewing machine. If you think this is awesome, just wait to see how easily we can quilt with paper stencils by watching the video all the way to the end.
Check out the Paper Quilting Stencils we’ve released so far! These stencils for quilts can be used one at a time: one design stitched in rows across a quilt. Once the paper quilting stencil is ripped away, this will look very similar to longarm pantograph quilting.
You can also use multiple stencils in one quilt! I used 6 different stencils, free motion quilting the designs in rows across my baby quilt. This added extra texture and interest to the quilting design and made the quilting process more fun.
Because our paper quilting stencils have the same start and end point, they can be used together too. Play around with these free motion quilting templates to see what looks great for your quilts!
Step 6 – Finish Your Four Patch Baby Quilt with Binding
The final step of the quilting process is to trim and bind the edges of your quilt. This secures the outermost edges, which notoriously receive the most wear and tear.
I’ve shared many binding tutorials over the years and you can find one of my favorites right here. I’m also playing with a new binding method that uses the back of the quilt as binding. Be looking forward to this tutorial coming soon.
If you enjoyed this free quilt pattern and free motion quilting stencil tutorial, please share it with your quilting friends! We’d love it if you’d pin the images and videos to Pinterest and share this project with your local quilt guild or bee.
Let’s go quilt,
Leah Day
Will try this method. Thx for the small lesson.
Thank you Leah Day! I have just finished a beautiful applique lap size quilt and needed help making a decision on how to quilt it. I have always told people that I was a Piecer (evidently this is not a word spell check doesn’t recognize it..lol) and not a quilter. Now I have to step up to the plate cause my long arm quilter has reached an age like me that she can no longer take in quilting. I have ordered your stencils but I needed your video. It just made sense. I’m interested in seeing more stencils! Where do I look?