
Quilting Basics 9: How to Tie off Loose Quilting Threads
For Part 9 in our Quilting Basics series, we’re learning how to securely tie off your thread tails and then perfectly hide it in the fabric.
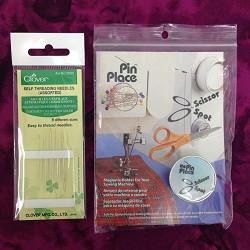
Click Here to find the Cheater Needles I use for this technique.
Now I know tying off and burying your thread tails might seem like a lot of work. It takes extra time that you could be quilting.
However, I encourage you to give this a try because it looks so amazing on the front and back of your quilt and it’s 100% secure. If you bother to tie your thread tails together this way, they will NOT come out of your quilt.
Many times quilters will build up threads to start and stop quilting, which creates a noticeable knot on the surface of the quilt. This knot both looks and feels unsightly and, even worse, it’s not really secure. This type of knot can easily unravel, allowing your quilting stitches to come apart.
The best way to deal with loose thread tails is to tie them off and bury them in the middle layer of the quilt. This technique comes from hand quilting and it’s very secure, completely unnoticeable, and with a little practice it will become a quick habit to grab a cheater needle, hide your thread tails, and get back to quilting.
The trick with making anything a habit is to make it easy and accessible. You’re never going to want to bother with it if you always have to hunt down your cheater needle every time you need to bury your threads.

Keep your cheater needle always accessible by placing it on a Pin Place, the smallest magnetic pincushion so it’s always handy and won’t get lost in a massive pile of needles.
When you start quilting, get a few inches away from your starting point and tie off and bury the thread tails. This way you’re not building a large supply of threads you have to tie off all at once.
By incorporating this technique into your routine and keeping your cheater needle close by your machine, this step will be easy and quick to accomplish, and your quilting stitches will be more secure as well!
Let’s go quilt,
Leah Day
Leah, I am avid reader to your blog and learned some much. On this mystery quilt series I have read and watch the videos. Your advise on free motion slow down practice has help. Fm is looking better. I do use the cheater needles, they are great, however, have not tried your method. First thing tomorrow I will put it to use. Thanks for all the learning tools you give us.
Love your tutorals; you break things down and make easy for a newcomer to follow and understand – thank you!!!!! One quick question: do you also starch your quilt backing fabric? I dare say you have addressed that somewhere and I have missed it. Thanks for your help – you are a newcomer's blessing!
Hi Leah, I have some cheater needles, but find when I try to pull the thread down through the top it shreds. So I have gone back to threading a regular needle. NOt sure what I do wrong.
It's really easy to do that! The key is to leave a lot of slack between the thread and the eye of the needle when you pull it through. Also be really gentle as you push the thread tails into the top of the needle. If they hit the prongs weird, they will shred easily.
Thank you for your kind compliments! Yes, I do starch and press my backing fabric so it's nice and stiff before basting. This takes the stretch out of the fabric and makes it less likely to pleat and pucker as I quilt.
You're super welcome Sandi! I'm so glad you're following along and enjoying this new series!