
Which Foot is Best for Microstippling on a Longarm?
I’m quilting on the grace Qnique 14+ / 15R and stitching on the Continuum quilting frame. I love this machine because it’s very simple to use and has been the perfect size to see if I would like quilting on a longarm frame. Click here to learn more about this machine and frame.
Click Here to find the 3 piece Hopping Foot Set I’m using in this quilting tutorial. This foot set is compatible with all Grace Qnique 14+ and 15R machines.
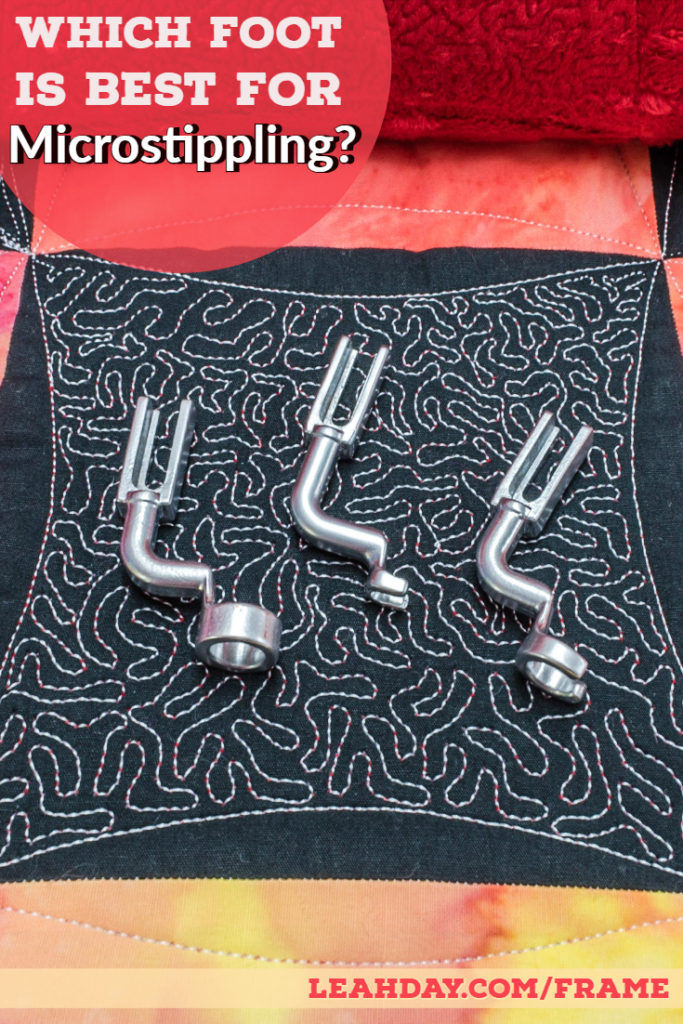
The Hopping Foot Set includes a Ruler Foot, Microstippling Foot, and Open Toe Foot
I’ve shared a few videos on quilting this checkerboard quilt over the last few weeks. Click Here to learn how to quilt the corner-to-corner curves with a quilting ruler.
Click Here to see how to quilt to the edge of the quilt when using Quilt Clips to secure the quilt top to the frame.
Why quilt on a micro scale?
Stippling is one of the most popular free motion quilting designs. You can quilt it on a huge scale and cover loads of space with every wiggle and wobble you stitch. You can also quilt it on a micro scale and use it to flatten out the background of your quilts.
Why would you want to flatten the background? This helps your quilting motifs like feathers stand out much better. Yes, this is a bit of a show quilting technique, but it’s still a terrific design to know how to quilt.
Dense quilting flattens the background so your motifs stand out better. See how this bit of Microstippling is already puffing up the unquilted area?
The best thing about quilting on a tiny scale is getting a lot more repetition in a smaller amount of space. If you begin feeling frustrated that you’re wasting fabric as you practice quilting, try quilting on a smaller scale. You will get more bang for your buck and use less fabric in the process.
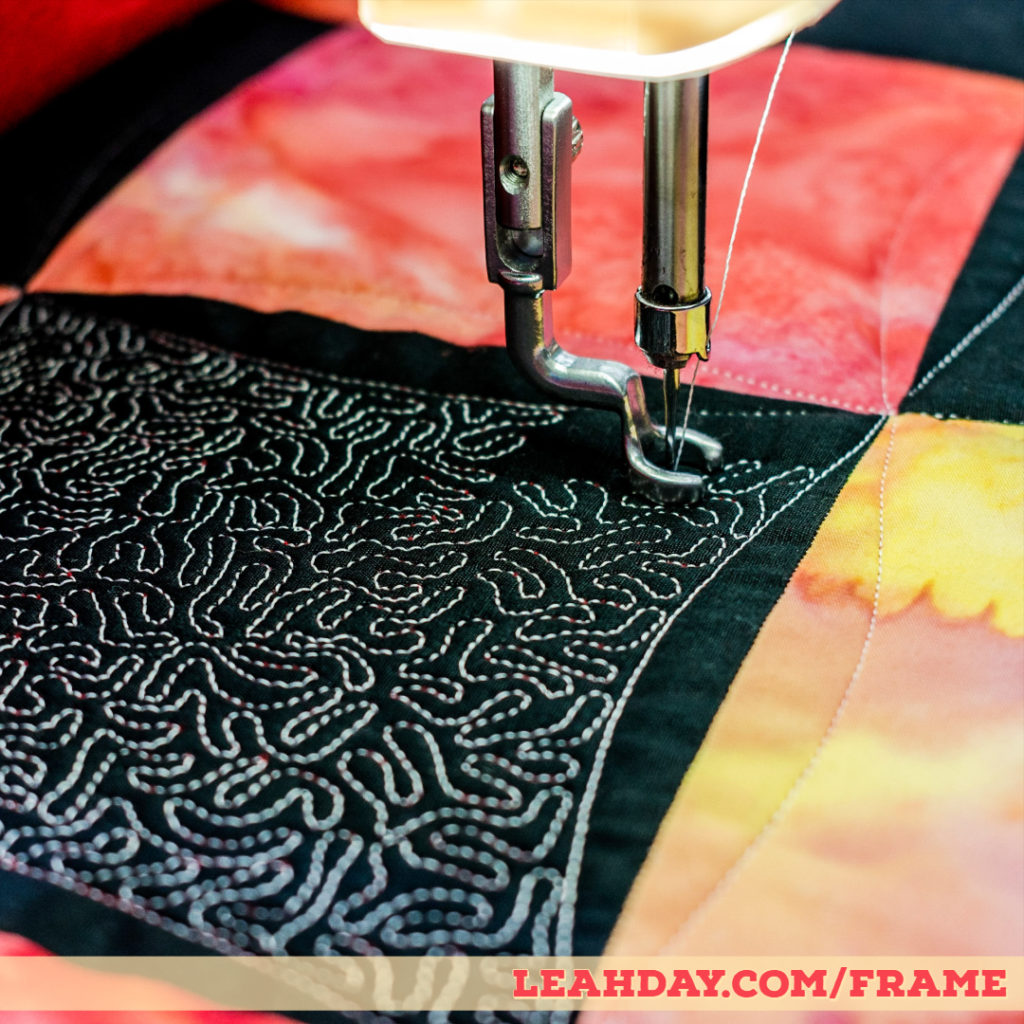
I’m pretty bad at microstippling on my longarm machine. I really want to get better at this, and the only way to do that is to practice! The dark squares in this checkerboard quilt provided the perfect opportunity to play and practice this design.
Quilting Microstippling with a Ruler Foot
I almost always have the ruler foot on my longarm. It’s so convenient to be able to grab rulers and quickly quilt any design the rulers can guide, then wiggle back into a free motion quilting design like Stippling.
The downside is this foot is a solid circle so it’s harder to see the area around the needle.
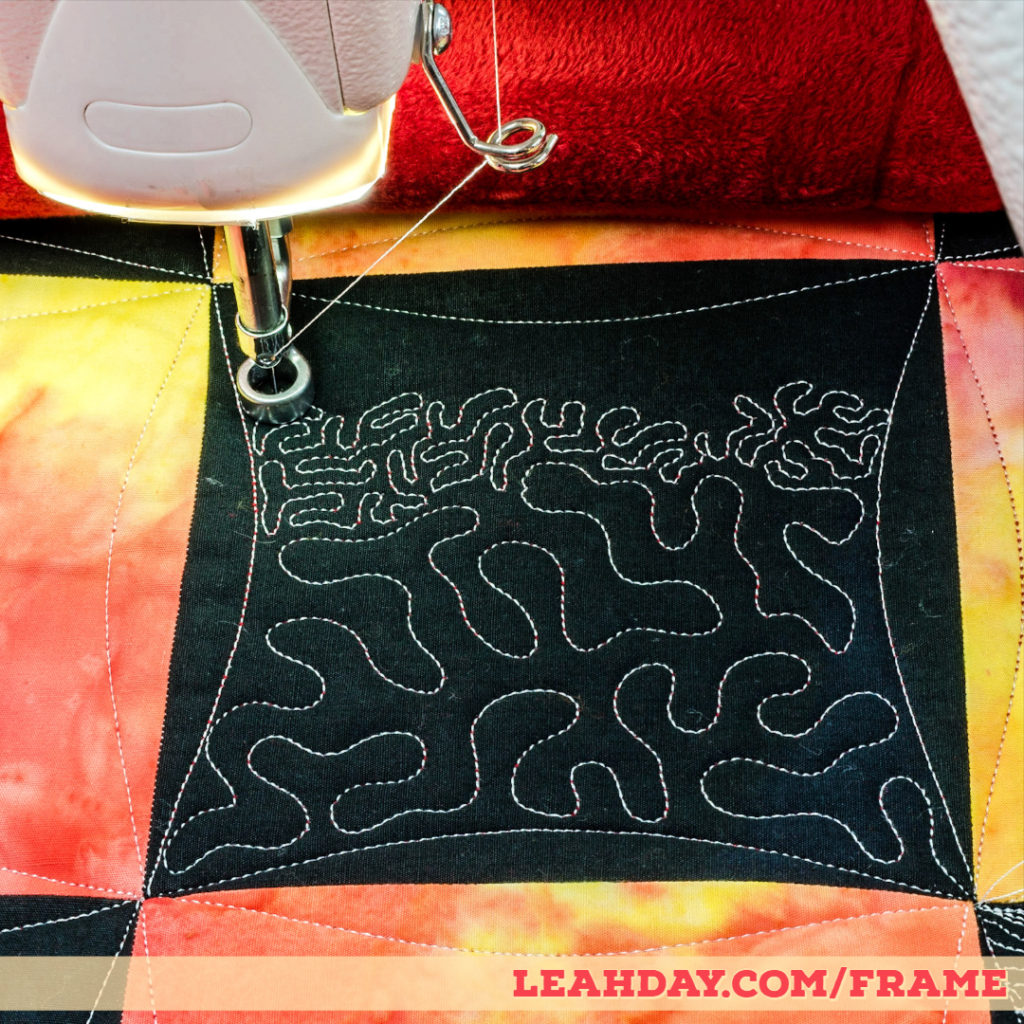
Microstippling with a ruler foot is kinda hard to see…
I also find myself naturally using the edges of the foot as a guide, and this means it’s much easier to quilt Stippling on ¼-inch scale versus a tiny 1/8 or 1/16-inch scale needed for Microstippling.
I ultimately found I could get my Microstippling down small, but it wasn’t quite as small or as consistent as I liked.
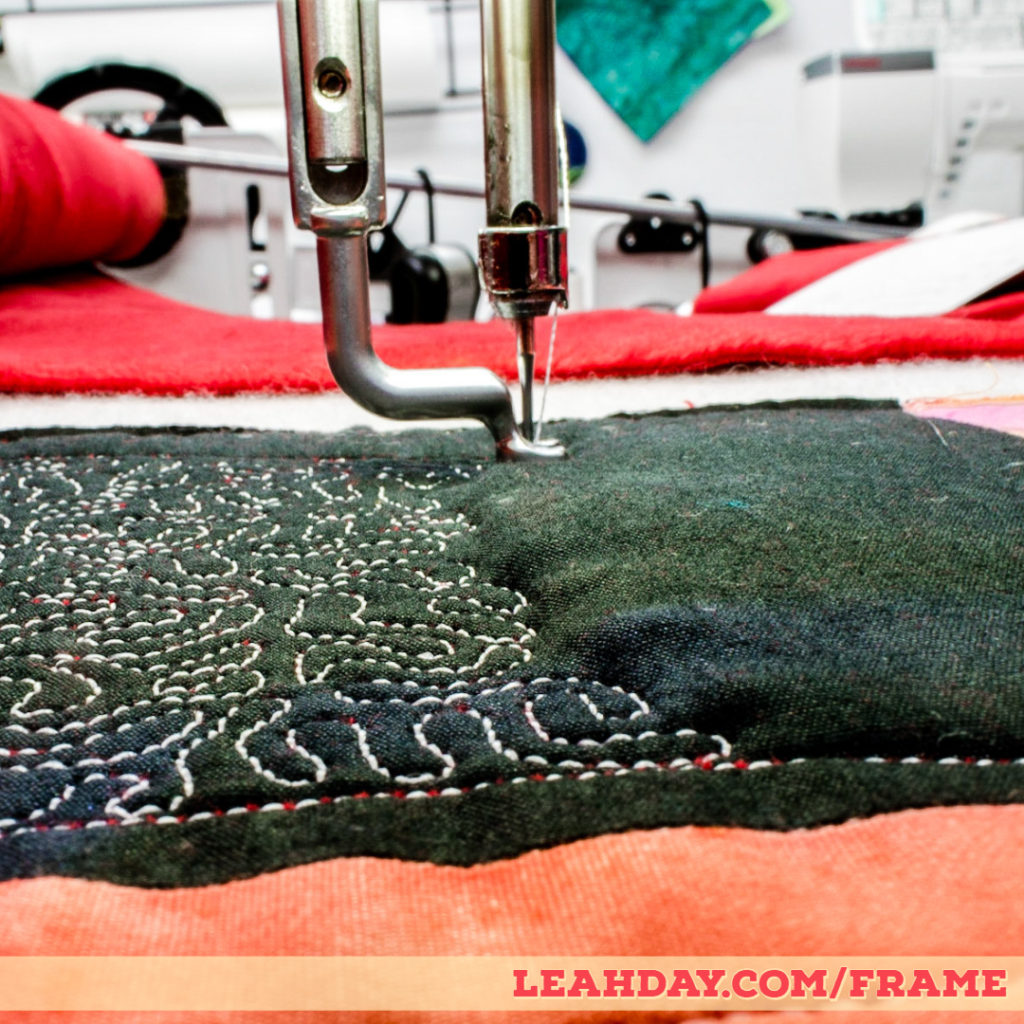
Quilting Microstippling with the Microstippling Foot
I admit, I wasn’t expecting to like this Microstippling foot much. I once used a similar foot that had a solid circular base and it was impossible to see the needle on the machine.
I’m glad to say I was very wrong!
I really liked this Microstippling foot because it has a tiny open toe so you can clearly see the needle. It also has 1/8 inch spacing between the edges of the foot and the needle.
This Microstippling Foot definitely made quilting on this smaller scale easier.
Something about this and the light glinting down from the machine made it much easier to shrink my Stippling down to a smaller scale.
I noticed an immediate improvement in how close the stitches were and how well I was echo quilting. I think my Microstippling looked the most consistent in this square out of all three, but what do you think?
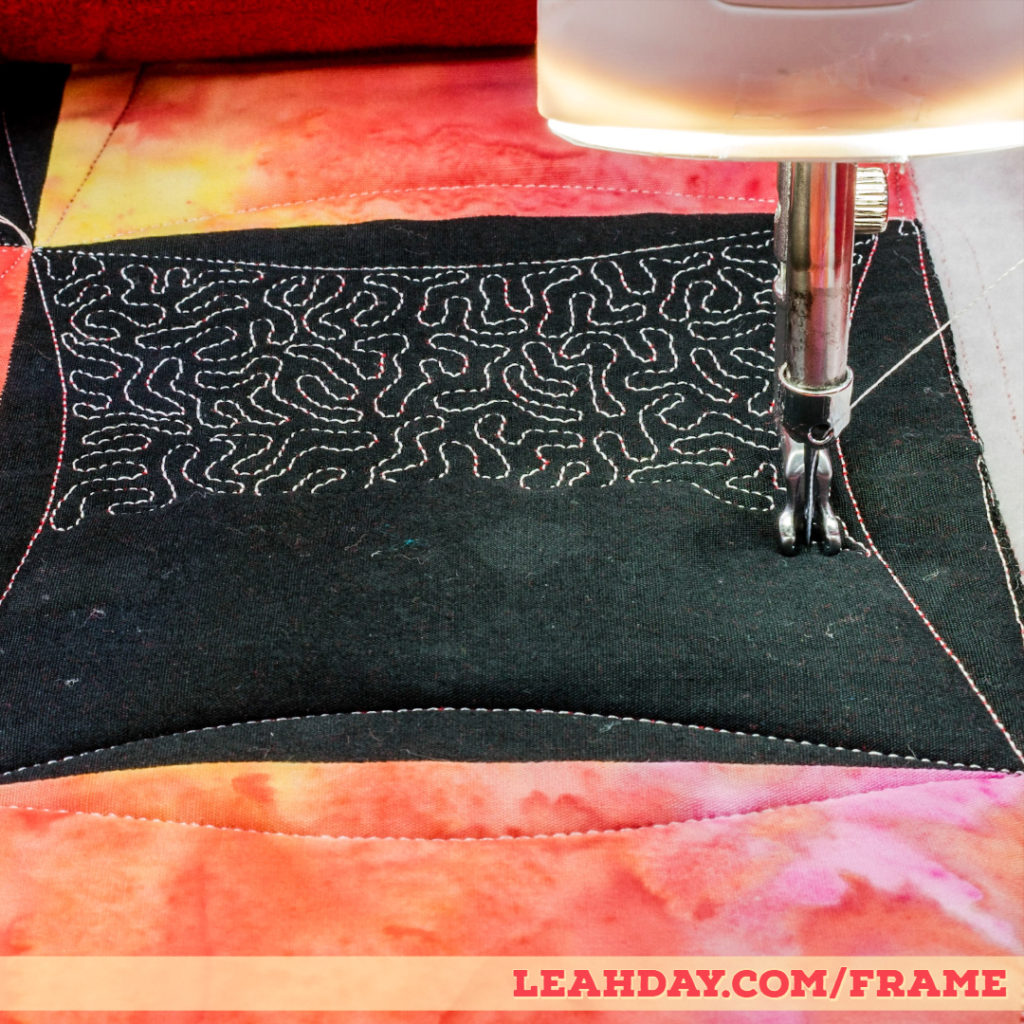
Microstippling with the Open Toe Foot
I really love quilting with the Open Toe Foot because it gives me such a nice visibility around the needle.
The foot itself is around 1/2 inch wide so you’ll have a little bit more space to see where you’re quilting. I did find my Microstippling shrunk down slightly when using this foot, but I sometimes lost control and stitched a little too close.
More visibility of the needle definitely helps when quilting on a smaller scale
I hope you enjoyed this quilting experiment!
I think mastering this design will require more time, practice and patience. I believe the Microstippling foot was the best out of the 3 for quilting this design. I was the most consistent and found it easiest to quilt Microstippling, even with one hand on the handlebars.
Click here to find this hopping foot for the Grace Qnique 14+ / 15R.
Click here to check out all the Frame Quilting Friday videos I’ve shared so far.
Let’s go quilt,
Leah Day
P.S. Do you have a quilting experiment you wish I’d try? Let me know in the comments below!
Leah, I have a question. How long did it take you to get comfortable with free motion quilting in general on your frame mounted longarm? Thanks.
Great question Mary! I’m still working on controlling the machine, but it has felt easy to move and make designs like Stippling since the first quilt I put on the machine.