
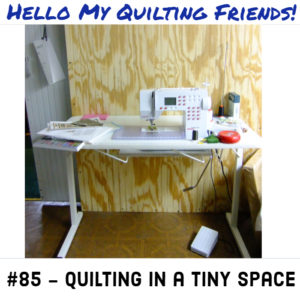
How to Quilt in a Tiny Space, Quilting Podcast #85
This past week I received a great question from Ellie about quilting in a super tiny sewing space. I decided to shoot an entire podcast episode just to answer her question and share my tips for sewing and quilting in a small area!
Listen to this quilting podcast or download it to your computer using this player:
Just in case you’re interested in the Hemline Advent Calendar I shared in the introduction, here’s an affiliate link to find it on Amazon. Thank you so much for your support of the show!
Quilting is a Space Hogging Craft
 There’s no doubt about it – quilting takes up SPACE! I realized this while hand quilting at Hart Square last month. The quilting frame I was sitting at took up about 1/2 of the room in a tiny log cabin. Consider the space our TVs, huge couches, giant dining room tables, and overstuffed recliners take up.
Even 100 years ago, our houses were filled with hard wooden furniture, a fire place or wood stove, and a quilting frame. And that was about it!
So quilting has always been a space hogging craft. It’s thanks to our sewing machines, flat bed tables, and clever quilt-as-you-go techniques that we’re able to make quilts in such small spaces. Our great grandmothers would probably be shocked to see what we can create in such tiny sewing spaces.
How to Set Up Your Machine in a Tiny Area
I got serious about sewing when Josh and I moved into a tiny 500 square foot apartment. We had a large master bedroom which left just enough space for a computer in one corner and sewing machine in the other. I had about 2 1/2-feet from the edge of the bed to the wall that I could set up my sewing machine and THAT. WAS. IT!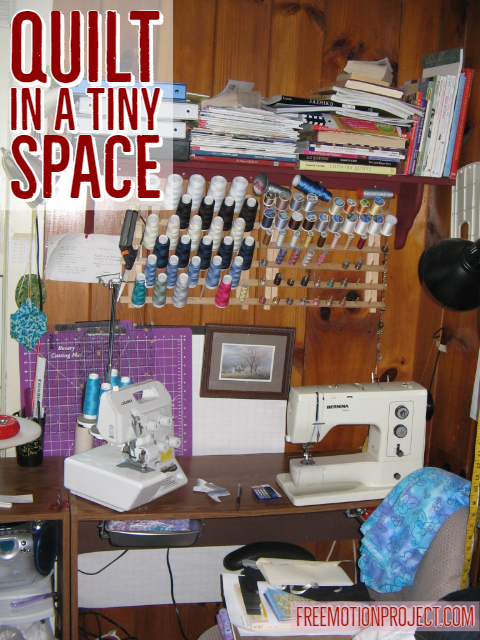
A quick search online and I found a narrow table that fit within the space and set my sewing machine and serger on top. I built makeshift drawers underneath the cabinet using “L” shaped brackets and cookie trays. I hung spool racks on the wall and added a shelf to hold books and patterns.
Thin plastic boxes slid under the bed where I stashed all my fabric. This is where I sewed 60+ garments a week and where I made my very first quilts!
So yes, I think it’s definitely possible to sew and quilt in a small space, but you are going to have to be very creative about how you use that space. I used the walls, the floor, and the space under the tables. See my cutting mat in the photo above? It’s hung on the wall on the same nail as my two cutting rulers, along with a big pad of graph paper. Even the nails I drove into the wall did double or triple duty.
Keep the Space Organized
In the podcast, I shared my upstairs sewing area which I primarily use for pattern testing and quilting smaller projects. This area tends to get junky and I identified in the video exactly why – there is actually too much area to the right of the machine. I’m also not using the drawers effectively to store the things being stashed on the table top.
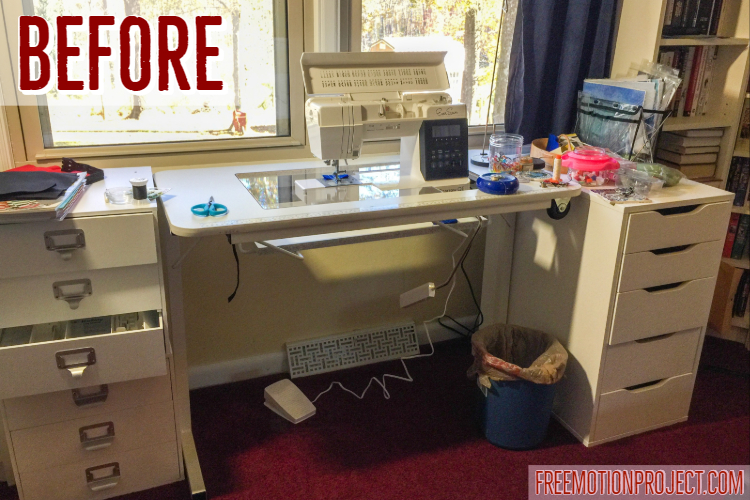
Before organizing this sewing space
Today I cleared out the drawers and reorganized them to hold only the things I need next to this machine. I also cleaned off all the surfaces, leaving only a few small tools right around the machine:
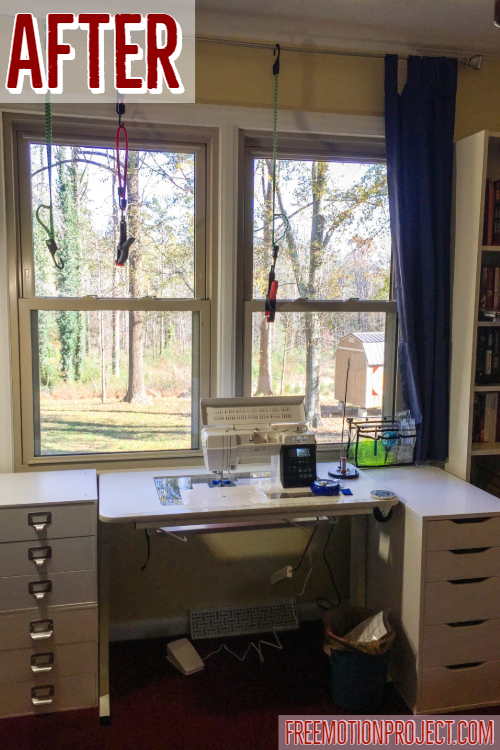
After organizing my sewing table
Ahh! Now I can use this space easily for sewing and quilting. It’s no fun to sit down at your sewing machine and have 50 things fall off the table. I’m really going to try keeping all my sewing areas better organized from now on. It makes such a difference for being able to quickly get started on a new project.
Make Quilting Easier on a Home Machine
The very first thing I advise for making quilting feel easier is to get a flatbed sewing table. This can also be called a drop down sewing table and basically it gets your needle on a flush surface with the table top.
Click Here to find the Affordable Sewing Table I use. This table is small at 20 x 40.25 inches and the legs easily collapse so you can store it under your bed or in a closet when you’re not using it. I’ve set this table up in the weirdest of spaces and it always works great. I’ve also been using the same 3 tables since 2010 so they are also very sturdy too!
Having your machine and table on the same surface is essential for quilting because it gets everything on the same level. Otherwise you will be pushing and pulling the quilt over the arm of the machine.
No, even adding an extension bed around your machine doesn’t hold a candle to dropping it down into a sewing table. When your machine is up on top of the table, it’s 3-4 inches higher, which means you will need a very tall chair in order to comfortably push the quilt through the machine.
Use the Space OVER Your Machine
Scroll back up to check out the last photo. I stepped back when taking this shot so you can easily see my bungee cords and clamps which hook to the curtain rod over my sewing machine.
This is a super simple way to lift the quilt vertically while you quilt to take the weight and limit the space it takes up. Here’s what it looks like with a quilt on the machine:
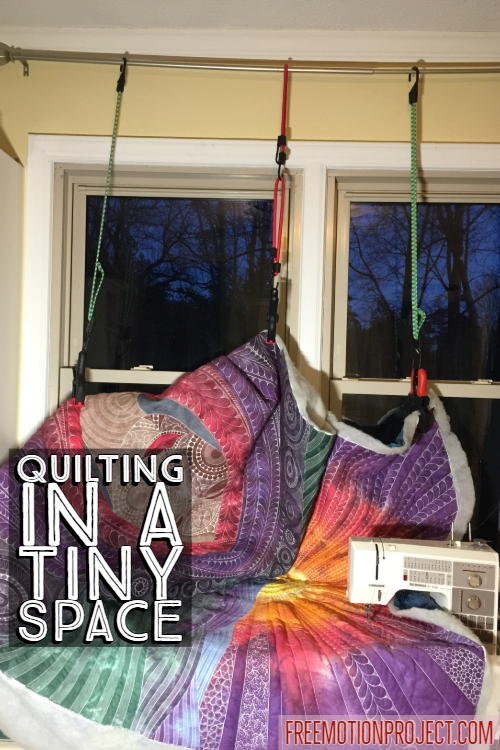
Suspend your quilt to make it easier to move on your home machine!
Keep in mind, you will have to continually shift these clamps as you quilt. For every 4-6 inches you quilt, you will need to stop and move the clamps so the area around the needle is best supported.
Final thoughts on quilting in a small space
My final pieces of advice for quilting in a limited area:
- Keep your quilts small. There’s a big difference between quilting a 30 inch baby quilt and a 60 inch throw, especially in a limited space. Break your quilts down into smaller pieces and use quilt-as-you-go techniques to connect the pieces to create bigger quilts.
- Rent time on a longarm. This is relatively new so you’ll need to check with the quilt shops in your area. Some shops are offering rental time on their longarm machines. You can use this opportunity to baste your quilts. With practice, you could also quilt the entire quilt with a simple all-over design.
- Buy a bigger house! After quilting multiple quilts in that tiny apartment, I knew quilting was the craft for me. I also knew I would need a lot more space. To make this affordable, we moved to a smaller town with cheaper housing. We also searched for a fixer-upper with a partially finished basement which we’ve steadily improved for years.
So yes, it is possible to quilt in a smaller space, Ellie. You may need to be flexible about how your machine is set up. You need to experiment with different methods for managing the bulk of the quilt on your home machine. And you may need to look into your area and see what other solutions are available from local quilt shops.
The key is to not give up. Keep trying, keep improving, and with every quilt it gets a bit better, a bit easier, and you figure one more thing out!
Let’s go quilt,
Leah Day
After watching your podcast I realized that I can’t get anything accomplished for Christmas because of how cluttered my room is. So I started organizing and decided I needed to be honest with myself about a lot of things I have. I must have over a dozen quilt kits and over that in patterns and magazines (some many years old). So I asked myself if this is something I am really going to make or use? If I am honest the answer to many of the kits and patterns is no. So the decision is to donate them. I need to find a guild or organization that can use them. Maybe you can do a small segment about being honest with yourself when it comes to cleaning and organizing your workspace. Getting rid of stuff is a difficult thing for some of us. We think maybe we will get to this next or we like this material so we buy it and a year later look at it and wonder what we were going to make with it. At that point we put it back in our stash thinking I will use it for something when in all honesty we probably won’t.
I know exactly how you feel Leah! I’ve been working on cleaning out a sewing room and getting honest with much of the materials and kits I’ve collected as well. I think your best bet will be to contact a local quilt guild and see if you can donate the kits for door prizes or to be part of their boutique to sell to help support the guild. It’s very easy to buy, and in our minds we have infinite time and energy. In reality, there are so many limitations on our time and energy and space!
This is something I’ve been thinking about a lot lately and when I feel the urge to buy I’m trying to ask myself – where will this fit? When will I tackle this project? Where is it going to go or who will I give it to? Because at this point, I have WAY too many quilts! LOL!
Instead of buying kits or yardage allow yourself to buy one fat quarter for a project you have in mind. The satisfaction of purchasing something is fulfilled without breaking your wallet and you won’t end up with kits you will never make.
You akways have the option to bust up the kit and use it for something else.
Very true Margaret! I love this tip of only buying one tiny thing instead of something huge. Thank you for sharing!
What a great idea to donate to a local guild for door prizes! I never thought of that. I recently did a clean sweep of my sewing area because of a washing machine hose that leaked. Total redo, whew, but so worth it. I gave so much away and got rid of things . You’re right, honesty about you will really make.
Thank you for sharing Mary! Getting all that stuff out makes room for the things you really want to do and make! Great job!