
Winter Wonderland Part 2
Thank you to everyone who commented yesterday! I really appreciate hearing your advice and getting input from everyone all around the world.
I’m pretty much decided on the Style A orientation and the wavy binding, even though it will take a little more time.
 I’m a sucker for curved edge bindings and I was already planning on scalloping the edges of the quilt.
If I do that, I will be needing to cut bias strips anyway, so it’s really not too much of a pain to also connect the blocks with the curving binding.
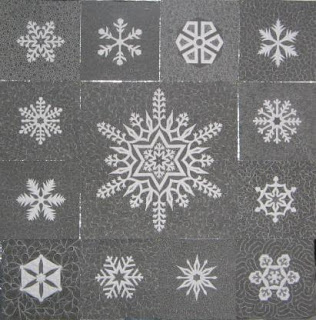
So let’s check out the second set of 6 blocks and the big central block!
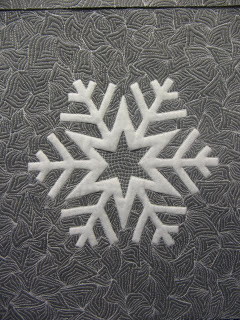
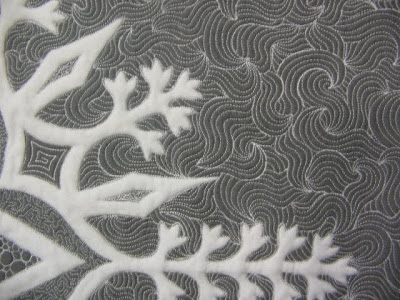
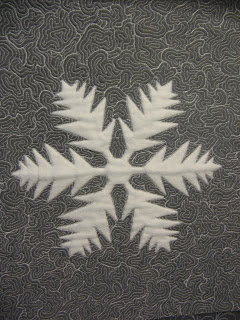 This block had so many tight corners and crevasses that Brain Coral was one of the best choices for filling the background.
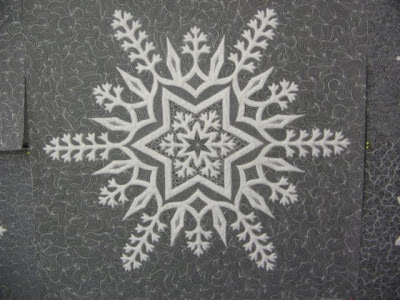
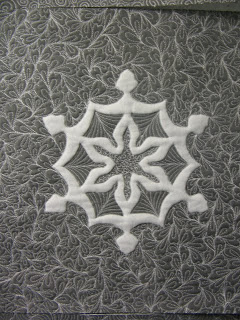 This snowflake was probably the most complex of all the designs. Cucumber Vine was used in the center, then Leaf Veins was used in the middle sections.
The background was filled with Bleeding Heart.
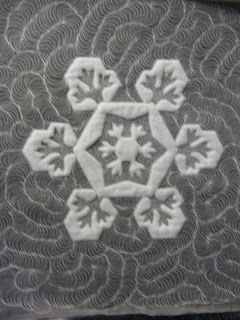
 This was one of the fastest snowflakes to finish because it was quilted much lighter than the rest. The filler I used here is Mussel Shell.
 This snowflake was filled with Matrix in the center, then Drunk Pointy Paisley in the background.
 Notice how this snowflake stands out quite a bit? The inside was filled with Microstippling and the background was filled with Tree Roots.
Both are flat, directionless designs that put the focus on the motif, not the quilting.
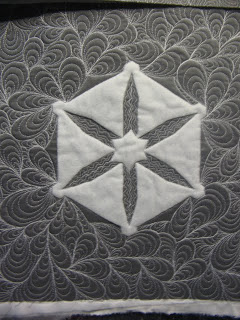
 This was the first block I quilted for this quilt. The center and leaf shapes were filled with Microstippling.
You might be wondering why I still use Microstippling.
The reason is that for tight, complicated areas that I want to flatten and recede into the background, Microstippling is still the #1 choice.
Now drumroll please! Let’s check out the center block!
 Here are some closeups so you can really see the stitching:
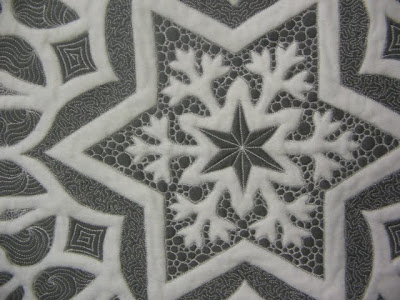
I stitched plain lines in the center star, similar to Bright Star, then Pebbling in the second area.
I wanted the middle star to stand out so I used Microstippling again in the 3rd area.
I ended up with 2 sets of little tight areas to fill. In the square shaped areas I stitched a square shaped spiral.
In the small diamond shaped areas I filled using dense Microstippling.
The whole background was filled using McTavishing, which set off the outside of the block and added loads of movement to the quilt.
I really like being about to connect different designs or fillers within the quilt. I used Pebbling and McTavishing in several areas, but not so much that it overwhelmed the whole quilt.
Now I’m just ready to get the blocks together and the quilt totally finished and off my design wall!
Let’s go quilt!
Leah Day
Wow – wow – wow!! This is going to be one fantastic quilt! Thanks for the close ups – you do wonderful work!
Some day I would love to learn the method you used for the snowflakes!
BEAUTIFUL! You're very talented!!! I OTOH couldn't even make polar fleece socks for my kids today! They're now dog toys LOL! Thanks for sharing!!!
It's amazing! How are you now going to put them together? You have tons of patience… gorgeous!
Hi Leah! These up-close shots really show off your skill and accuracy. You must be really pleased with how your free motion technique is so precise yet creative! thats a hard balance! I'm still dying to know how the binding will bind in both sides of two squares to hide the edges… I'm totally baffled by this!
Thanks! WendyB @ http://www.ThatSeamsFun.com
Beautiful work Leah!
Leah, this is fantastic but how, if the blocks are already quilted are you putting them together. Is it, well, 'quilt as you go' format and if so what is your method of joining each of the blocks or block sets?
That is absolutely inspirational! It makes me want to have another go at quilting something apart from straight lines 🙂
This quilt is beautiful, I wish it were my own design! I'm rather obsessed with snowflakes! My reader showed both this and the previous post together, so I'll comment together. I agree about the rotation of the centre block, and the wavy 'sashing'. I also agree about the muting from the organza – as much as I like the trapunto effect and the way you quilted it, somehow it's not quite as stiking to me as the blocks were without the organza, on the black-black background. That said, without seeing those, I'd never know! Do you plan to do wavy sashing on the back – and how are you going to get the front and back aligned if you do???
I got a chill down my spine just looking at these delightful snowflakes! Absolutely beautiful. And yes, these are great for a quilt show. I do hope you'll submit this quilt (or similar) in a quilt show (e.g. IQF?). Love it!
Inspirational. Thanks for sharing.
I can also visualize a scene with your snowflakes and a scene, below, with your delightful quilting!
SewCalGal
http://www.sewcalgal.blogspot.com
Fabulous work once again Leah. Can't wait to see how you put it all together.
Absolutely beautiful!