
How to Piece Half Square Triangles
Click Here to find Block 1 of the Friendship Sampler Quilt if you’d like to get LOTS of practice piecing half square triangles!
How half square triangles work
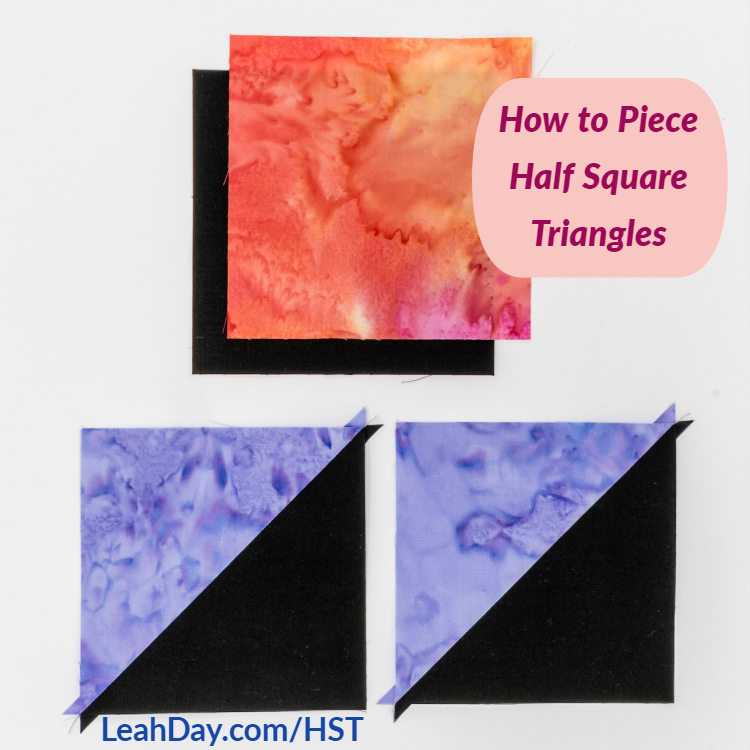
Learn how to make two half square triangles from two squares
This technique takes two squares of fabric and turns them into two half square triangles. The best thing about this triangle shape is you never have to work with an actual triangle. We stitch diagonally over squares to create two right angle triangles.
If you’re working with fabric scraps, check out my quilting tutorial on scrap cutting. You’ll learn how to cut accurate fabric squares that are true to the grainline of the fabric.
Also check out my 5 Tips on Quilt Piecing Tutorial so you know why I used a scrap charger and why I change my stitch length to 1.5 mm before I begin sewing.
How to piece two half square triangles at a time
Step 1 – Mark your line. Stack two squares right sides together. Mark a diagonal line from corner to corner on top of one square.
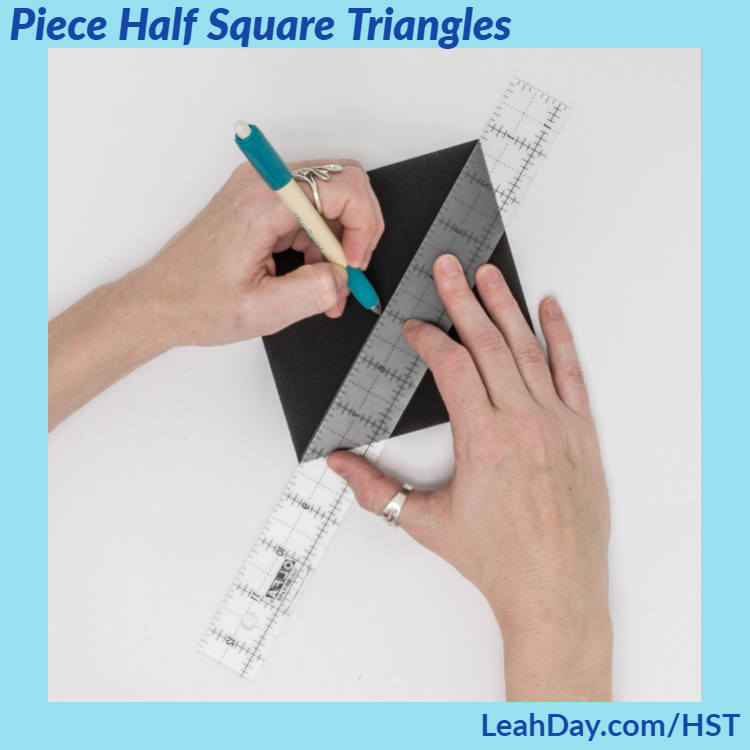
Mark a Diagonal Line
Step 2 – Stitch ¼-inch from both sides of the line. Use a ¼-inch patchwork foot to help you piece exactly ¼-inch to either side of the line very quickly.
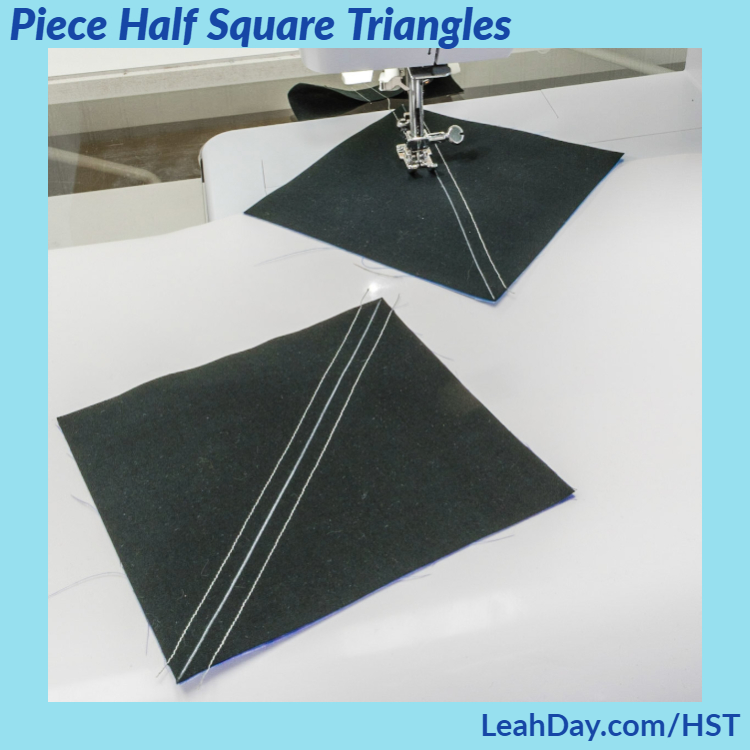
Stitch 1/4-inch to either side of the marked line
Step 3 – Cut along the marked line. Using a pair of sharp scissors, cut along the marked diagonal line to cut the two half square triangles apart.
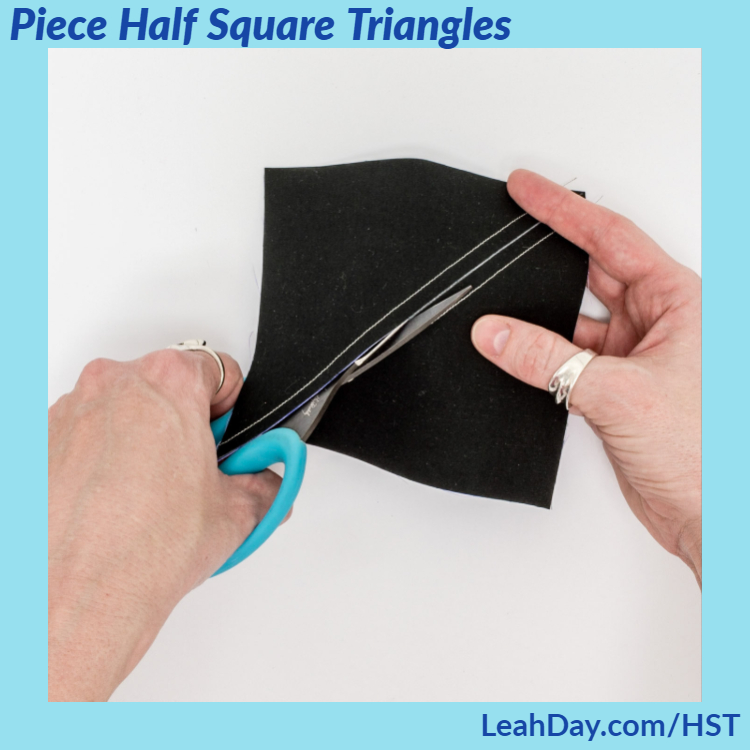
Cut along the marked line
Step 4 – Press the seam allowance open. Gently open the seam allowances with your fingers, then press with a hot, dry iron. Be careful not to wiggle the iron around too much as this is a diagonal seam and can stretch easily out of shape.
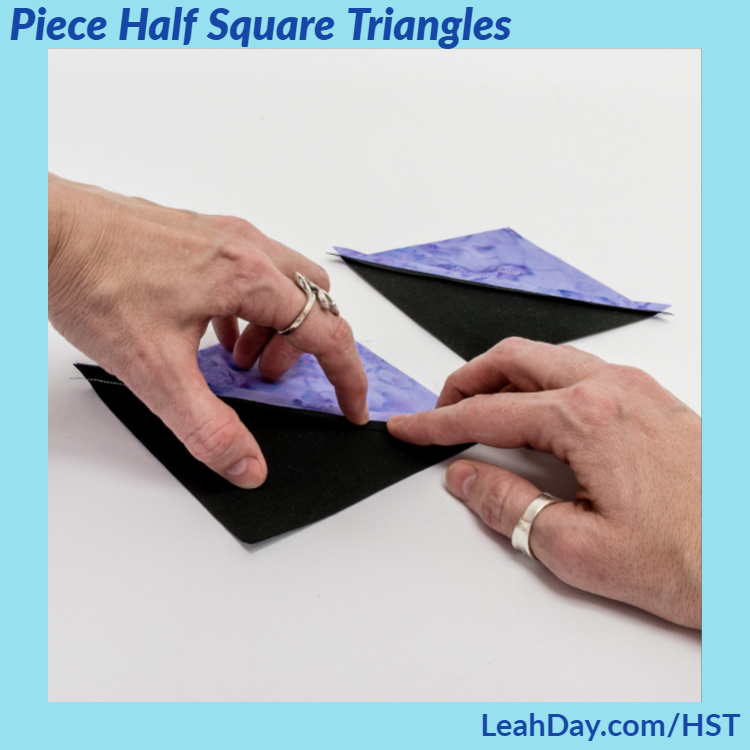
Press the seam allowances open
Step 5 – Trim the half square triangles to the correct size. Align the diagonal line on your ruler with the seam line on the half square triangle. Trim off a tiny bit of fabric of fabric from two sides first to square things up.
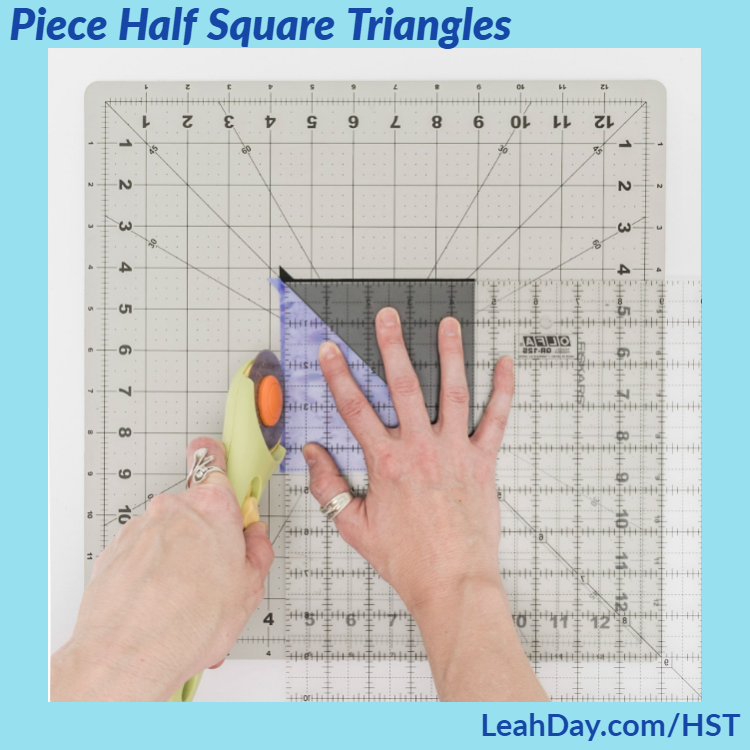
Carefully trim the half square triangles to the correct size
Finishing your half square triangles
Rotate the ruler with every cut so you are always cutting with your dominant hand along one side of the ruler. Once you have two sides cut, you’ll then cut the unit down into the shape you need.
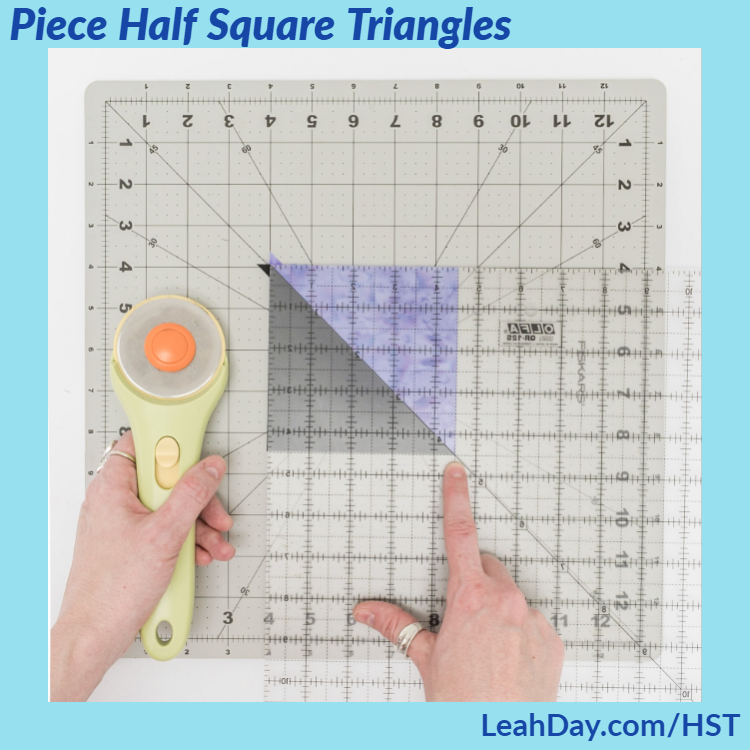
Cut two edges, then align the squared edges and the diagonal line to make a perfect half square triangle!
Align the cut edges with the lines on the ruler for the size you need. Also align the 45-degree line on the ruler with the diagonal seam line on the half square triangle.

Click Here to learn about the Friendship Quilt Along!
I always design my quilt patterns so the half square triangles come out bigger than needed so you can trim them down to exactly the correct size. Accurate cutting is the key to making a perfect half square triangle!
If you’d like to get more practice piecing many half square triangles, check out the Friendship Sampler Quilt. This quilt along features 13 super scrappy quilt blocks and we’re going to piece AND machine quilt the blocks together!
Click here to find Block #1 to get started!
Let’s go quilt,
Leah Day
P.S. It’s never too late to join the Friendship Sampler Quilt Along! Click Here to find the patterns.
Find more Friendship Quilt Along Tutorials
Check out the other tutorials I shared for this Scrappy Star quilt block:
- How to cut scraps for the Friendship Quilt Along
- Piece two at a time half square triangles
- How to piece the Scrappy Star quilt block
- Baste a block for home machine quilting
- How to quilt a Scrappy Star on your home machine
- How to load a longarm with a single quilt block
- Quilt the Scrappy Star block on your longarm machine
Light bulb moment! From the two pictures of trimming and finishing the HSTs I can see why my piecing is not quite square. Thank you.
Wonderful! I’m so glad you found that helpful!
Leah: A work sheet with piece sizes for the Mini’s would be helpful. Thanks
Unfortunately I don’t have time to offer that right now. That’s why I’m sharing the screen shot with the cut size listed. Just print the blog post page and take it with you for reference.