
Dresden Plate Patchwork Quilt
It’s Quilty Box time! This month’s box was put together by Jeni Baker from InColorOrder.com and she has selected a terrific set of fabric and supplies to play with. I’ve been hankering for a chance to play with my Accu Quilt Go and the Dresden Plate Die I picked up several months ago so I decided to create a mini Dresden Plate Patchwork Quilt:
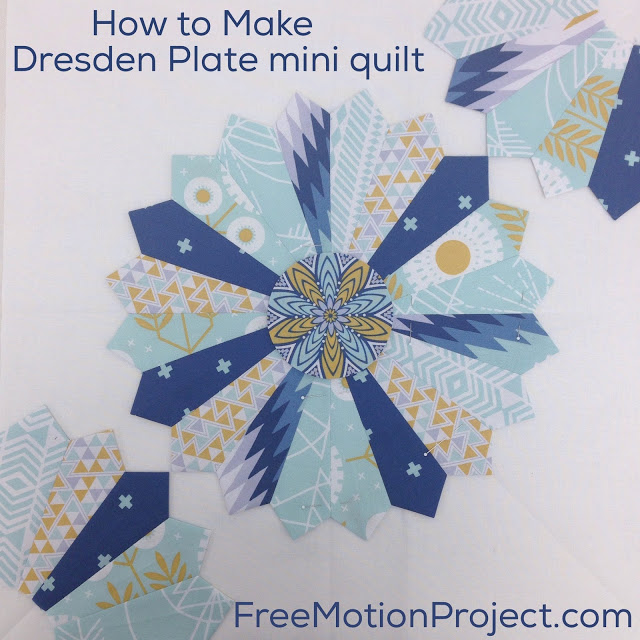
Of course, cutting out the shapes for my Dresden Plate was super easy with the die. I prewashed the fabric, starched, and pressed it so it was stiff and easy to work with. Then I cut 6 inch strips and ran them through the Accu Quilt Go to cut many little wedge shapes.
Unfortunately I ran into a snag with the first Dresden Plate I pieced. I knew 20 pieces should have created a circular plate, but it didn’t sit flat. It felt like there was an extra piece and no matter how much I pressed and fiddled, it wouldn’t work. After a bit of frustrated Google searching, I found that many quilters have had this issue with this die too.
So I ripped that plate into 4 quarters of 5 petals each and checked for square. They were way off! I squared up the shapes, pieced them back together again and suddenly 20 pieced worked perfectly. So it’s important to know if you’re trying this with the Accu Quilt Go Dresden Die that it doesn’t work perfectly and will require trimming to create a perfect Dresden Plate.
Now that you understand the prep, let me show you how I pieced my mini Dresden Plate patchwork quilt:
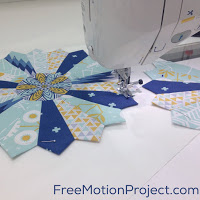 Yes, this was the quilt video that I sliced off the tip of my finger as I was filming. I cut that section out because it hurts me to watch and I’m sure you didn’t want to see it. I do hope you can see how easy it was to make this mistake and how to avoid doing this yourself.
Always take your time rotary cutting and re-position pieces so they are always along the edge of the ruler and you can make a straight cut away from you. Cutting across the top from left to right or right to left certainly feels like a time saver…until you cut yourself and everything slows down!
I hope this video has inspired you to give Dresden Plates a try. They are a really fun shape and create very beautiful quilts. Yes, there are a lot of steps to preparing each piece, but the finished effect is totally worth it!
So what was your favorite part of this video? Have you ever created a Dresden Plate quilt before? Did you find it easy or hard to piece? Share your experience in the comments below!
Looking for more videos to enjoy? Click here to find a playlist of many videos where I walk you through the process of piecing entire quilts on video!
Let’s go quilt,
Leah Day
As I was in my green room(aka sewing room) last night cutting out a project, I saw your photo every time I thought about cutting on the left or under my arm. I think your photo has left a lasting impression in my mind
Beautiful Dresden cutting. So sorry for your injury
LOL! I'm glad to hear that. I'd really gotten lazy with re-positioning my fabrics and this injury has been such a pain to deal with all week. It's MUCH easier to shift your fabrics and cut from a good angle than get hurt.
Thank you! It's mending well and hopefully the band aid will be off by the end of the week!