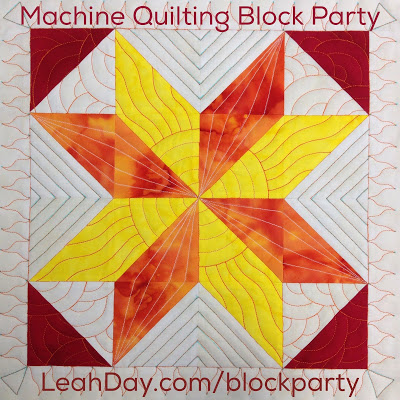
How to Machine Quilt Block #3
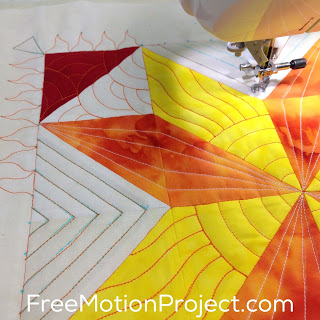
I decided to use both white and pumpkin Isacord thread so my lines should show up a bit better and this beautiful quilting design would get more attention!
My favorite part of this block is the echoes and wiggly rays in the yellow sections of the block. When split up with the orange sections, it ends up looking like a split sun. Make sure to use a thread color that stands out in this area because you don’t want to miss out on this cool effect!
Click Here to find the pattern for Block #3
When using multiple colors of thread, it really pays to think ahead and plan your path. Minimizing stitching in the ditch is especially important because going over the same area in 2 colors of thread is really a waste of your time. It’s already secured once so move on and quilt over something else!
I like that I was able to plan a path that didn’t involve double ditching. The orange sections were easy to knock out in white thread when I started in the center. Then I changed colors, ditched the block once, and began filling each section from the center.
As I mentioned in the video, there’s no right or wrong way to fill a block like this. Sometimes I’m in the mood to repeat the same steps over and over so I’ll break thread intentionally just to return to a similar starting point for the next area.
Other times I’ll just flow in to the next closest section and avoid thread breaks at all costs. Again – no right or wrong way to do it, just whatever you’re feeling at the time!
So now that we’ve tackled this third block are you feeling more confident for patchwork and machine quilting? Have you noticed a difference in your skills? Are you ready to start using these designs in your quilts in progress?
If not, what’s missing? Share your thoughts in the comments below!
Let’s go quilt,
Leah Day


Leah: you mentioned math problems/printers and inaccurate templates or pattern pieces; here's an easy fix. Print the page, measure the sample for accuracy. With my printer, the 3 inch square measured 2 5/8 inches. This can be adjusted with printers that have a Custom Scale % in the Print window. The formula is: Desired Size ➗ Actual Size = Custom Scale %. in my case 3 ➗ 2 5/8 = 114. I adjusted my Custom Scale to 114% and my sample correctly printed at 3 inches.
Leah, I have the Juki F600 and switched to my other sewing machine when I noticed lots of skipped stitches. I had rethreaded, reinstalled a new needle (the same one) without improvement. THANK YOU for having the same problem and a solution!! Love all that you do.
Leah, I am interested in the Juki machine I see you using. I am assuming it is a straight stitch only. I have a Janome Horizon but would like to have a Juki for quilting only. What is the model name/#? Thanks in advance.
Hi Jackie – I'm working on the Juki F600 in this video and no, it's a regular sewing machine so it has decorative stitches, zigzag, etc. It's not a straight stitch machine.
I should also include, however, that I'm about to start filming on an older Bernina 1230 just to see if it fits better. I've been needing to service this Juki so if you notice me change machines in the next few weeks that's why!
Hi Leah, forgot, are you planning to use other colors on this quilt? if not I won't change color. Thanks DL
I know this is an older block (sunshine) however, when you changed threads did you change both top and bottom or just the top. You discussed using the same colors in both because of the top thread would show up within the stitches of the back
Yes, I always change the bobbin and the top thread together because otherwise it will show in the form of little dots or pops of color from one side to the other.
I believe I used white, orange, and red thread in this quilt. I didn't plan to do that from the beginning and yes, the first few blocks looked different from the rest, but they were pretty mixed up in their arrangement so it didn't matter too much. Mostly I changed colors to create contrast for the video so you could see what I'm doing. You don't have to change colors if you don't want to.