How to Wash Out Marked Lines

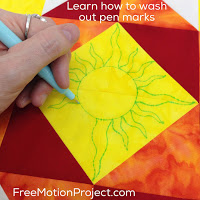
We’re rolling right along with the Machine Quilting Block Party and today let’s learn how to wash out the marks that helped us quilt our first block.
Why Wash Out Now
This is a year-long quilt along and it’s going to be 12 months before this first Half Square Sun block gets trimmed and connected together with the other blocks. That is a long time to leave pen marks and starch in the fabric!
While I’ve certainly left pen marks and starch in a quilt longer than a year, I knew this will bother many quilters so let’s learn how to wash out the blocks to remove all the marks and chemicals so it will be ready to connect with the other blocks in December 2016.

Please don’t forget to erase any marks that are non-water soluble first! Any marks you put on the quilt block with chalk, a ceramic marking pencil, etc, need to be erased with the eraser on the pencil.
The reason you need to be extra mindful with this is sometimes getting a block wet can set certain pencil marks and make them permanent, or at least very, very challenging to erase.
So erase everything you can first, then soak the block in lukewarm water to remove any water soluble pen marks.
If you have a sheet of polystrene board and want to block the block, definitely do! You can find detailed instructions for blocking a quilt in the Heart & Feather Wholecloth Workshop.
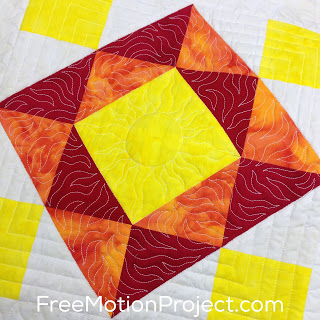
The wonderful thing about washing out the marks is you will suddenly be able to appreciate the quilting design so much more.
So now that we’ve pieced and quilted one block, how do you feel about your progress? Have you identified areas that give you problems like matching seams or quilting straight lines?
Please let me know which areas of the block came easily to you or felt more challenging, and what techniques you’re needing to focus on the most.
Let’s go quilt,
Leah Day

Two things came to mind with this:
1. Why my tracing paper, even if accurate, didn't match with my block?
2. Why are some of my points are 'chewed off' and other not? I asked the question in more detail on the Blog.
Thanks Leah
Great questions! 1. Double check that your quilting diagram printed the right size. It's easy for your printer settings to be slightly off so make sure to select "actual size" in your printer dialog box.
If the pages still won't print properly, open a web browser and click "print preview" and check to see if the page is set up to shrink. This setting must be set to 100% for your printer to print properly.
2. Triangles getting chewed off usually happens because your seam allowance is a bit big. Are you using a patchwork foot? Have you measured your seam allowance to see if it's accurate?