How to Machine Quilt Block #1
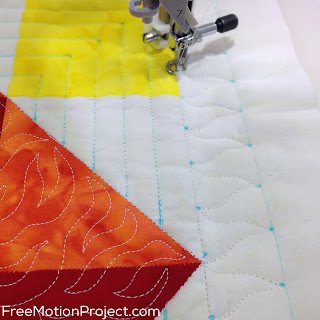
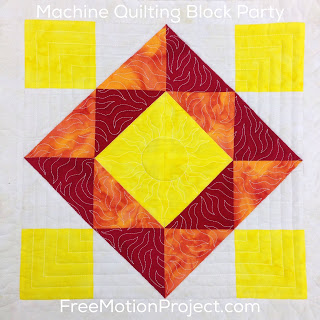
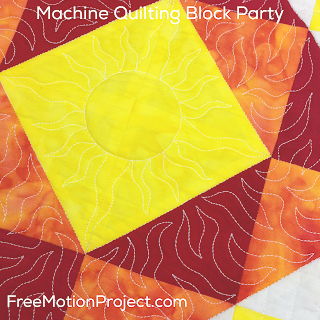
Are you ready to machine quilt your first block? Half Square Sun is going to be such a fun block to quilt because it incorporates lots of skill building techniques – quilting the sun motif on the lines, filling in spaces with Sharp Stippling, and you’re going to get lots of practice stitching straight lines and flame shapes.
To make quilting all of these designs easier, make sure to mark your block with the quilting diagram included in the Block #1 pattern.
Quilting on marked lines will feel a lot easier because you can focus completely on moving the block smoothly over your machine and matching the speed of your hands with the speed of your machine. This can be a bit of a struggle when you’re first getting started so take it slow, mark the designs, and your block is sure to turn out great!
Watch the entire block being machine quilted in this video:
Are you wondering how to hide your thread tails? Click Here to find a video on how to tie off and bury your loose threads securely.
As you can see from the video, there’s a lot of different designs within this block and you don’t have to mark everything. I didn’t mark the spaces with Sharp Stippling, and only minimally marked the outer border.
 However, if you’re just getting started with machine quilting, you’ll probably want to mark everything so you have a line to focus on as you quilt over the block. This will make it much easier to focus on moving the block (which can feel a bit out of control) and matching the speed of your machine with your hands (which can feel even more out of control)!
Why Marking Makes Quilting Easier
In the Quilting Thread Test video I explained why free motion quilting is hard to master – it’s one of the only sewing machine techniques that doesn’t use the feed dogs.
The feed dogs are the little teeth on your machine that feed fabric forward at a steady, even pace to produce perfectly spaced, even stitches. Unfortunately feed dogs only move forward and backward, which can be a bit of a hindrance to free motion quilting because we want to move in ALL directions.

So we either drop the feed dogs or limit their movement by setting our stitch length to 0 (click here to learn more about free motion machine settings) so we can move the quilt in all directions, but it comes at a price. Now that the feed dogs aren’t doing their normal job of making perfectly even stitches…we have to make the stitches even ourselves by matching the speed of our hands with the speed of the machine.
Now everyone does this differently. I know some quilters that quilt super quickly with the foot pedal mashed down to the floor. Other quilters quilt very slowly. Personally I like using my foot pedal like the gas on my car – I speed up and slow down depending on what I’m quilting at any given time.
No matter what speed you like on your machine, you’ll need to learn how to continually match that speed with the movement of your hands. Sometimes this works great, sometimes you’ll feel like a toddler learning to walk with wide stitches giving way to tiny stitches in a drunken wobble across your quilt.

Yes, this is NORMAL! We all go through a certain amount of ugly stitches in the beginning, just like most of us fell off a bike a time or two before we got the hang of balancing just right. You just need to stick with it, keep quilting, keep practicing and you will get the hang of balancing the speed / movement of free motion quilting eventually.
As for how long this takes – it’s really different for everyone. If you practice every day you should see great improvement in less than a month. If you quilt once and never try it again…well, I don’t know of any skill you can build that way!
Just keep quilting. The more you do this, the better you will get and the more confident you will feel!
Now that block #1 is complete, I’d love to know what you think of this project so far! Share your thoughts in the comments below.
Tomorrow we’ll learn how to wash out the marks from our block so they can be stored safely until the end of the year.
Let’s go quilt,
Leah Day


When did you show us how to sew in the ends? Its mentioned that you already taught it in this video, but I missed it. Which video should I refer to? Thank you!
I am just loving it Leah, I have learnt so much this month. I am going to enjoy this year!
Fantastic! So glad to know that I will get plenty of practice with those wiggly flame shaped mountains that gave me such fits!!!!!
Wow, I'm new to quilting and have learned a lot already. It's a privilege to be in your class, not to mention fun. Thanks!
Am loving it!
I normally just quilt in straite or wavey lines as my confidence is not so good for other designs yet. Iv tried but the skill just isn't there. So gave up!
But I gave block#1 ago and it wasn't to bad at all.
I love the idea of a catalogued progress on one quilt to. Roll on December wen I can see that progress!!
Leah- when did you get the Juki Exceed? Are you still using the other Juki?
Did you keep your Janome you used to quilt on?
And do you like the Juki better than the Bernina for piecing? (You used to say you pieced on you Bernina even when you quilted on the Janome.)
Yes, I still have both Juki machines. Nope, I didn't keep the Janome Horizon 8900, but do have the Janome 15000, which is an embroidery machine. Keep in mind, this is just my experience with these machines and my preferences so the best thing to do is try them with a local dealer and see what you like best.
Hmm…piecing on the Bernina and the Juki F400 with the patchwork foot is really so similar, I can hardly tell one from the other. I guess I still prefer the Bernina 1230 simply because it's such a sweet, precise little machine. Again – all my opinion, but it's definitely worth trying a 1130 or 1230 just to see how amazing they were. So precise and solidly built!