
Decorative Antennae Designs
 We’re nearly finished investigating all the creative ways we can play with the butterfly designs from the Dancing Butterfly Quilt Pattern. Today let’s explore some creative ways to stitch the butterfly antennae!
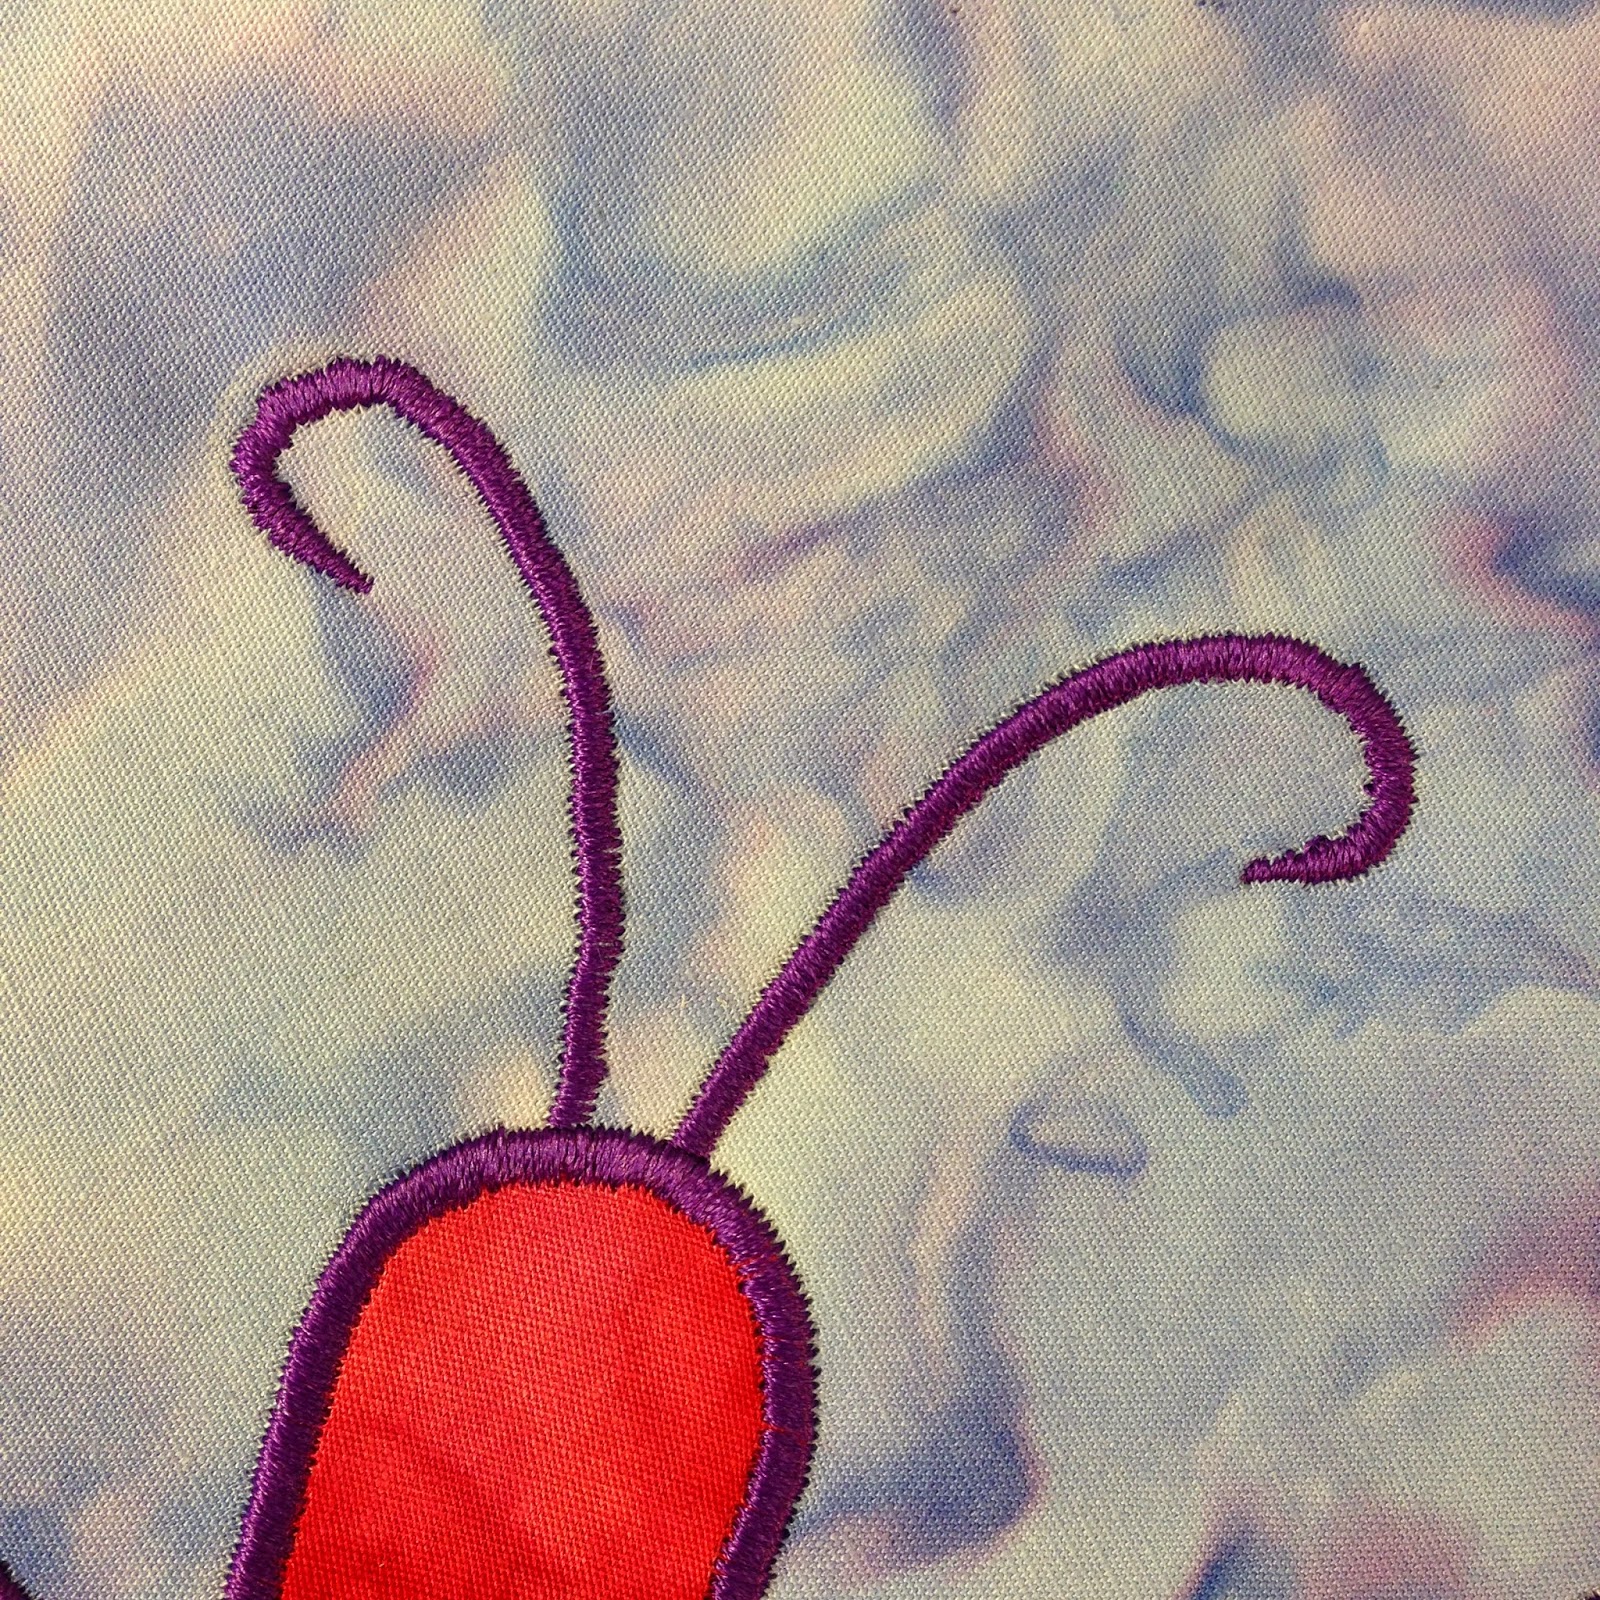
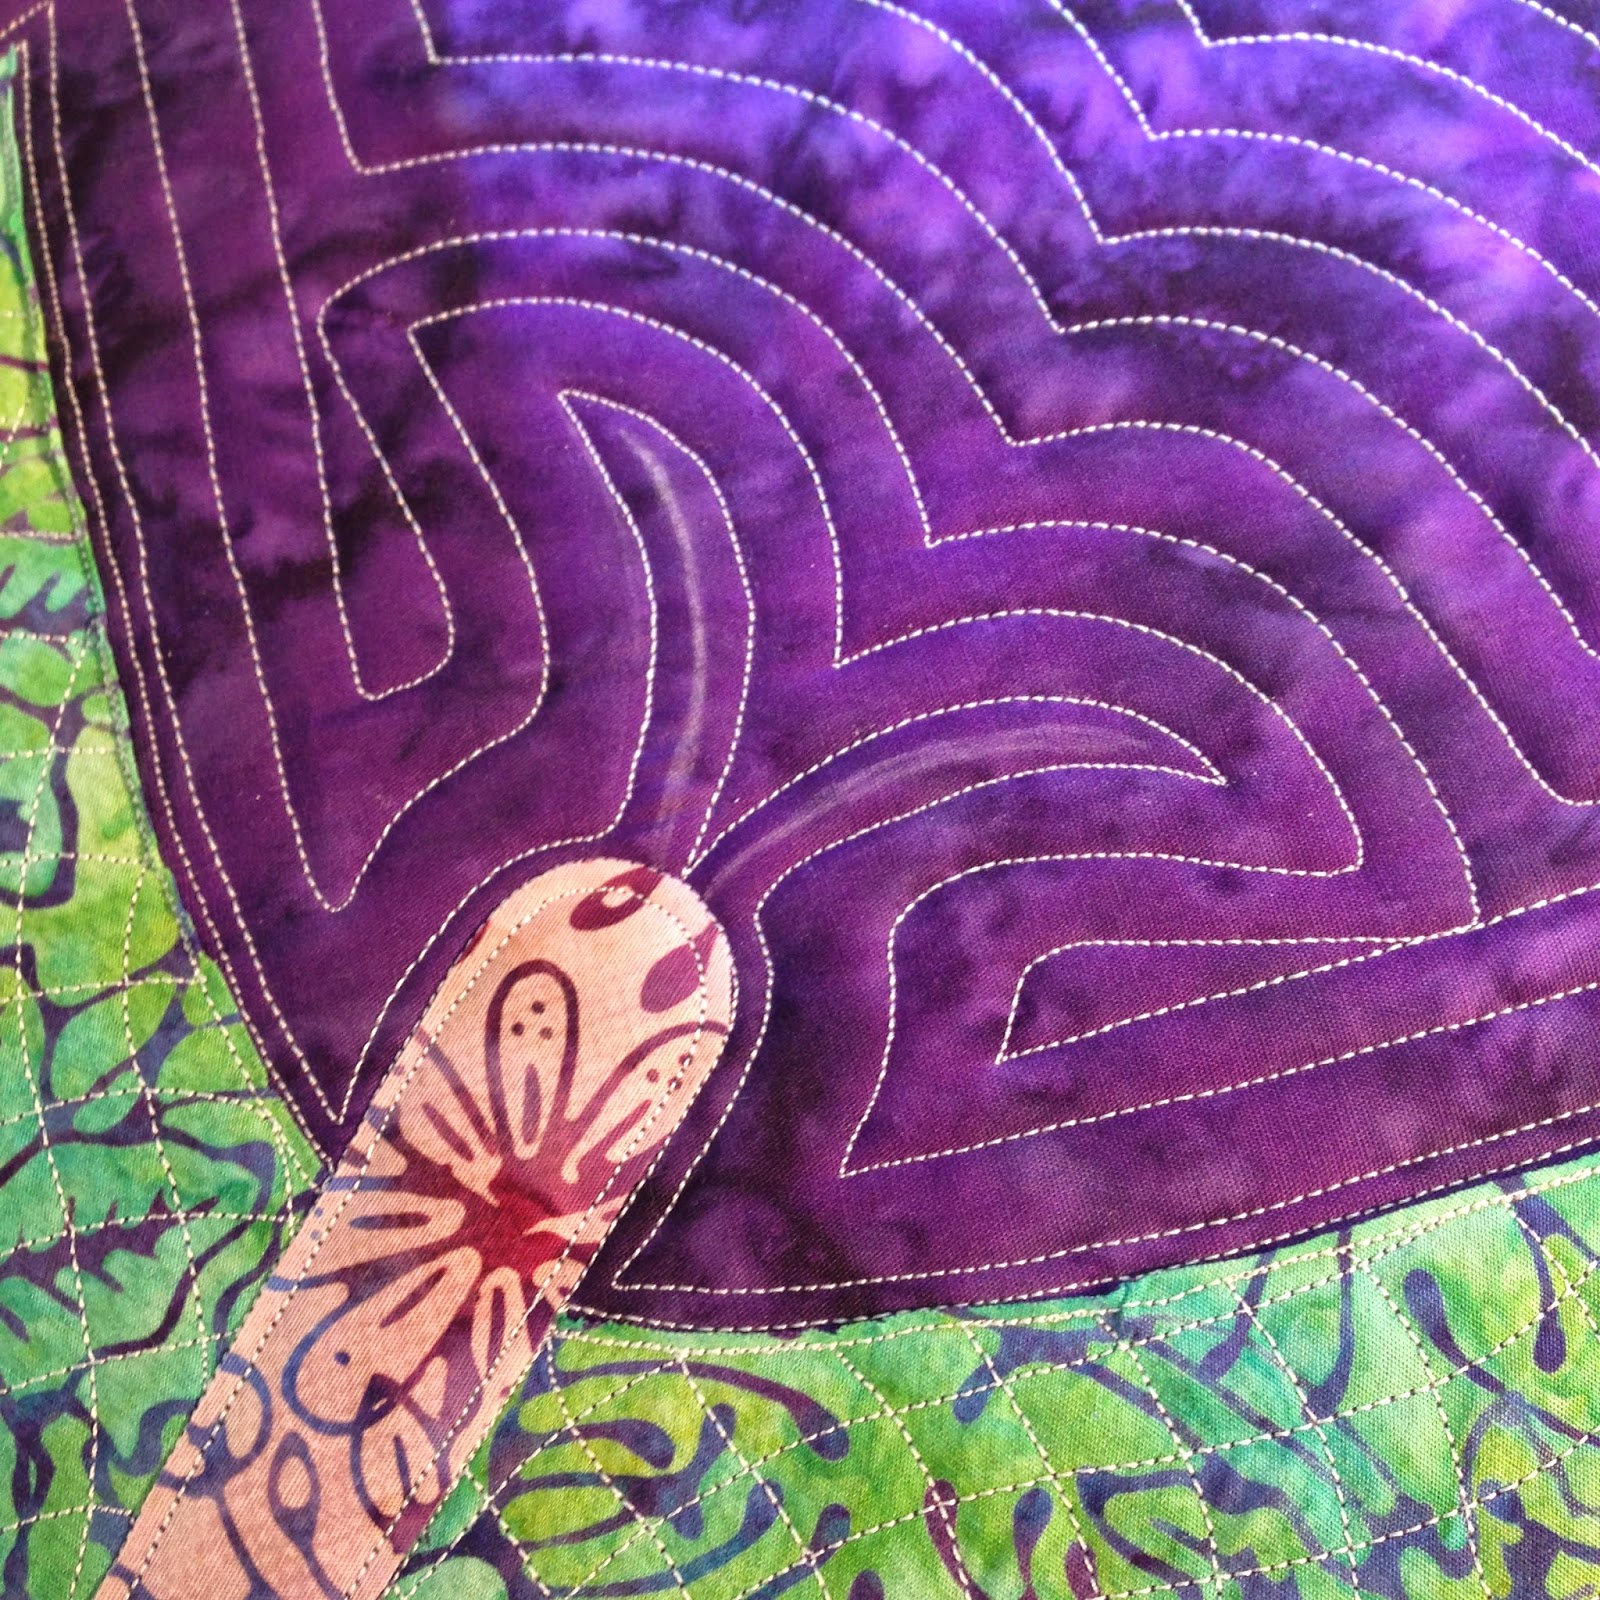
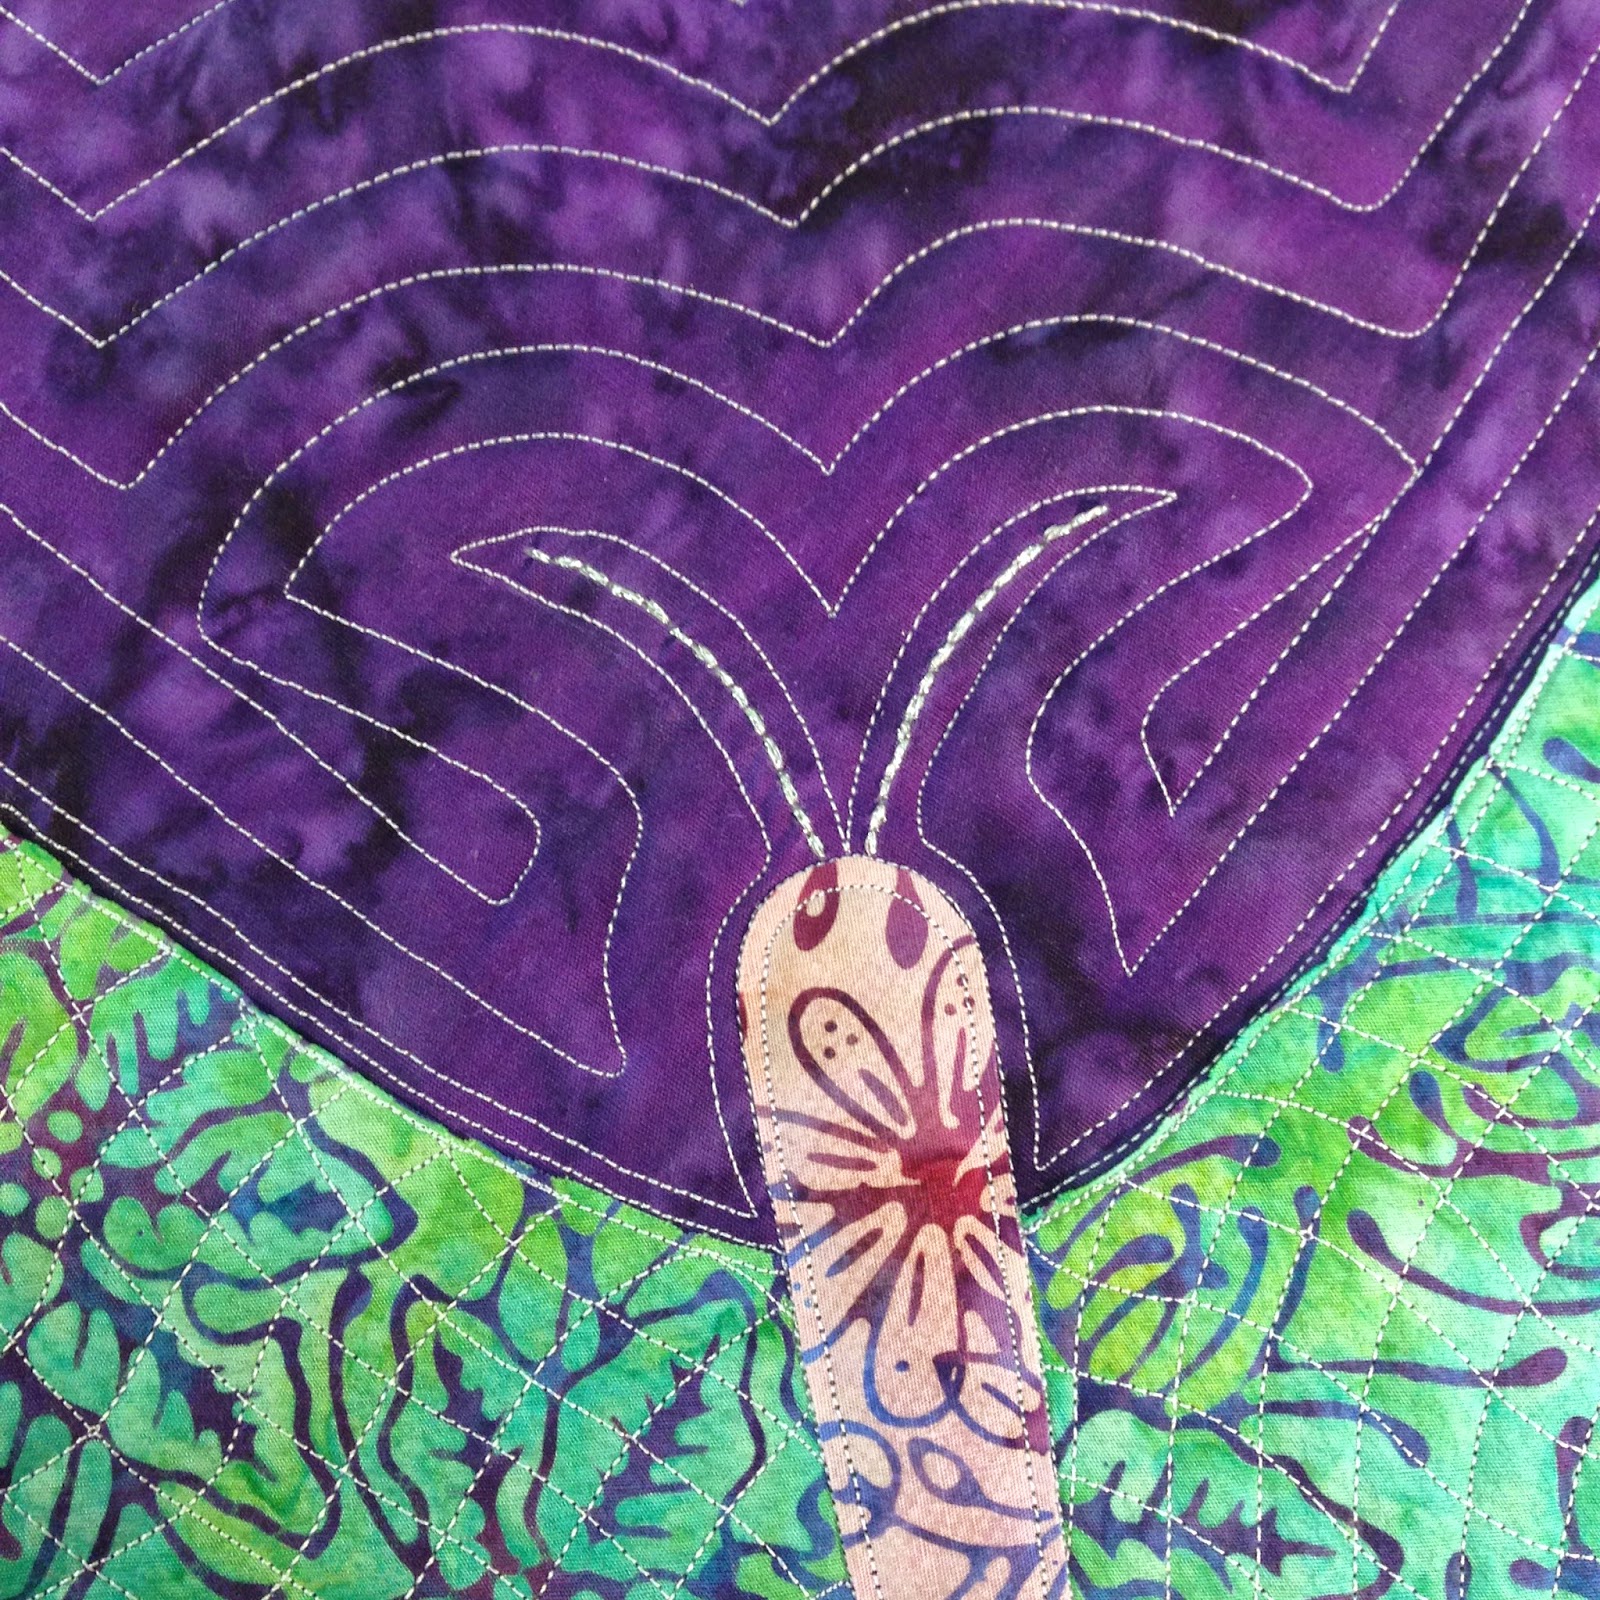
In the pattern, you’ll learn how to mark and quilt the antennae shapes using satin stitching. The one challenge is this adds the thin, tricky shapes to the block surface BEFORE the quilting. As you fill the background space, you will have to stitch carefully through the area to keep the design consistent and not stitch over the antennae lines.
I frequently stopped and marked my way through this space to plan my entry and escape. It worked well, but it was a bit time consuming and many quilters have reported just ignoring the antennae and quilting all over them just to make it easier.
So the first way to change up the antennae is to wait to add them until AFTER the block is quilted. Jodi J on the DB Facebook Group free motion quilted her antennae shapes in place with a contrasting thread color so they stood out against the quilted background.

Another idea is to skip stitching all together! In this block I added the simple shapes using 20 mm hot fix crystals:
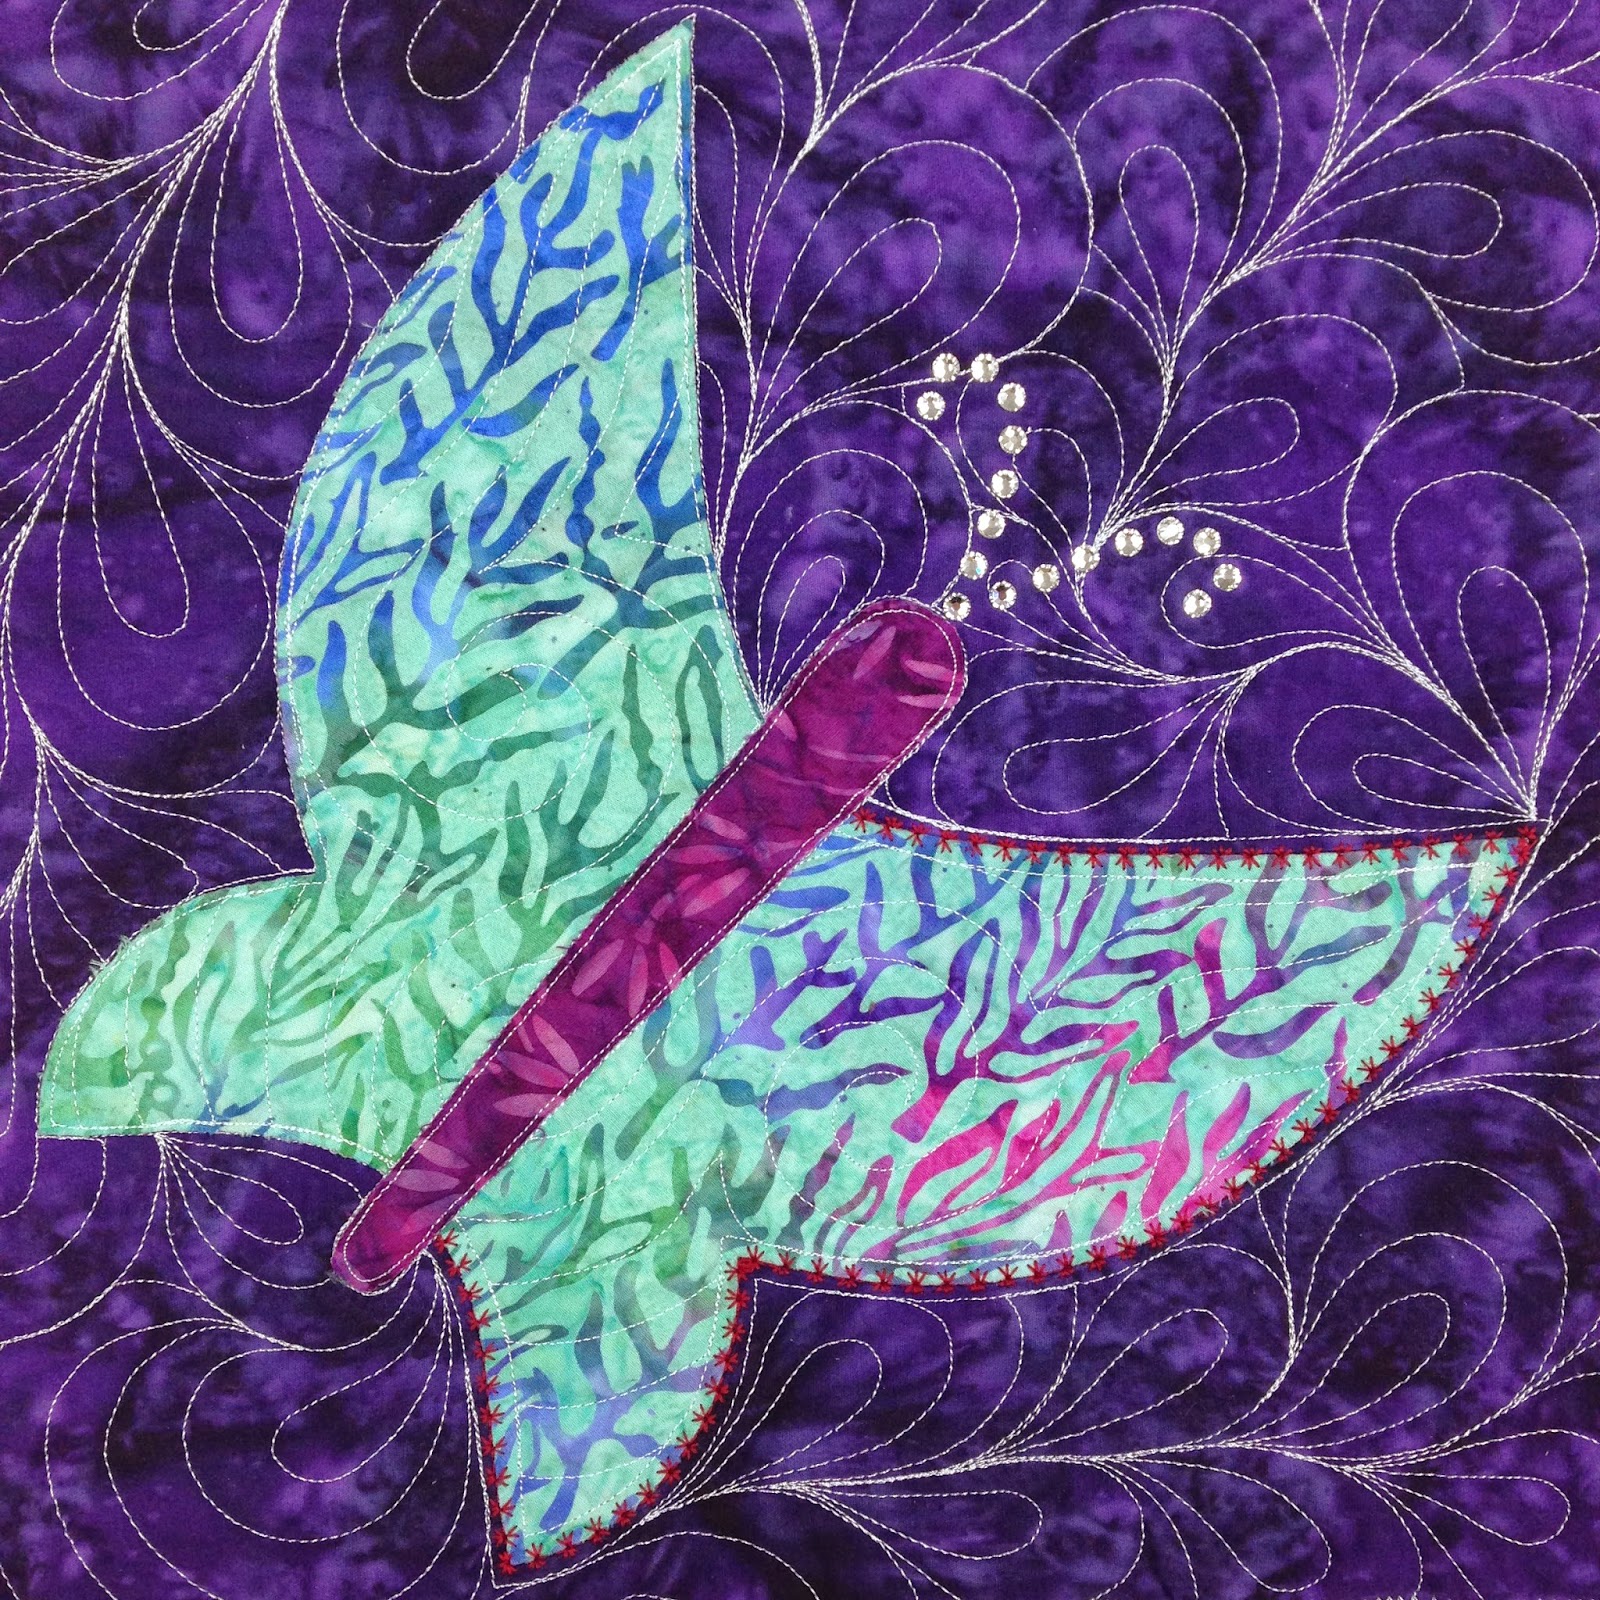
I’ve wanted to play with hot fix crystals for years, and horded the supplies, but never actually put heat to rhinestone until now. They’re surprisingly easy to use – just place the crystals, then press with a heat tool like Cheri’s Cool Tool and the glue on the back of the crystal heats up and bonds with the fabric.
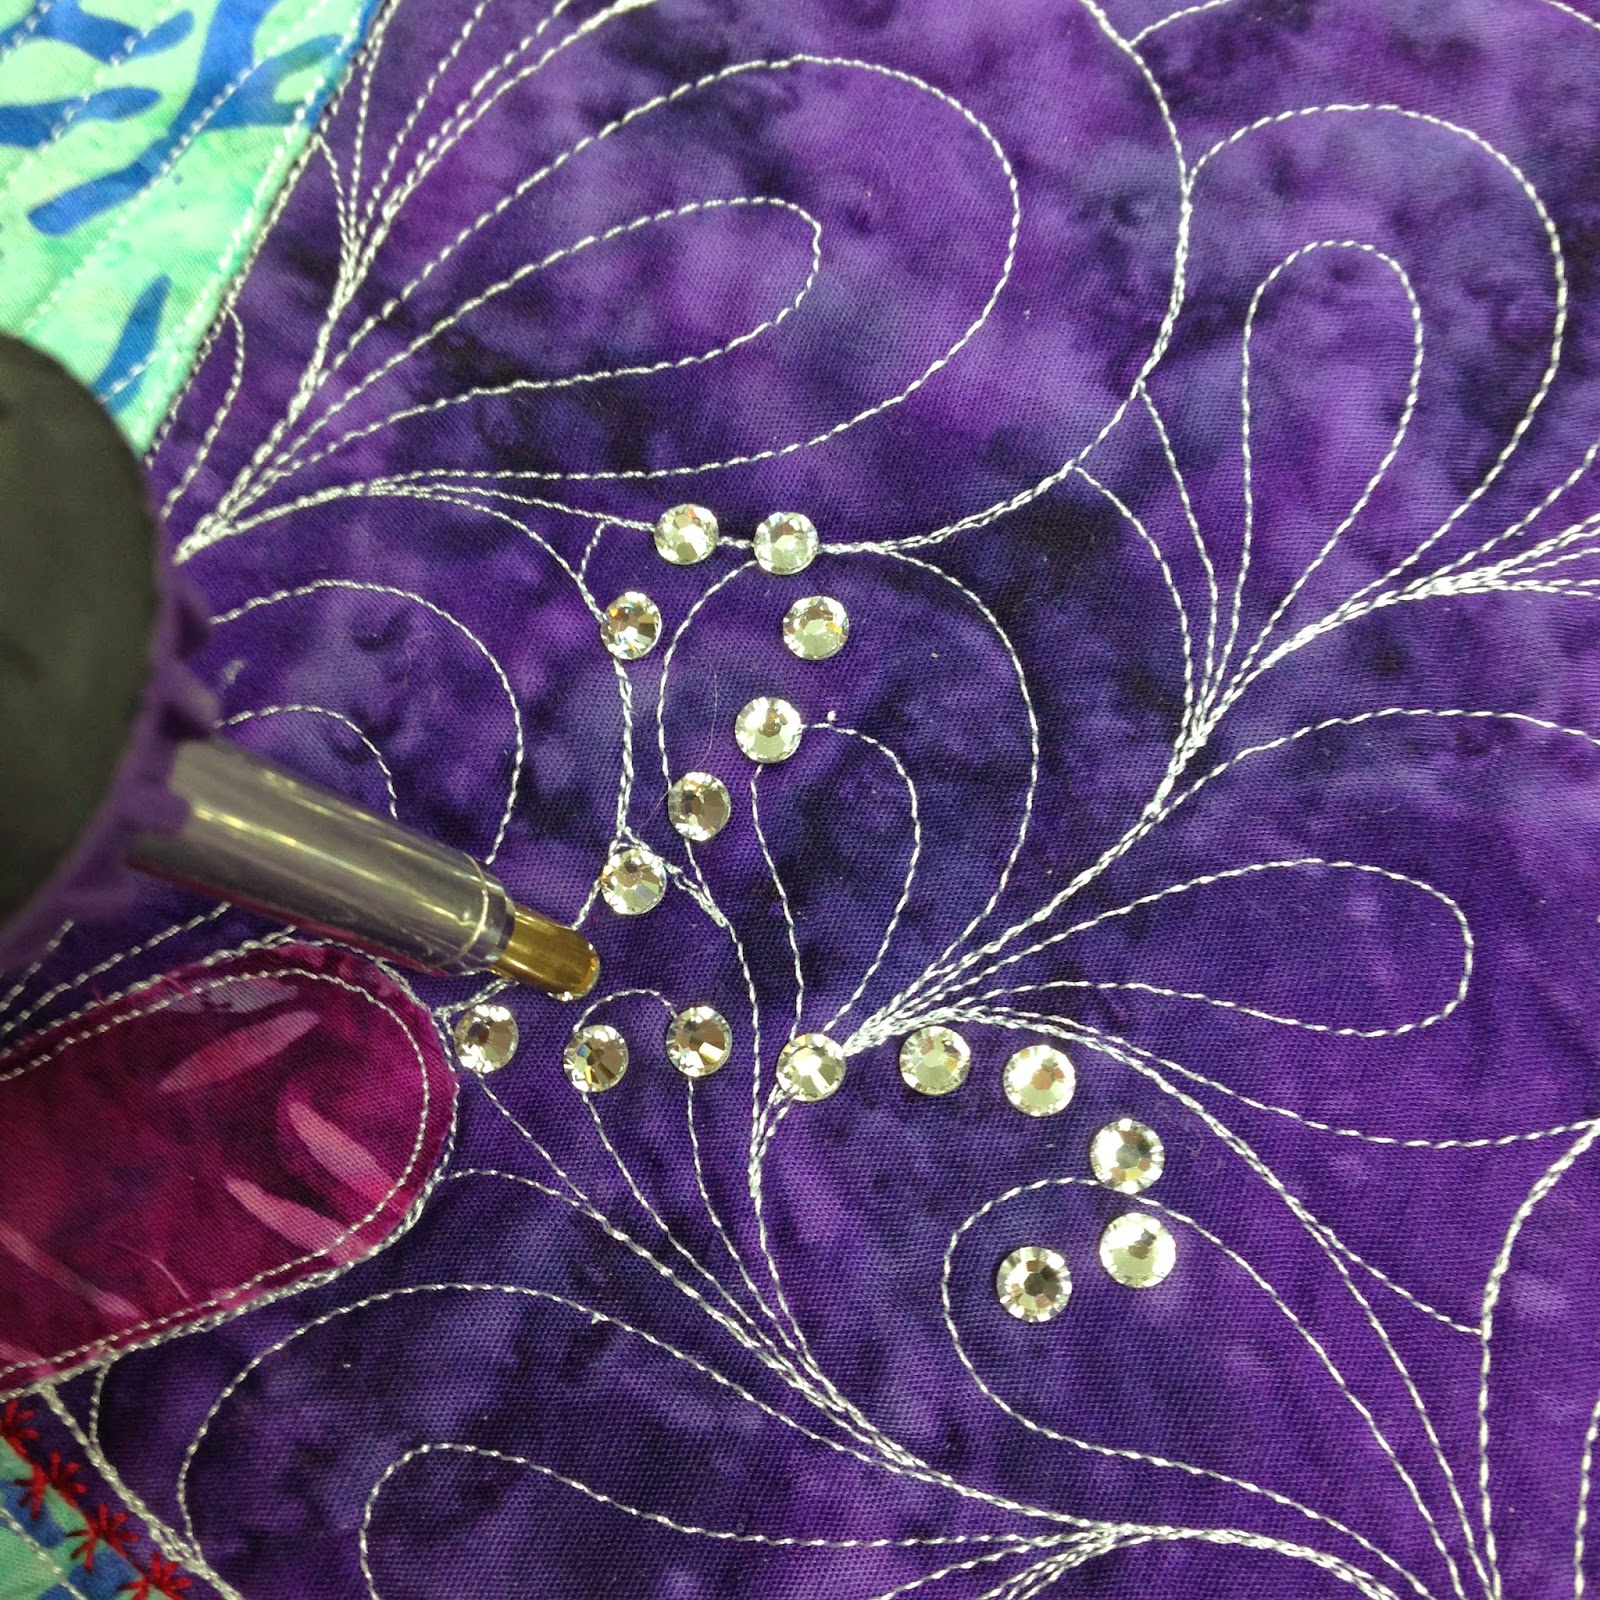
You do have to hold the tool on for awhile, particularly for the larger crystals. I held it on for 25 seconds per crystal to secure these big guys in place.
The one downside to the crystals is the question of washing the quilt. Will the glue on the crystals stand up to a run through the washing machine? I didn’t have time to test it yet, but I’ll update this post as soon as that block has gone through the ringer!
Now for another creative idea – hand embroidery. You can hand embroider the antennae shapes either before or after quilting. In this case, I marked the placement for the antennae and then quilted around them as if they were really there.
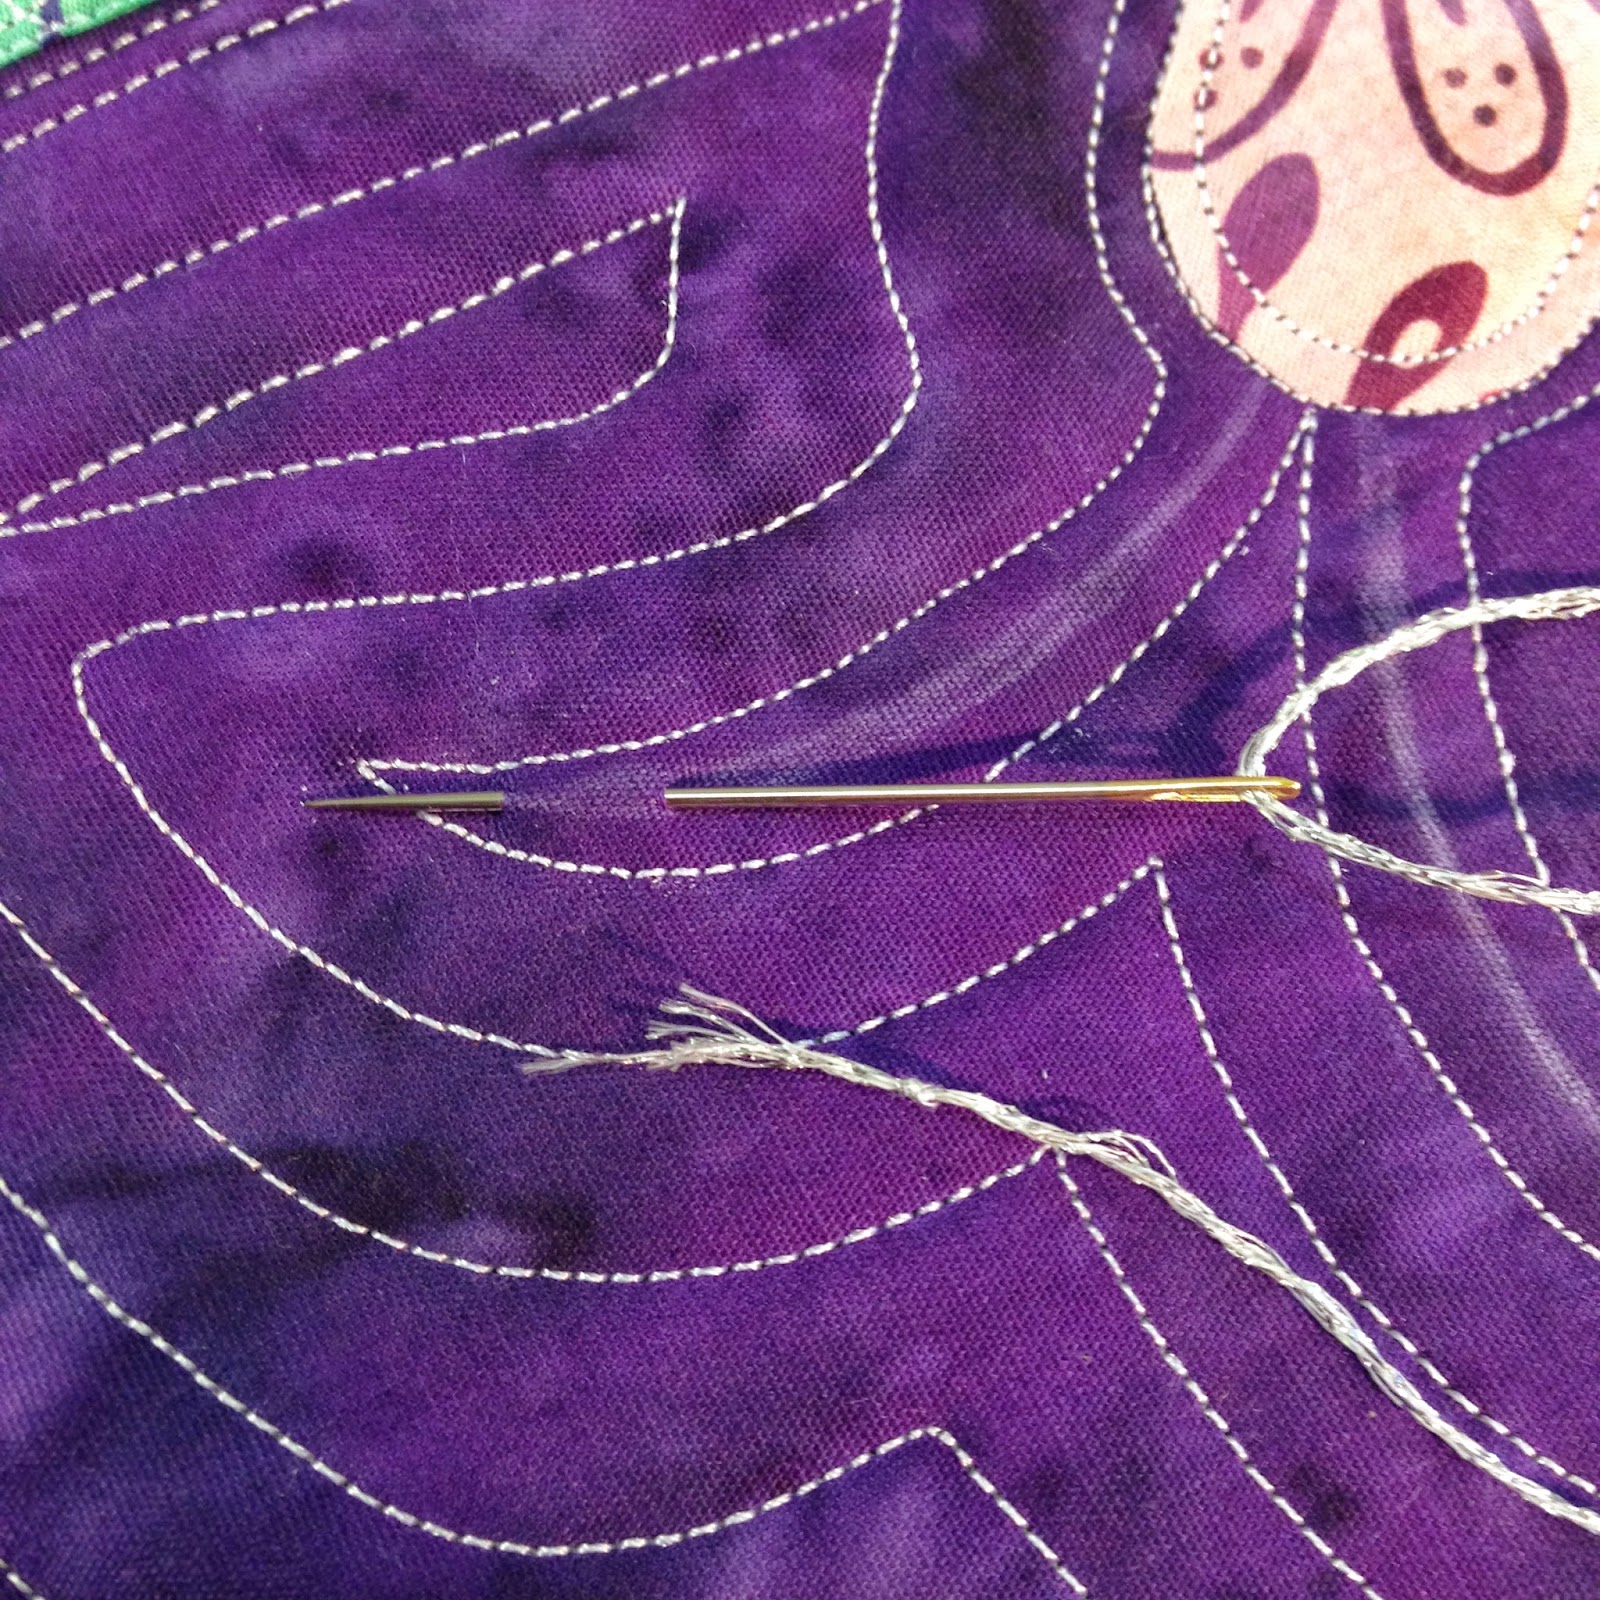
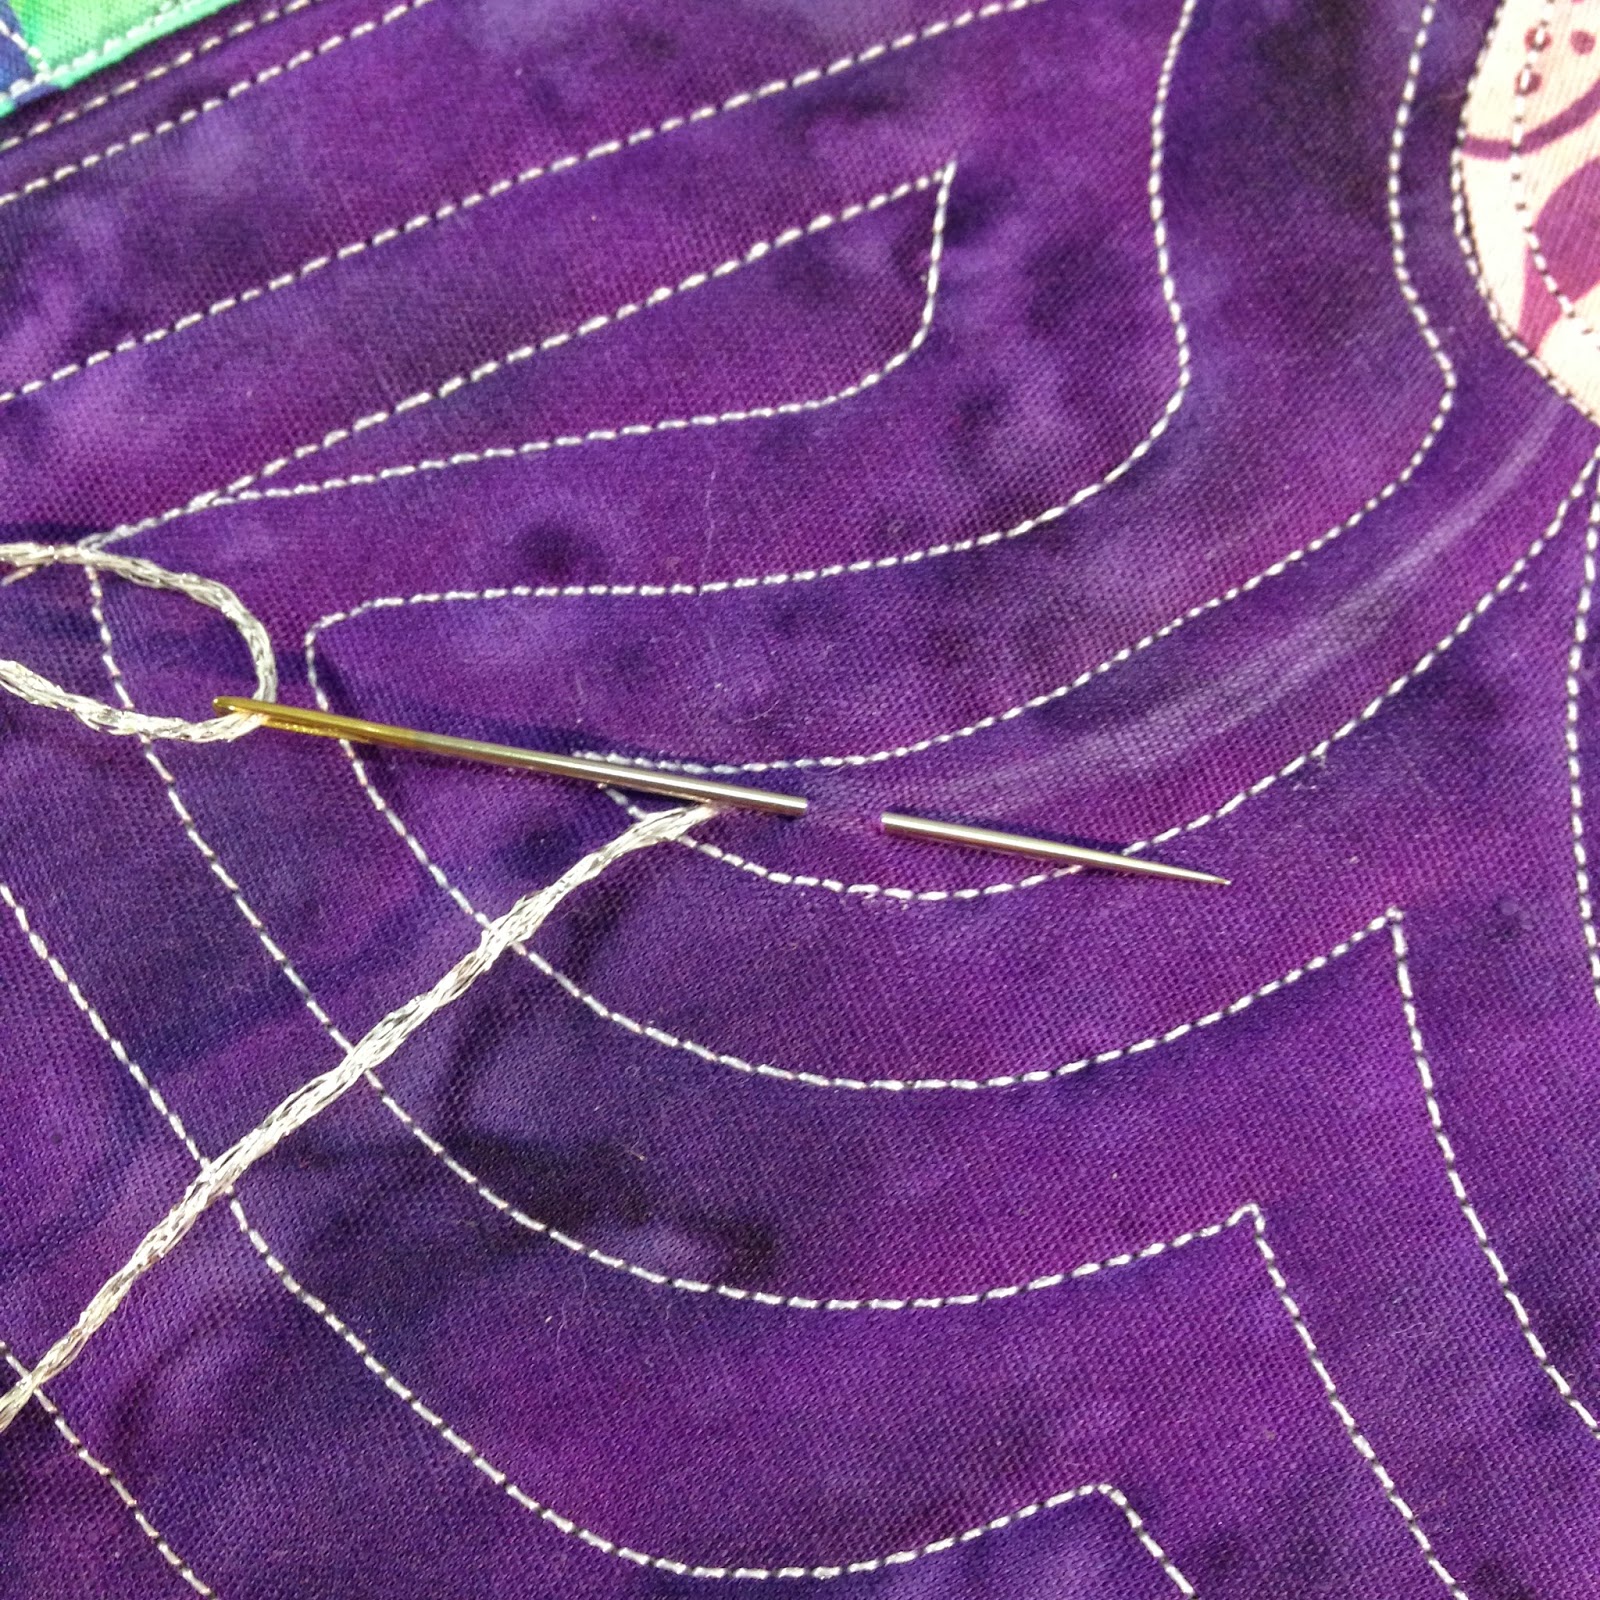
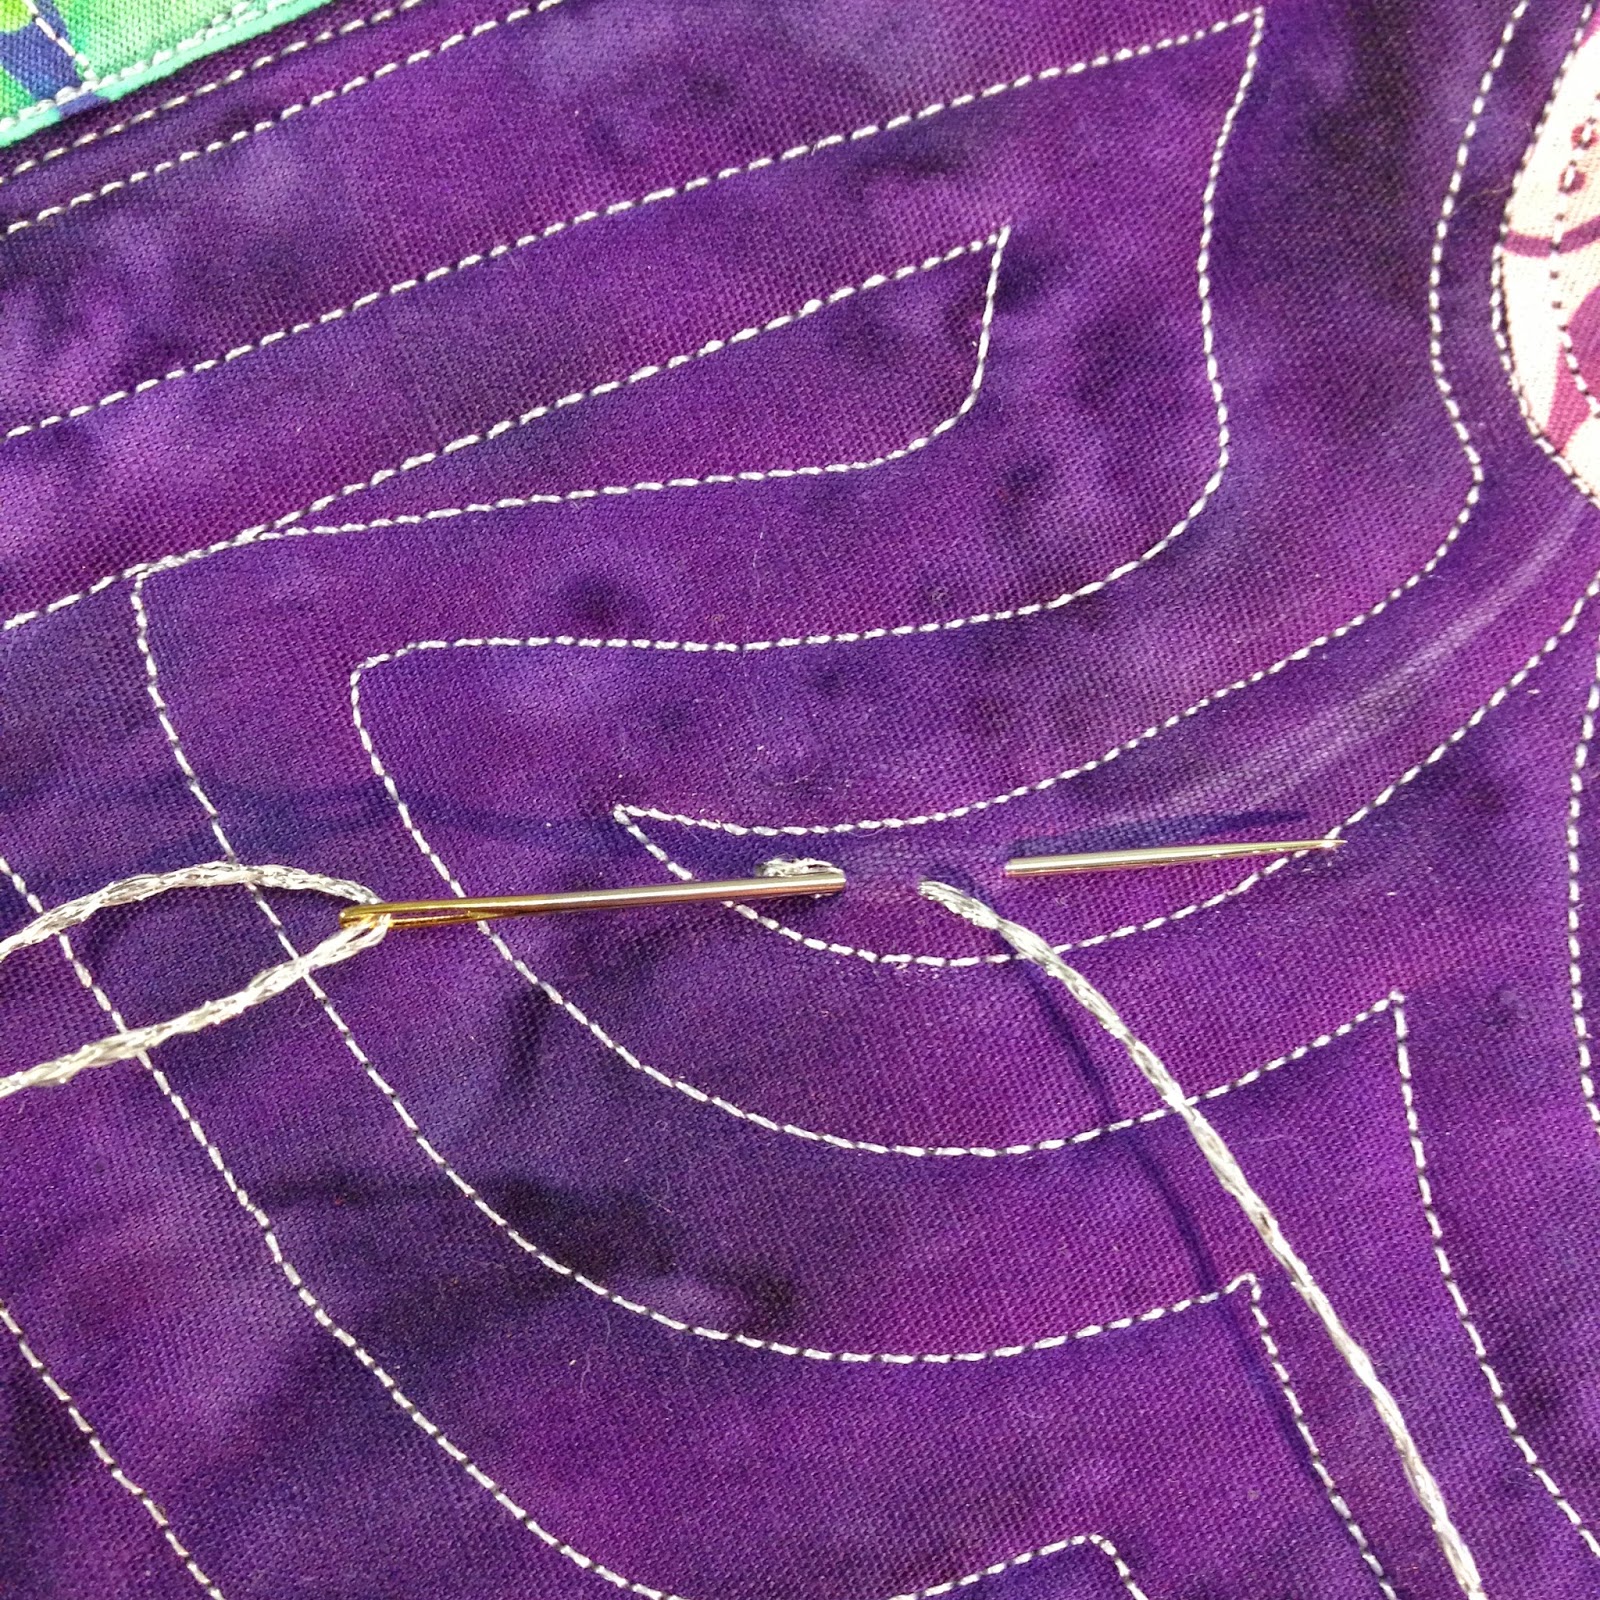
All the remaining stitches are made this way – by stitching back through the second hole of the previous stitch.
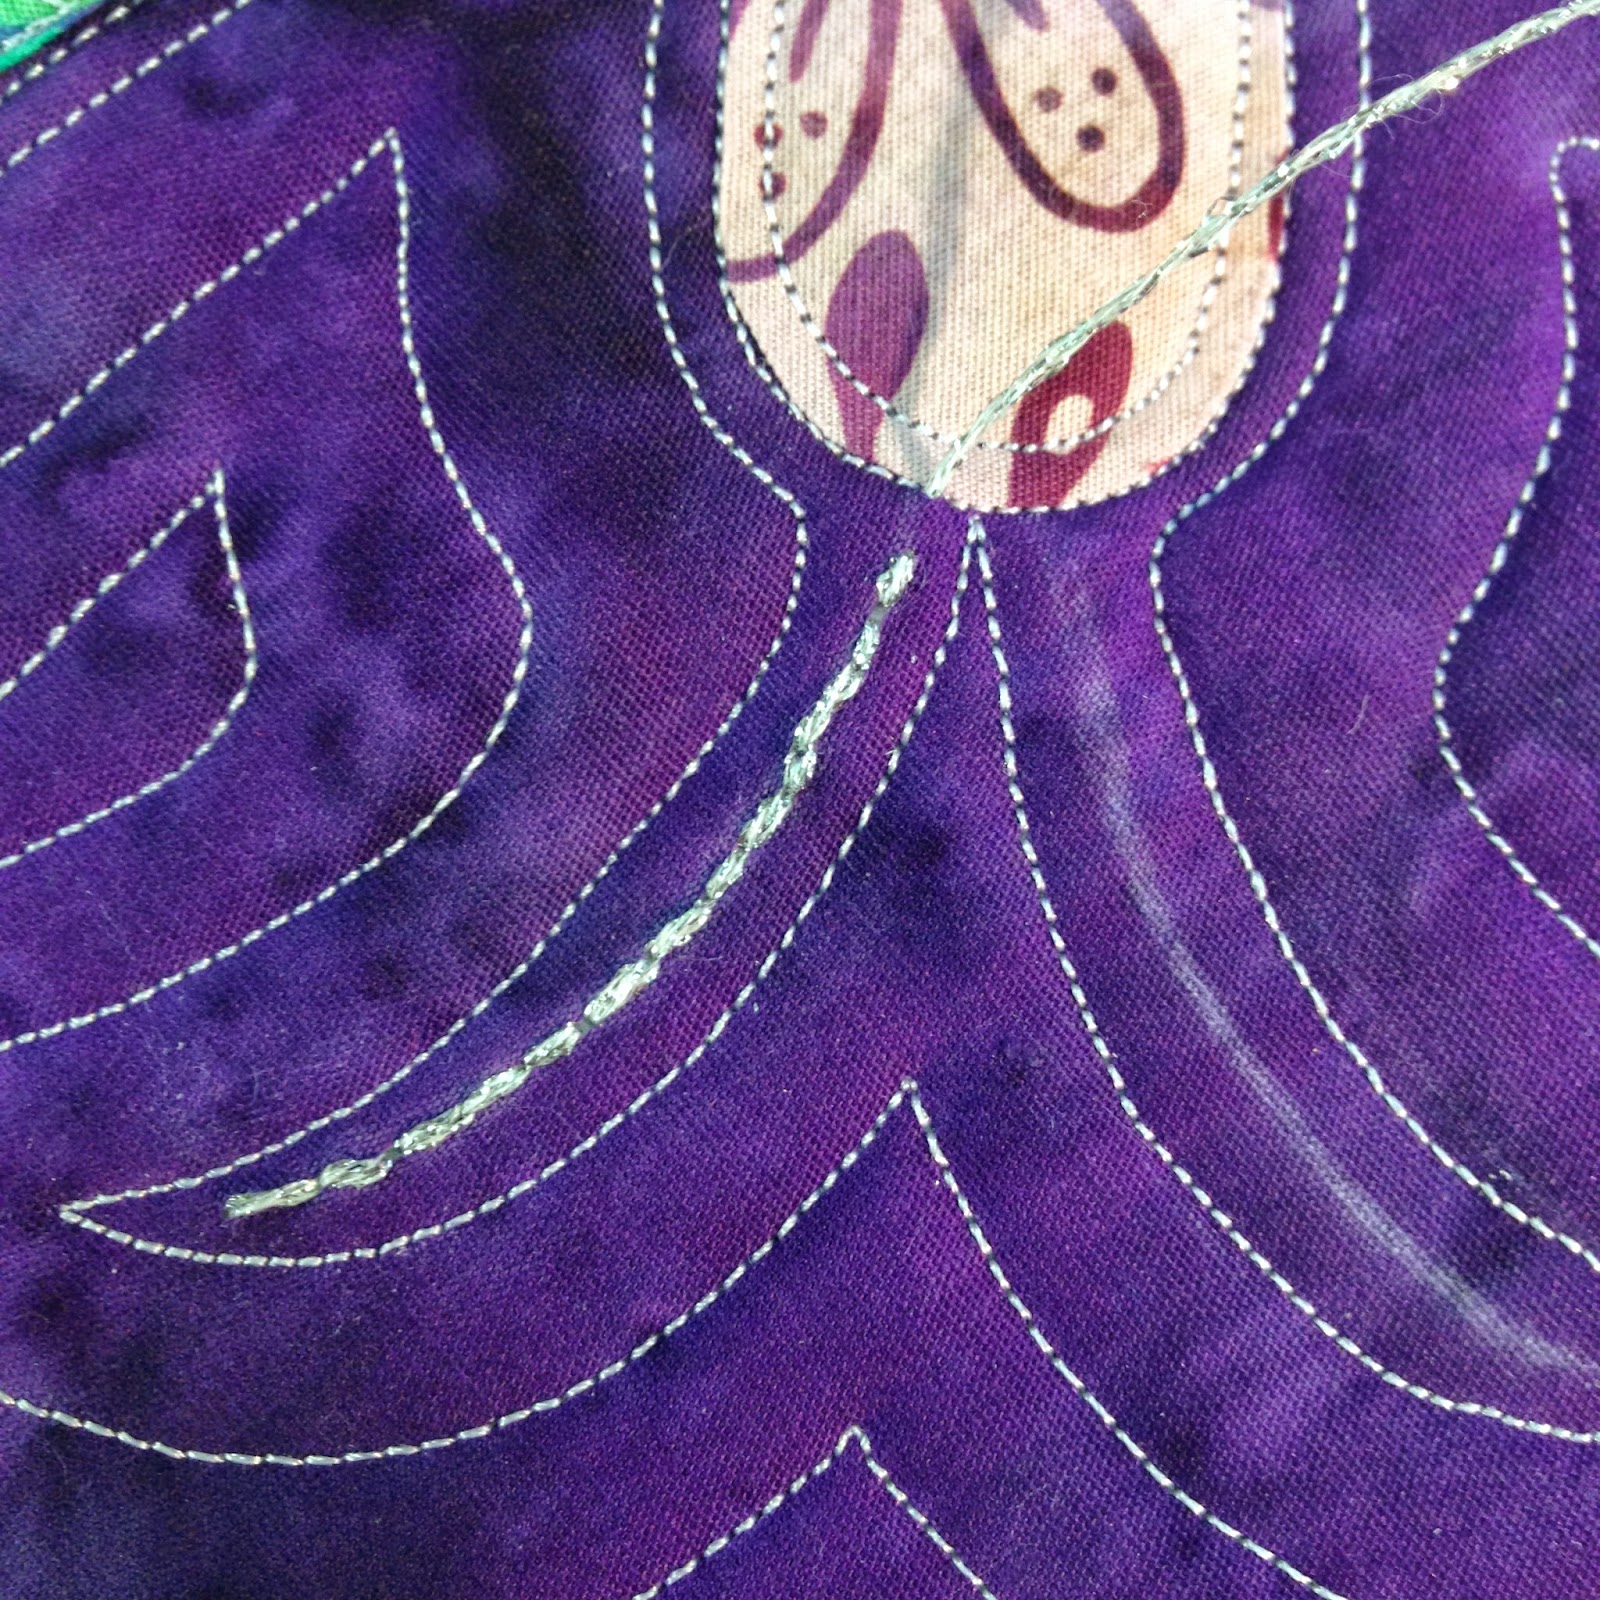
This forms a nice line of decorative stitches all the way to the top of the butterfly body. To jump to the other antenna shape, I just traveled through the middle layer of the quilt and brought my needle up right at the start of the marked line:
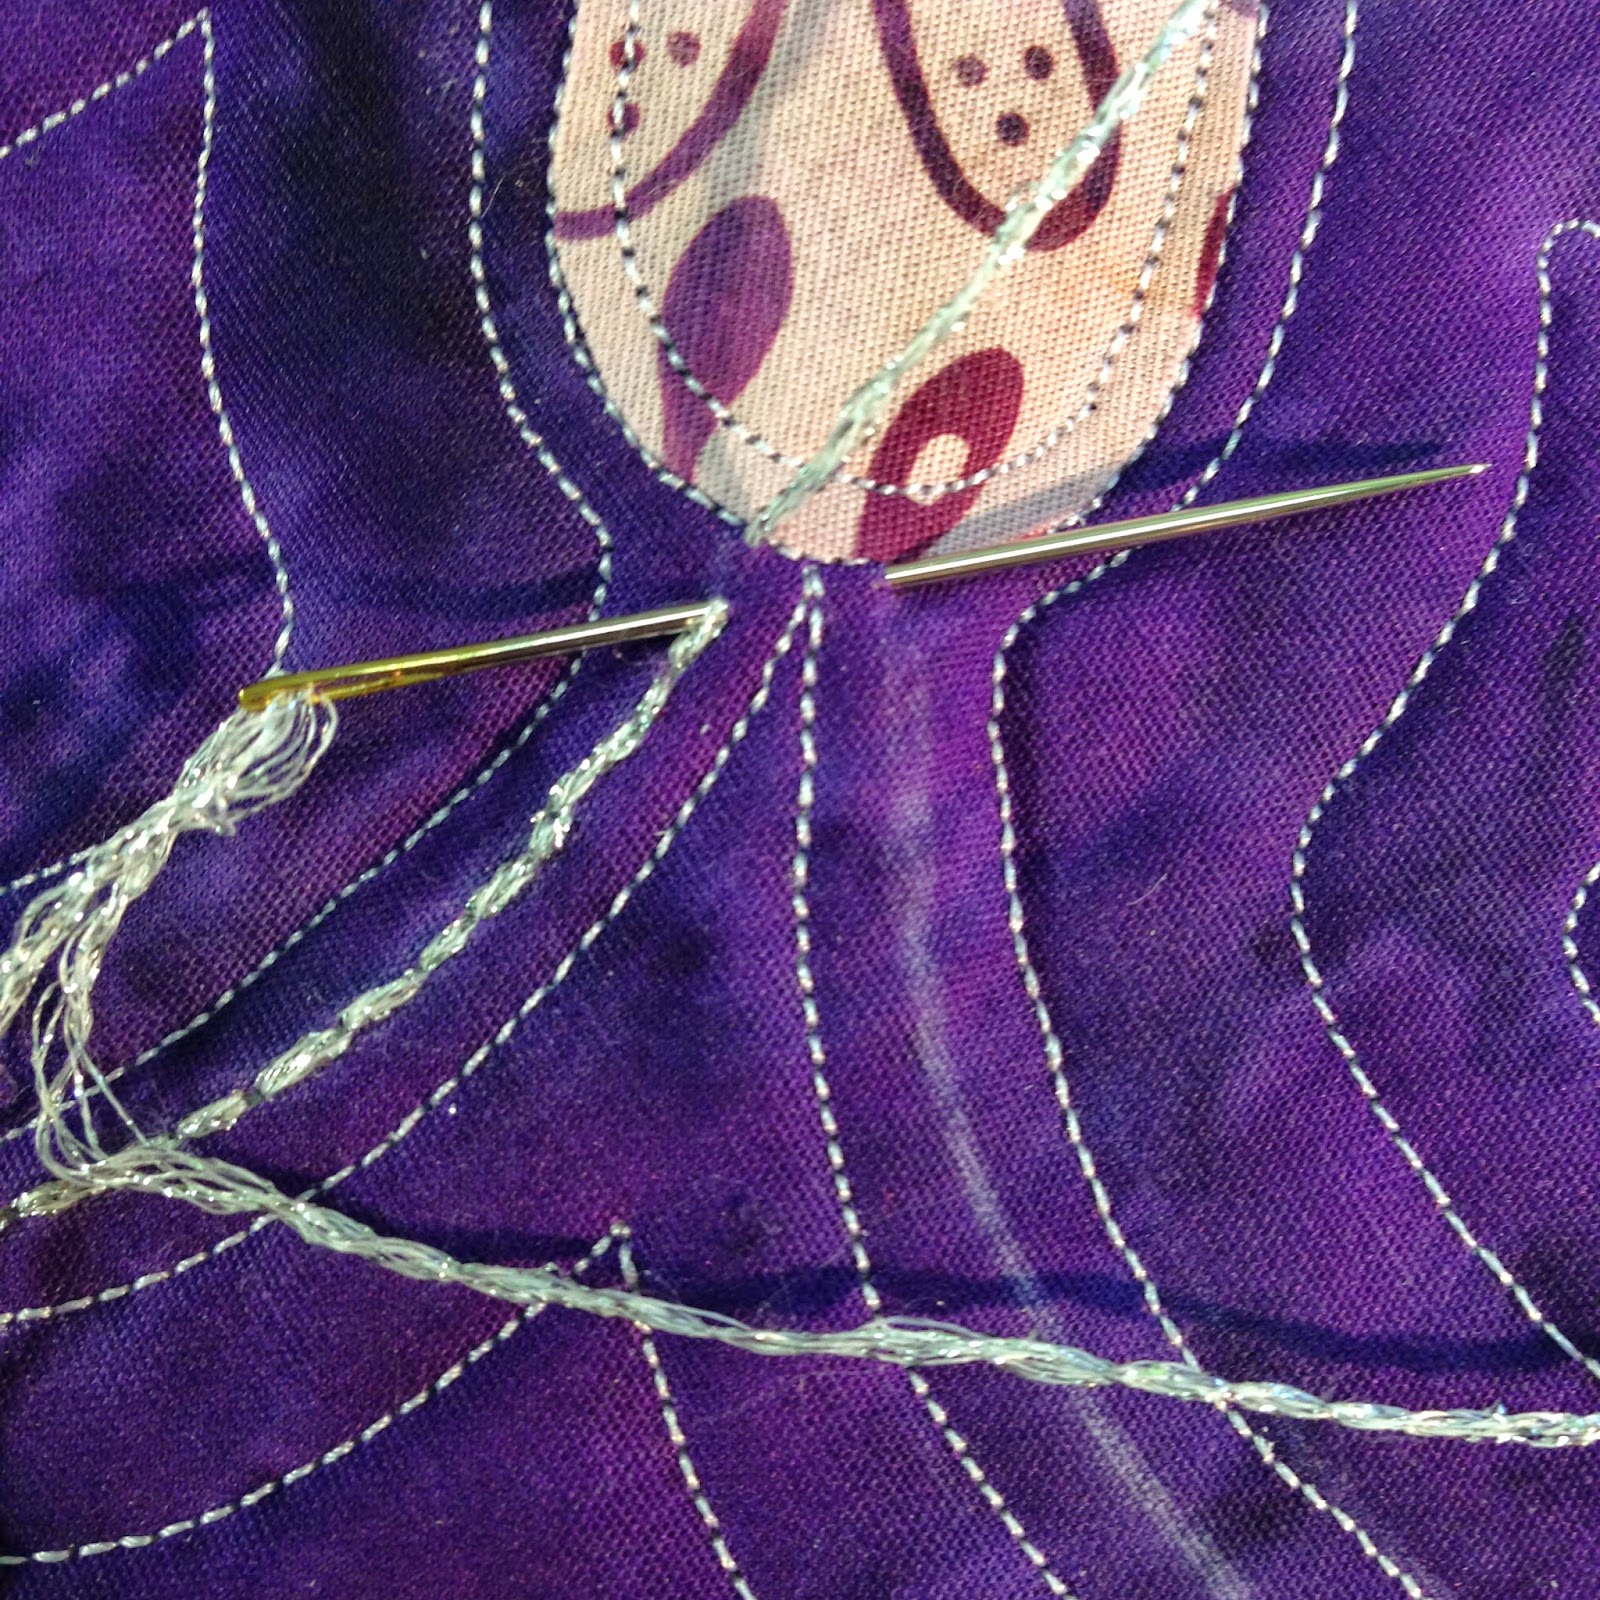
I repeated the same stitch on the other line, then ran the thread through the middle layer of the quilt about 1 inch, then tied a knot, then ran the thread another inch, making sure the knot popped into the quilt to hold the thread securely inside the quilt.
I love this option because it’s so subtle, but also clearly a little extra time and effort was made to add the little antennae lines to the quilt surface.
Ultimately it doesn’t matter if you add your antennae before or after the quilting, or with satin stitching, hand embroidery, or a surface material like hot fix crystals.
Whatever you use, make sure it fits with your goals for the quilt. Obviously if you’re planning to give the quilt to a baby and it will receive heavy use and washing, adding crystals, buttons, or beads might not be the best idea. However, if you’re planning for the quilt to hang on a wall or show, these additional elements will really stitch it up a notch!
One thing I’ve learned is to stop being so afraid to try new materials. Buying new stuff is the easy part, and it feels so good to have a stash of cool materials to play with at any time. But hording materials and never using them is as silly as baking a cake and not eating it!
So what materials have you been stashing away? Pull them out and play! The only way you will learn how to use them is to USE THEM in a real project and what better quilt than one that is all about experimenting and learning new designs and techniques?
Let’s go quilt,
Leah Day

At Road to California this week-my highlight was seeing your 365 quilt! Stunning! While cruising the aisles I stopped by Alex Anderson's booth….about tools, she said "The only expensive tool you have – is the one you DON'T use!" All the tools you've recommended CHANGED me into an FMQ'r -THANK YOU Leah – for everything!!!
Great ideas! I appreciate the way you set a base for the project then embrace creative ideas that emerge as others get involved. This is such an effective…and freeing…learning model for me. I appreciate you, Leah Day, and I appreciate the way that you share your gifts and talents to help others learn.