
43. Foundation Piecing + Applique Introduction
It’s time to learn something new! Over the next several weeks we’re going to switch between learning new designs on Express Your Love and how to construct large pieced sections using a technique I call Foundation Piecing + Appliqué.
So where do we start with Foundation Piecing + Appliqué? Well, as with any foundation piecing project, we have to first create the foundation, or a base upon which the fabrics will be stitched. Check out the video to learn what to do!
Now take extra sheets of paper and extend all edges by 6 inches. If you have created your log cabin background, lay it on top of this master, lining up your special star block (or whatever you used in that center spot) with the Earth shape it replaced. Mark the edges of the fabric background so you now have an extended pattern the same size as your pieced background.
2. Flip the master pattern over.
I felt like having a bit of stabilization to the fabric would be nice so it wouldn’t go wobbly on me later. Turns out we ended up with so many layers of fabric that this might get a bit bulky on some piecing arrangements so only do this if you want to.
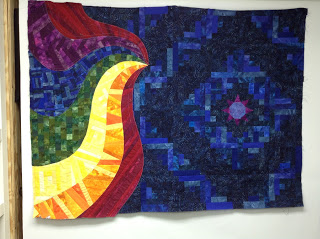
That’s it! Once you create all the 7 foundation pieces for the goddess hair it will be time to start piecing! Next week we’ll get started with an easy arrangement of diagonal strips as we tackle the first red section.
Now I don’t know about you, but learning new techniques makes me hungry! I’m off for a snack and then back to the machine!
Let’s go quilt,
Leah
Other Foundation Piecing Posts:
Prepare Your Foundation
Red Diagonal Section
How to Create a Scrappy Mix of Colors
Orange Triangle Section
Yellow Log Cabin Section
Green Mosaic Section
Blue Double Scrappy Section
Purple Braid Section
You make me excited to do some of your projects. Pray that I get my sewing room ready to head in there soon. I need some sewing therapy!!!
Thank you Leah.
Amazing work
good weekend
http://tearpiaocupacional.blogspot.com.br/