Studio E Challenge
Last fall I participated in a Studio E challenge to create an art quilt for the fall quilt market. Basically the company sends me some fat quarters and a size requirement and I play around to come up with something pretty.
And yes, in light of Friday’s post, this does sound a bit familiar…with the big difference that I don’t plan to put these quilts in books…at least I didn’t until I thought about it just now…oh no! lol!
So this is the quilt I submitted last fall and was displayed at the Houston Quilt Market:
I don’t travel at all these days so it’s nice to know my work is showing in some way at that big event. This spring I was contacted again, this time with the challenge being black and white fabrics.
Now I love a good black and white print! There’s so many things you can do with these fabrics – use them as is, or play with dye and paint to create really interesting colors.
For this challenge, I decided from the beginning I wasn’t going to make a black and white piece. I want to play with lots of color and texture!
Instead I set myself the challenge to see if it would be possible to dye fabric AFTER it’s been pieced, but BEFORE it’s a complete quilt. Essentially it’s like dyeing the tube of a bargello quilt before slicing it up and piecing it together again. That’s more or less my inspiration here!
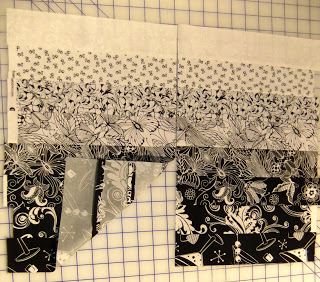
So to start I selected the fabrics I wanted to use and cut 2.5″ strips and seamed them all together to create 3 panels of 8 fabrics each. These measure around 16 inches x 22 inches – ish. This really isn’t an exact technique.

Then I sliced each panel in half to create 6 pieces. The more I sliced, the more worried I was that I wasn’t working with enough fabric, but it ended up working out almost perfectly.
Next I dyed each sheet a different color with this simple method:
1. Soak the fabric in a mixture of water and soda ash. Wring out the excess water so the fabric is wet, but not dripping.
2. Mixed 1 tsp of dye with 2 tablespoons of water and painted each panel to evenly coat with color.
I used plastic bins and large plastic sheets to keep the mess down in my sewing room and let the dye set for 15 minutes. The dye I’m using is Dharma Trading Procion Dye (Fire Red, Deep Orange, Deep Yellow, Better Blue Green, Sapphire Blue, and Grape) – AWESOME STUFF!
3. Now just wash the excess dye out by hand, gently squeezing and agitating the fabric so the seams don’t get too messy.
4. Once the water ran clear, I laid each piece on paper towels to dry.
The next morning, all the pieces were dry and ready to be pressed. I was pretty surprised the seams weren’t in too bad of shape. Yes, lots of stray threads were floating around, but a lot less than I expected.
A careful press along with extra careful starching prepared all the fabric for cutting.
I cut all the dyed panels into 2.5″ strips and then seamed them all together into one long strip of multicolored fabrics:
Now I needed to make a quilt 24″ square, so I laid this strip of fabric out on my mat and cut it off every 26 inches. Already I could tell this is one neat way to make a quilt!
And here’s what the quilt looks like all together:
The quilt is still a bit short on size, so I’ll need to add more strips to the top and bottom with scraps that won’t be the same width as the other strips. I don’t think it will be too noticeable and I kind of like the slightly hodge podge look to it. This method could definitely use more experimentation – especially different sizes of strips, more scrappy quality to it, even curved seams???
So that’s how this quilt is coming along. I think this dyeing / strip cutting / cut to size method is really neat! Definitely play with this idea if you like it and have fun with it in your sewing room this weekend!
Let’s go quilt,
Leah Day
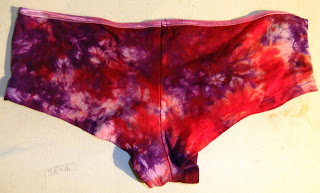
p.S I couldn’t resist playing with some extra dye:

My underwear drawer will never be the same! LOL!

Breathtakingly beautiful quilt, Leah. And wonderful photos that illustrate the transition from b&w to 'wow'…had me appreciating the end-state fabrics even more 🙂
Best,
Jae
very neat idea…must say TMI on the panties! 🙂
That is so pretty! You have such great ideas.
Loving it…so vibrant. Haven't gotten into the dyeing 'thing'…yet. Taking today off from the sewing room- sunny, 58F (and headed higher), watching NASCAR, and the first rhubarb of the season just picked along with a few asparagus spears. Tomorrow, back to the whole cloth (almost caught up;-)….really loving the whole project! Hugs, Doreen
Do you mean sodium carbonate (soda ash)? Sodium bicarbonate (antacid) isn't going to help those dyes bind very well. 🙂
The result is fabulous. I hadn't realised that dyeing is so easy – I see colour in my future!
Vicki W – Oops! I got that one wrong, but super thank you for the correction. I've corrected the post to reflect the right thing.
Cheers,
Leah
Wow, I love the finished big square – it looks amazing :]
Gorgeous color work, Leah!
I can't wait to see what you decide to do with the quilting!
So sweet!! I've dyed lots of white-on-white fabrics, but what you've done is way cooler!
Laughing about the underwear!
I came over here from Stella's blog (up there ^) and just wanted to say how amazing I think that quilt is. It's amazing. As are the undies. Way to not waste materials! 🙂
I love the jewel colors and your technique!
Leah,
Love this technique, a great way to do an original quilt. I might even copy it.
Way to think outside the box! Nice results too