
Quilting to the Edge with Longarm Pantographs
This is new territory for me today! I’d never quilted all the way to the edge of a quilt when pantograph quilting on a frame. It just goes to show that you can learn a lot quilting on a practice sandwich, but a real quilt is always a different story.
Accessing the edge of the quilt
The first thing I did was remove the pins connecting the quilt to the longest leader cloth. I needed to be able to stitch beyond the edge of the quilt and didn’t want to hit pins or the leader cloth as I secured down the edge.
At first I moved some pins to hold down the quilt top, then I tried just stitching along the edge without pins. I placed my non-dominant hand down on the quilt and used it to smooth out the layers so they were nice and flat as I secured down the edge of the quilt.
Once I secured the bottom edge of the quilt, I advanced the quilt through the longarm one more time using the exact same method I used before. Click Here to see how that works.
Using a Ruler to Mark the Edge of Your Quilt
With the quilt advanced through the machine, it was time to quilt along the bottom edge of the quilt. But I didn’t need to quilt the entire pantograph! I just needed to quilt the little sliver to fit the remaining space of the design on my quilt. Using a long ruler, I was able to see the small section I needed to quilt on the pantograph.
I just stitched those little fern fronds along the bottom edge, and travel stitched in the batting area between them. Because the edge of the quilt was already stitched down and secure, I didn’t struggle with pleats or puckers in this area.
Technically I should have started the pantograph design with a bit of the design cut off at the top and end with a bit of the design cut off on the bottom so it would be consistent. But honestly – that seems like a lot of work and a bit silly to worry about. Dividing the number of repeats by the length of the quilt didn’t really work out. I think the math was a bit fuzzy because this is fabric and batting and it shifts and shrinks as you quilt it.
It’s finished! If it ever stops raining, I’ll be able to shoot a better photo of it!
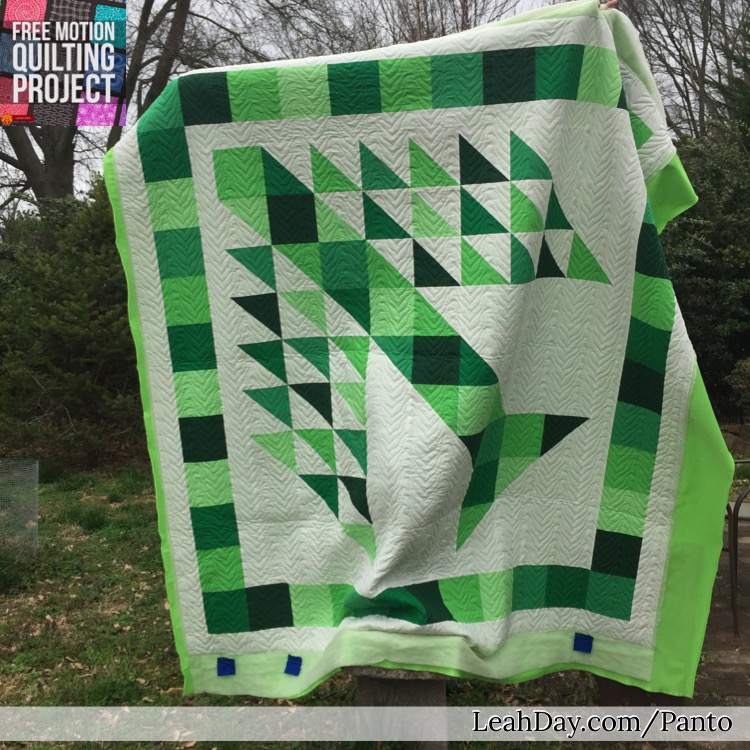
I love the texture of this Curvy Chevron over the Tree of Life quilt!
The end result is beautiful and you really couldn’t tell where I quilted and quilted with pantos. That’s the great thing about pantograph quilting. Once you get comfortable with it, your stitching will be consistent and pretty.
Click here to learn more about pantograph quilting on your longarm frame and download your Pantograph Quilting Guidebook.
Let’s go quilt,
Leah Day
I have a Grace Q’nique 15R Longarm with a SR2 Frame from Grace Co. I do stippling all over quilting, but I am interested in the Qnique Laser stylus and do pantograph quilting I am looking forward to see Leah’s Day teaching videos.
Thank you Olivia! You can find both the rear handles and the laser light along with some pantographs to start with here: https://leahday.com/products/grace-qnique-pantograph-quilting-kit
Hi Leah, great videos on long arm quilting, I am learning a lot. When working from the back of the frame doing pantos I am guessing that it wouldn’t be a good idea to float your quilt top since you are not at the front and able to smooth the quilt top?
Great question Valerie! No – you definitely want to baste down the sides of the quilt and maybe run some belly bar lines across to get the entire surface stable before starting your panto. I learned the hard way that it’s really easy to flip over the quilt edges and make a mess and not even know it until I look up to advance the quilt. And that can be a LOT of ripping to get to that point!