
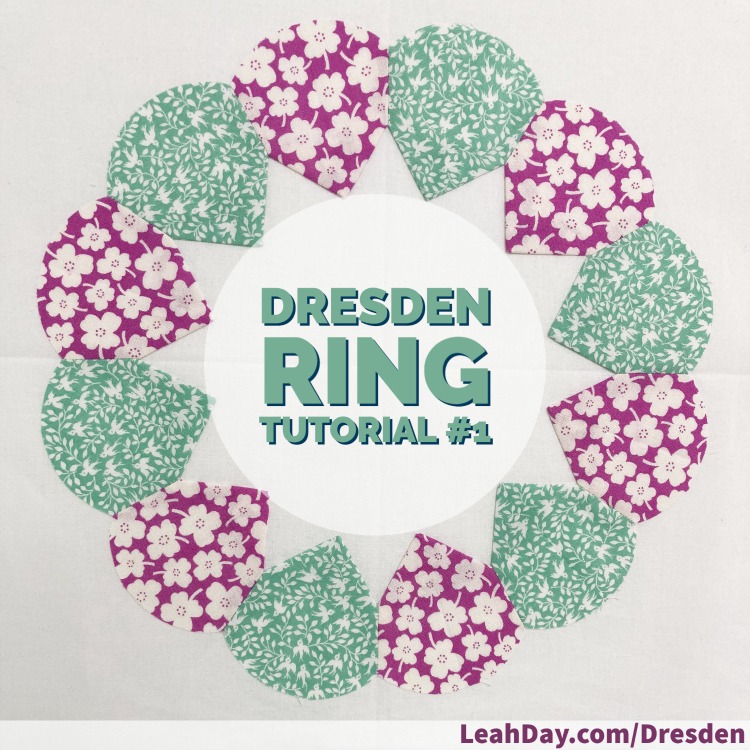
How to Piece a Dresden Ring – First Dresden Block of 2022!
 Note – in the video I mention peeling a film off the right side of the templates. You do not need to do this step. I’ve already peeled the film off all of the templates.
Click Here to find the new Dresden Template Set – This new set of templates can cut dozens of Dresden Plates and now easily cuts Dresden Rings as well. They are redesigned from the original template set I created in 2017 and are now much more functional!
Find True Grips for the back of your templates here – I place these little grips on the backs of my templates to stop them from sliding when cutting. One pack of True Grips should be enough to cover all 6 Dresden Templates.
Check out Lite Steam a Seam 2 here – This is my favorite fusible web because it’s very lightweight and has paper on both sides. When you peel off one side of the paper, the fusible is slightly sticky which makes it easier to fuse quick and then cut out your design.
Find the microtip glue bottles here – You only need a thin line of glue on the folded edges of your Dresden Ring. Too much glue will really make a mess! I put Elmer’s school glue in a bottle and can easily dispense a thin line exactly where I need it.
Is This a Dresden Plate Quilt Along?
No, it’s a Block Along! I’m making 1-2 Dresden Plates or Rings each month and making a fun quilt with 15 blocks. If you want to make this with me, just pick up a Dresden Template Set.
This is a Block Along, so we’re going to work block-by-block. No, there isn’t a pattern, fabric calculation, or a picture of the finished quilt.
The purpose of this project is to use up scraps or your favorite fat quarters. Working on one block at a time makes this a lot less stressful and encourages you to shop your stash for material. I’m planning to use up my stash of 1930s reproduction fabrics, which I’ve been saving for over ten years!
But how much fabric do I need?
I honestly don’t know, but I think 10-12 fat quarters for the Dresden Plates and Rings will be plenty. Grab 2-3 yards of background fabric too and you’ll be ready to follow along. Again, think Block Along – one block at a time – with a goal of 15 blocks by the end.
Preparation to Piece Dresden Ring #1
To make this 12 petal, fused curved edge Dresden Ring, you’ll need the following materials:
Fabric A – 3 1/2 x 21-inch strip
Fabric B – 3 1/2 x 21-inch strip
Background square – 14 inch square (roughly) – we will trim this down to 12 1/2 inches when it’s time to piece a quilt together.
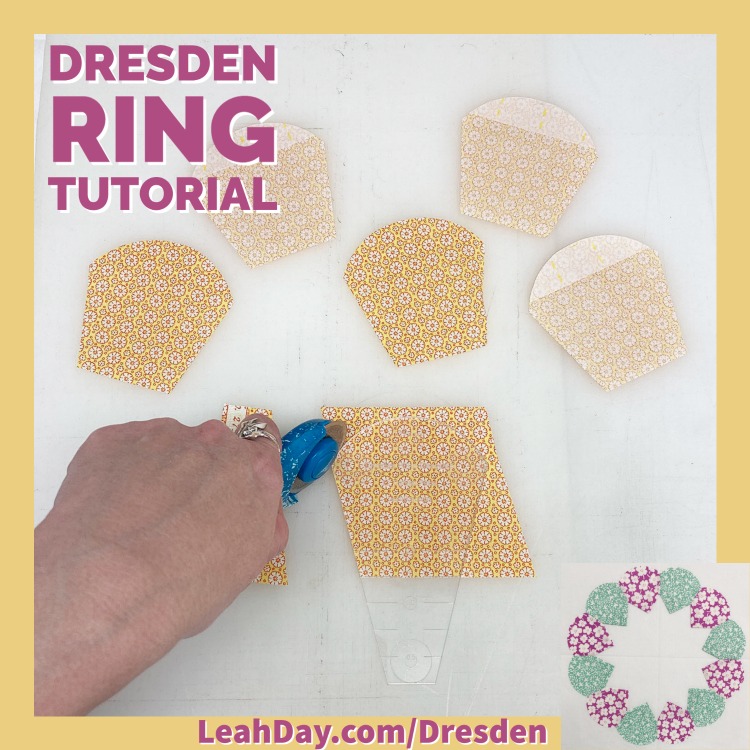
Now follow along with the video and fuse 1-inch strips of fusible web to the back of the Fabric A and B.
Cut out 6 petals of each color using Template #4 – 12 Petal Curved. To cut, align the #2 etched line on the bottom edge of the fabric strip. Make sure the curved edge of the template is corresponding with the edge that has fusible web on the back as shown in this pic:
How to Piece Dresden Ring #1
The key with Dresden Rings is we will finish the inner edge of the petals as well as the outer edge. The outer edge of these petals will be a fused, curved edge. That means we only need to finish the inside edge, which we are piecing to form a point.
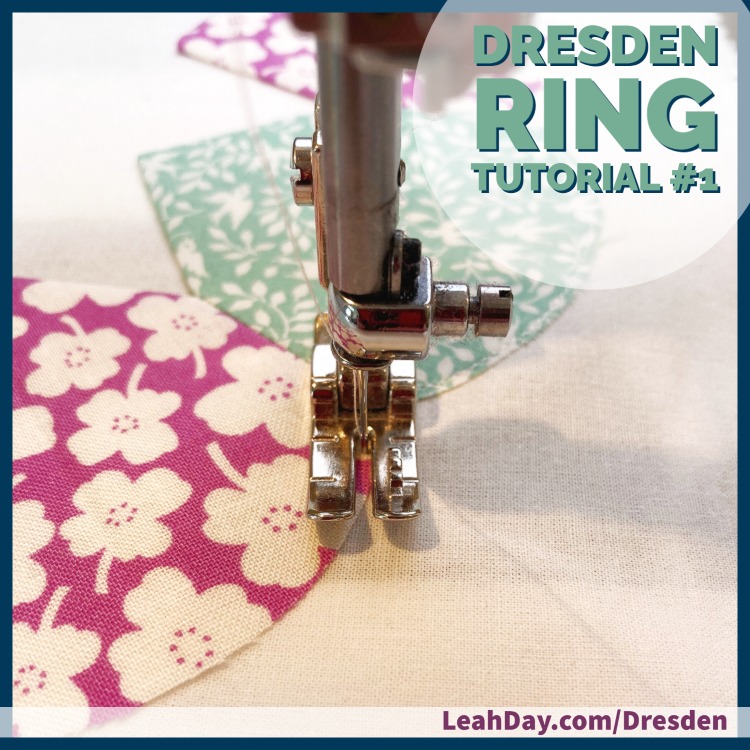
Fold the petals in half, right sides together, and stitch along the short straight edge. Backstitch at the beginning and end of the seam to reduce fraying. Follow along with the video to see how I trim and turn the petals, and press them flat so they are symmetrical.
Next, piece the Dresden Ring together in sets of 3 petals. You’ll need two sets of Fabric A-B-A and two sets of B-A-B. Follow along with the video to see how I check the Dresden Ring quarters are square and then piece them together to complete the ring.
How to Secure Your Dresden Ring
Fold your background fabric square in half and press to create crease lines running through the center in both directions. Peel off all the paper on the back of the fusible web. Center the Dresden Ring on the fabric and fuse it in place. Using a Microtip Bottle, glue the inner points of the ring in place and press with a hot, dry iron to heat set the glue.
Finish the Dresden Ring with a bit of stitching around the inner and outer edges. I like to use a straight stitch, 1/8 inch away from either the raw or folded edge of the fabric. I’ve decided to use white thread throughout to make securing the 1930s fabrics down quick and easy.
So that is it for how to piece a Dresden Ring and our first block in this Block Along! We have many fun Dresden Plate and Dresden Ring quilt blocks to come in 2022. I can’t wait to show you all the fun shapes you can cut with the new Dresden Template Set.
Let’s go Quilt,
Leah Day
Piece more Dresden Rings with me!
How to Piece Curved, Fused Edge Dresden Ring – #1
I love the new blocks with the Dresden Templates. I made a practice Ring #1. It worked! The tutorial was excellent! I feel like my white background fabric (Kona) was flimsy. Can you recommend a heartier one? This stretched and changed with starch and steam. Thank You! Hurry with #2!
Awesome! I’m so glad you’re piecing along with me with these Dresden Rings!