
How to Piece Hourglass Squares
Click Here to find the pattern for the Patchwork Mosaic block. This block includes four Hourglass Squares and a variety of Quarter Square Triangles. It’s a fun adventure to experiment with all these funky shapes!
What is a Hourglass Square Block?
This is a simple quilt block with four small, right triangles meeting in the middle of a square. This Hourglass Square unit can stand alone as it’s own quilt block!
For every two half square triangles you piece together, you’ll end up with two Hourglass Squares:
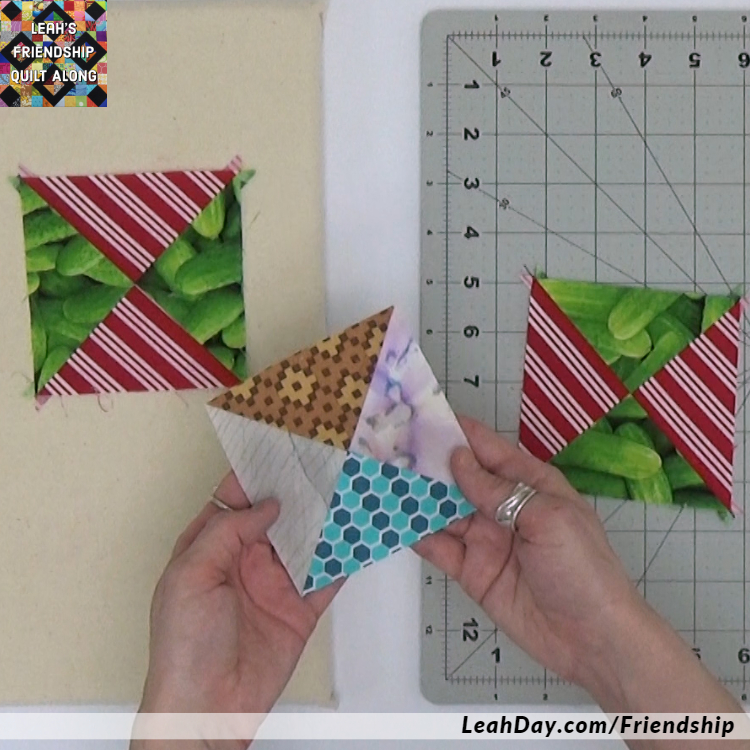
This is a really cute unit that can be a quilt block all on it’s own!
Of course, you’ll get a different effect depending on what fabrics you choose. If you piece two identical half square triangles together, you’ll end up with a checkerboard style Hourglass Square like the green and red ones above. If you piece two different half square triangles, all of the fabrics in the Hourglass will be different too like the one in my hands.
How to Piece Hourglass Squares
The first step to making Hourglass Squares is to piece a set of Half Square Triangles. Click Here to find a detailed tutorial on how to piece HSTs.
Cut the two half square triangles apart and press the seam allowances open. But don’t trim the units down. You need this to remain full size for the next step.
Now we’re ready to turn these into Hourglass Squares! If you want a super scrappy arrangement, make a second set of HSTs with totally different fabrics. If you want a matchy, checkerboard style Hourglass Square, simply use the two matching half square triangles.
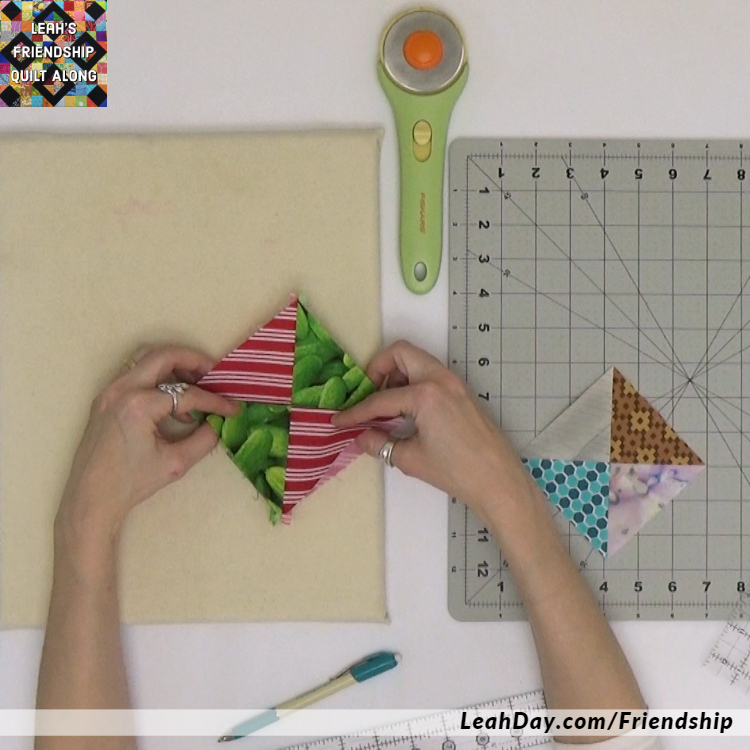
I folded my half square triangles in half so they would nest together in the middle. This helps match the center seam of the hourglass square perfectly.
Stack these units right sides together and carefully match up the seam line that runs down the center. Yes, you want to stack the seam allowances right on top of one another.
Mark a line diagonally across, perpendicular to the seam on the half square triangles.
Mark a line across the half square triangle from corner to corner, perpendicular to that seam in the half square triangle. Now take this stack of pieces to the machine and stitch exactly 1/4 inch to either side.
General Quilt Piecing Tips
I’m piecing and quilting these days on an Eversewn Sparrow 20 machine which is a very sweet, inexpensive sewing machine. I also use this patchwork foot because it measures an accurate ¼-inch to both sides of the needle.
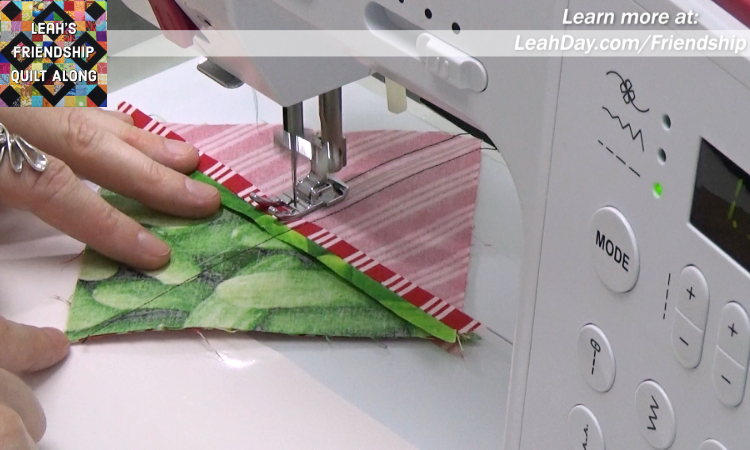
Stitch perpendicular across the half square triangles to make Hourglass Squares.
To get the machine ready for piecing, I lower the stitch length to 1.5 mm to make a tight, secure stitch. This allows me to press my seam allowances open.
I first stitch through a scrap charger, which is just a scrap of fabric folded in half. This sorts out any issues my machine may run into as it begins stitching. This also reduces the amount of thread I use up so I don’t have any long tangled thread tails on the end of every piece.
After piecing to both sides of the center marked line, I cut along the line to cut the two HGS apart. I finger press the seam allowance open, then press the unit flat with a hot, dry iron.
Cutting and Trimming the Hourglass Squares
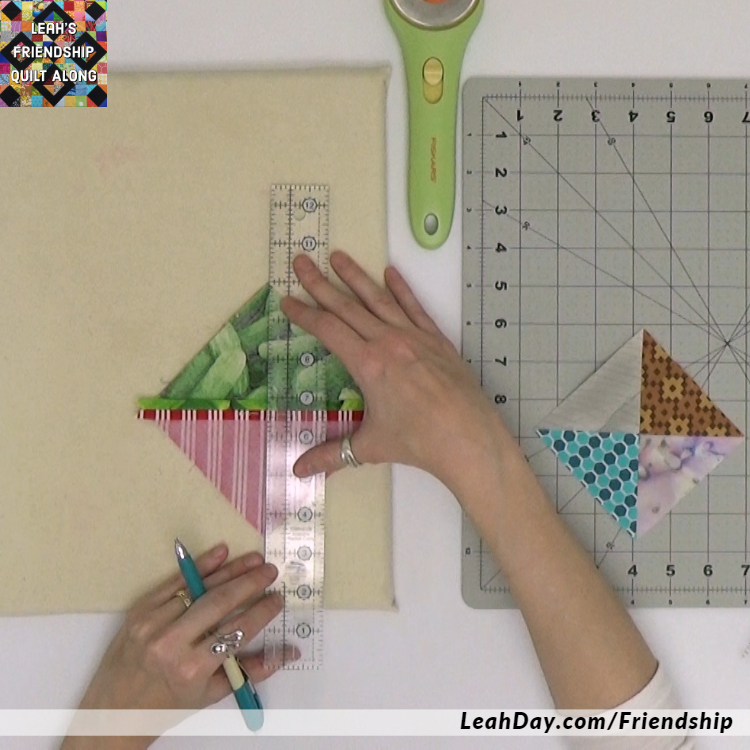
The last step is to trim the Hourglass Squares to get them to the right size for the pattern. For trimming, I love using a self healing cutting mat that spins (yep, that’s an affiliate link). I can get everything in place and just turn the mat without having to reposition my ruler.
First line up the diagonal 45° line with one of the diagonal seamlines through the Hourglass Square. Also check the second diagonal line and make sure it hits both corners of the size of square you’re wanting to make.
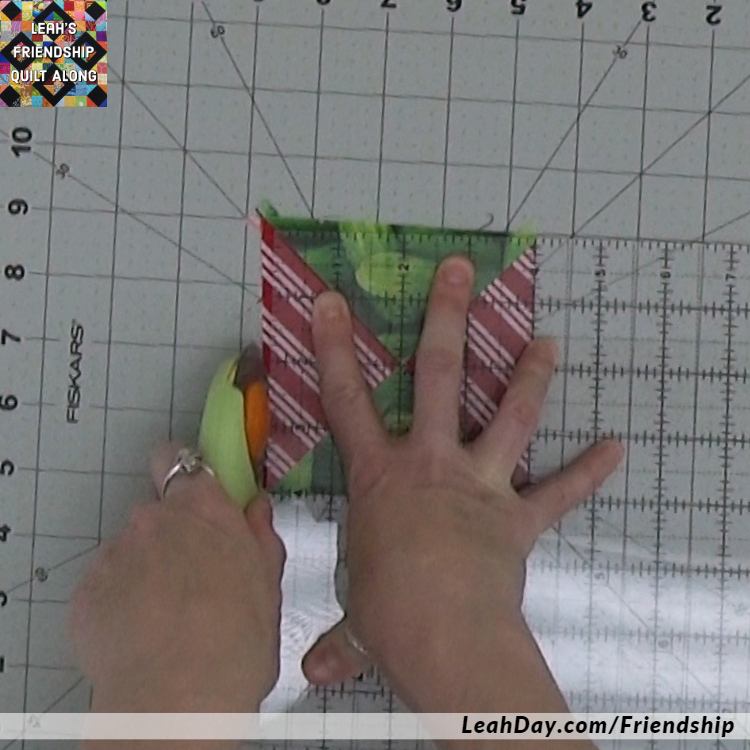
Take your time lining up your ruler so the diagonal seams in the Hourglass are perfectly centered.
Always cut with your rotary cutter in your dominant hand and along the side of the ruler that matches your hand. I’m left handed so I always cut along the left side of the ruler.
Do you want to waste time?
Don’t cut across the top of your ruler because your blade can easily bounce over the edge and slice off the tip of your finger. This absolutely won’t save you any time if you get hurt.
Though, as you can see in the video, I was focused so much on talking that I went right head and cut that way. LOL! Do what I say, not as I do!
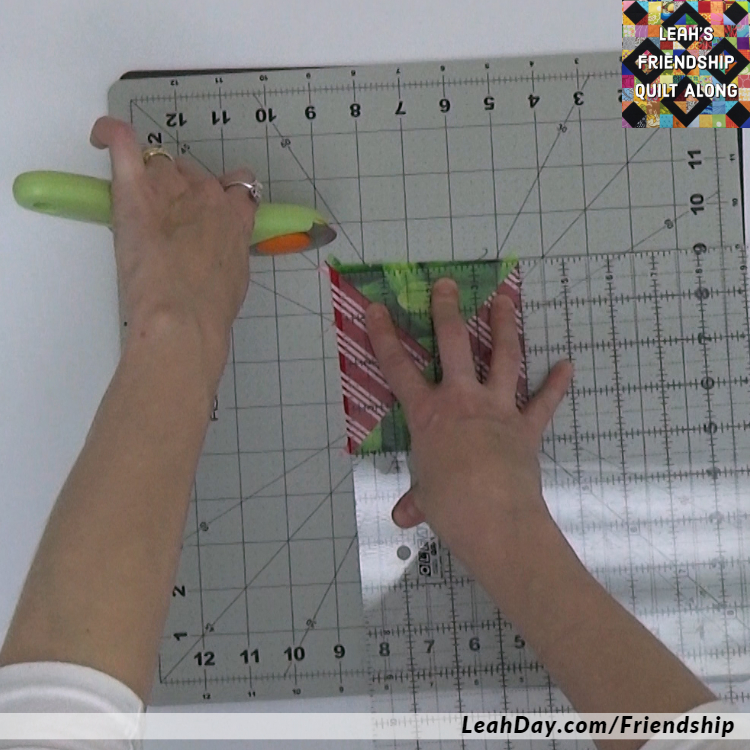
Ack! Don’t cut like this!
Would you like to make a fun quilt block to experiment with your Hourglass Squares?
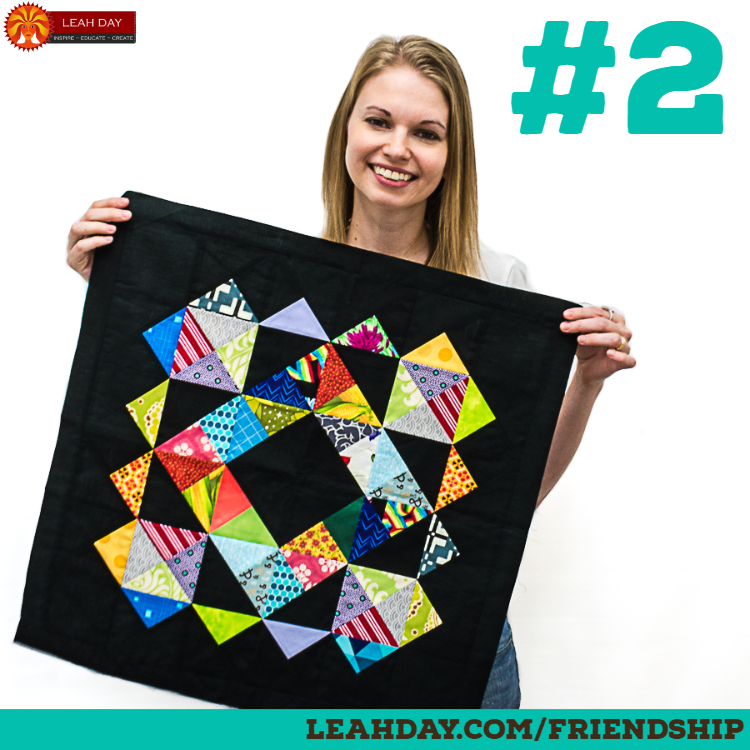
We’re going to piece and quilt this beautiful quilt block this month!
Click Here to find a fun block pattern which includes both Quarter Square Triangles and Hourglass Squares! This supersized quilt block could be used to make a baby changing pad, a nice sized pillow for your couch, or a massive tote bag. Or you can continue piecing and quilting blocks and make yourself a Friendship Sampler Quilt!
Let me know if you have any questions about making Hourglass Squares in the comments area below. Yep, I really do read every comment, and I really do answer your questions every day!
Let’s go quilt,
Leah Day
Find more Friendship Quilt Along Tutorials
Check out the other tutorials I shared for this Patchwork Mosaic quilt block:
Could you please create a PDF tutorial for the Crown of Scraps block?
Of course! You can find the PDF pattern here: https://leahday.com/products/friendship-sampler-block-of-the-month-quilt?variant=29631666225224