
How to Stitch in the Ditch with Walking Foot Quilting
Let’s begin with picking the right batting for your Rainbow Log Cabin Quilt, this is a very important decision that could save you quite a bit of time. The right choice of batting could allow you SKIP stitching in the ditch completely! Learn more in this new video:
So what will allow you to skip stitching in the ditch between the quilt blocks? The rating of the batting you choose. This is a number printed somewhere on the batting package that let’s you know the minimum amount of quilting required for that batting.
The wool batting I used in my newest version of the Rainbow Log Cabin Quilt said “quilts up to 3 inches.” which means I really shouldn’t leave spaces bigger than 2 1/2 inches open on the quilt or the batting could potentially shift and become unstable inside the quilt.
So I had to stitch my quilt in the ditch because the walking foot designs designs we’re quilting on the surface would leave too much space open in a few places and my batting might have become unstable.
 Quilter’s Dream Polyester, however, has a rating up to 12 inches – that is a huge amount of space! With a batting like that, you wouldn’t need to stitch in the ditch because most likely the designs we’re going to quilt on the surface will be enough to keep that batting stable.
Would you like to learn even more about batting and the basting process? Check out the Basting Basics Workshop, my newest online quilting class that is all about basting! I share my favorite methods for basting quilts of all sizes and dig into batting in depth because this is such an important choice for every quilt. Click Here to learn more.
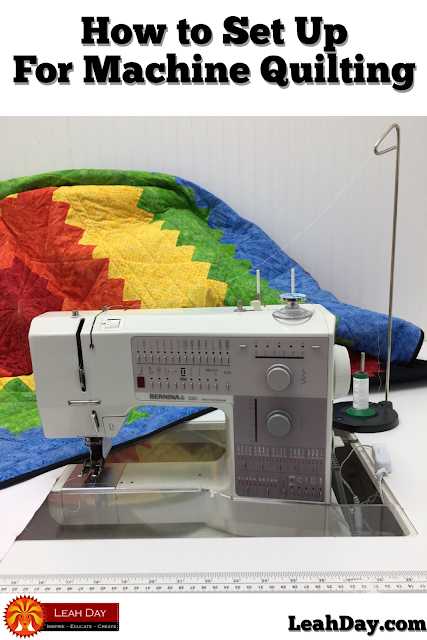
Set Up Your Sewing Machine
Now that we’ve covered batting and basting, let’s talk about your sewing machine. I personally believe this will make or break your machine quilting experience. If you want it to feel easy and smooth to machine quilt the Rainbow Log Cabin quilt, try the tips in this video:
Click Here to find the Affordable Sewing Table. This is the sewing table I’ve been using for years because it’s sturdy, lightweight, and gets the machine on a flush surface with the table top. I honestly believe if you have a choice of buying a bigger machine or a flatbed sewing table, buy the table!
This will eliminate all the drag and pulling and tugging the quilt over the “hump” of your machine when it’s set on top of a table and make it so much easier to feed through the machine.
The sewing table we offer is very small, but you can expand the table surface with folding tables so you have more space for the quilt to rest. Try setting up a 3 ft x 6 ft folding table to the back of the table and a second folding table to the left side of the machine. This is where the quilt typically wants to rest as you are quilting.
If you can, push the entire table set up – folding tables and sewing machine table – into a left corner. This will lock the quilt on the table so it can’t flop off the edge and suddenly pull against you.

If you don’t have any space folding tables, consider going vertical and creating a clamping system to clamp your quilt above your machine. As I mentioned in the video, this will require constant adjustment because as the quilt moves through the machine, you will need the clamps to change position so it continues taking the weight and bulk off the table surface.
I have used clamping systems like this for years. In some cases, I screwed handles or hooks to the ceiling. In other cases, I just hooked my bungee cords to a curtain rod over my machine, then attached clamps to the end of the bungee cords:

I know this seems like a lot of work and it is an investment. Sewing tables plus folding tables, bungee cords and clamps can add up fast.
I felt the same way for years. I made do with whatever I could find. My very first flatbed sewing table was a lucky yard sale find for $3 and it was a weird homemade contraption with a bent metal bed for the sewing machine. I spent $1000 in a machine before I ever spent $100 on the table it set in.
But after sewing only a few days with that cheap yard sale table I could see the difference it made for my ability to move the quilt. It made everything easier – easier to move, easier to see, easier on my body.
Please consider this a worthwhile investment into your quilting hobby. It can make a dramatic difference in your machine quilting ability and in how much you enjoy doing this. If it feels like an arm wrestling match to push and pull and fight your quilt through the machine, you aren’t going to want to machine quilt!
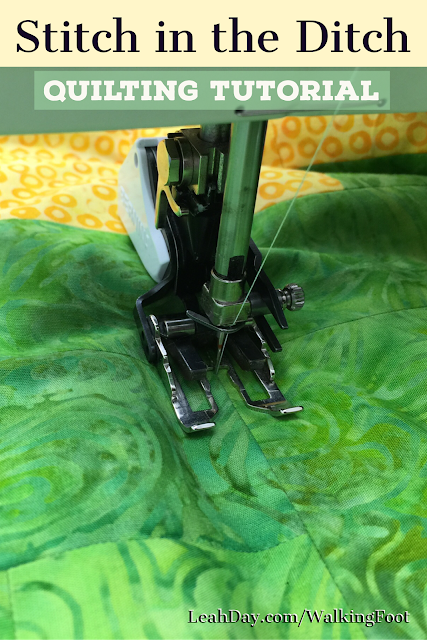
Stitch in the Ditch
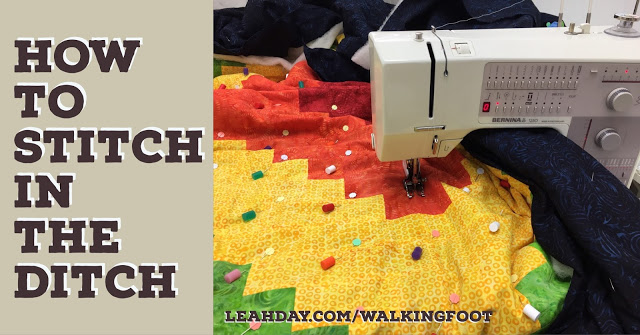
Okay, stepping off my soapbox about sewing machine tables now for the main point of this post! Stitching in the ditch! Learn how to stitch in the ditch in this new quilting tutorial:
No, we are not stitching in the ditch between every little piece! That would take forever and it’s really not necessary because we’re still going to quilt with Bright Star and Concentric Squares over the quilt too. By stitching in the ditch just between the quilt blocks, the layers of the quilt are more stable and secure and I got to remove a huge number of pins so they won’t be in my way when I begin quilting the other designs.
As I mentioned at the beginning of this massive quilting tutorial, you can skip stitching in the ditch on your Rainbow Log Cabin Quilt if you pick a batting with a very high rating (quilting up to 10 – 12 inches).
I stitched from the center of the quilt into the batting area in the ditch, then returned to the center, rotated the quilt, and stitched to the opposite edge. The key to staying right in the ditch is stitching slowly and carefully and re-positioning the quilt often as you saw in the video to keep the quilt moving forward smoothly.
Now to clear up any confusion:
Yes, I stitch right in the ditch.
Yes, I press my seams open.
I always piece with a 1.5 mm stitch length that locks the pieces together securely.
I’ve never had an issue from making my quilts this way. I’ve never experienced batting leaking through the stitching or the stitching in the ditch quilting breaking the piecing stitches. Click Here to hear a debate about pressing seams open.
Maybe I need to do another Great Quilting Debate about stitching in the ditch! It will depend on how many questions I get about it this week! Lol!
Whew! This was a very big quilting tutorial, but I think you can see why. Picking your batting is a big choice, setting up your sewing machine for machine quilting is a big deal, and stitching in the ditch is a big job. This is BIG!
Take your time working through all these steps this week, and please don’t worry if you fall behind. Remember the videos will stay online forever so you can catch up anytime.
If you’re looking for the quilt pattern to get started with the Rainbow Log Cabin Quilt, Click Here to find it in the book Explore Walking Foot Quilting.
Click Here to find all the posts we’ve shared so far for the 2018 Machine Quilting Party.
Let’s go quilt,
Leah Day
Sit right up against the table so the quilt has no choice but to be upright.
Words of wisdom, Leah! That's probably the reason I had the troubles I had with the three quilts I made as presents this past holiday season. Good to know for the next quilt. It may even help with the drag I get when assembling the rows together of the quilt top.