Machine Quilting Designs for Samplers – Part 2
I have more machine quilting ideas for samplers for you today! This is Part 2 of this tutorial, so Click Here to find Part 1 if you’re just getting started.
Machine Quilting Around Applique Blocks
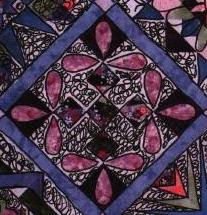
2nd Row Left Block – I really liked the sets of 3 appliqued leaves with this block and choose to emphasize them and the dark squares of the 9 patch as well. I hope you can see my sampler quilting process by now – I pick the design element I like the most and plan the quilting design to emphasize it.

The rest of the block should be filled with dense fillers and stitched in the ditch all around the block and motifs.
A quilter named “The Scott” asked in the comments of Part 1 how to stitch in the ditch. Quite basically, when you stitch in the ditch with free motion, you just run around the ditch of your blocks with a line of quilting stitches. If done correctly, your stitching should rest within the seam, making it nearly invisible, unless you look really hard.
Now, when you’re filling your whole block with free motion fillers, you can get away with a much less perfect stitching in the ditch because people are going to be drooling so much over your filler stitches that they won’t bother to nit pick your ditchwork.
You won’t have a “ditch” around applique. In this situation, just stitch as close to the edge of the applique as you can, without stitching on it.
Simple Quilt Block Quilting Ideas
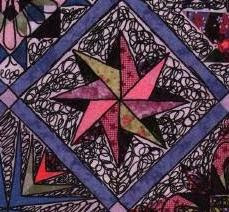
2nd Row, Right Block – This is a very simple block and I choose to leave it that way. I liked the shapes of the triangle pinwheel, so I stitched in the ditch around those pieces to bring them out, then filled in the dark triangles with dense fillers.

This is one situation where I would probably use a super dense, flat filler for the dark triangles, like stippling, then another, more flowing filler for the background of the block.
I think that would add to the dimension and movement of the block, plus be fun to quilt that way!
Create Interlocking Squares with Quilting Lines
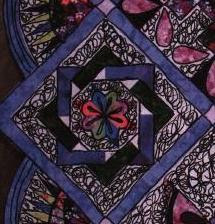
3rd Row, Left Block – With this block, I really liked the interlocking squares, so I’d definitely make that a central motif.

I also liked the center star, but wanted to again soften some of the angles of this quilt with Dresden Plate curves. This tiny Dresden Plate motif would then be surrounded with a dense filler so it stands out over the piecing.
You can quilt whatever you like in the background of this block. You’ve got enough space for an edge to edge design like Cartoon Tree, or even an edge to center design like flowing glass.
Yesterday, a quilter named Ethne also asked in the comments of part 1 where I come up with so many designs and inspiration on a daily basis.
To be honest, I don’t think of it that way. It’s not a matter of volume or quantity. I really enjoy thinking about quilting and playing with designs. For some reason this feels very easy and natural for me and I feel very grateful to be able to share it with you.
But I’m so extremely thankful to have this to work on and to share it with all of you! Keep the comments coming and let me know where your major confusion areas are on a quilt.
Let’s go quilt!
Leah Day
Check out the next tutorial in this series on Machine Quilting Designs for Samplers:

Thanks Leah, this is very useful. BUT
Girls AND boys if you please!
Peter
Do you stitch in the ditch around every pieced seam in the quilt or just around the blocks?
NVD – Ditching for a quilt like this would be around every area that has a different design. So if you have a design in tear drop shapes, obviously stitch around the shape, then fill with the design. If you ignore seams, you don't have to ditch them, but definitely ditch around each block and each area where there is a different design.
Of course, this is my opinion based on the best way for the quilt to look on the front and back. It's your quilt and you can quilt it any way you like!
Cheers,
Leah Day