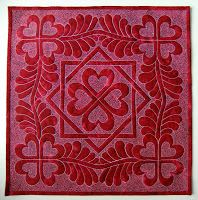
New Mark Your Quilt Kit
This kit comes with a Fine Line Water Soluble Pen which makes a fine, blue mark that’s easy to see on lighter fabrics. Also included is a Fons & Porter Ceramic Pencil which is a mechanical pencil that marks a fine white line on medium to dark fabrics.
So between the two pens in this set, you should be able to mark light, medium, and dark colored fabrics!
For tips on using these tools, let’s watch a video about fabric marking:
So when it comes to fabric marking, the #1 rule is to get your fabric completely ready to go before marking. Prewash, starch, and press your fabric completely to get it totally ready to go, and after marking, particularly with the blue pen, make sure not to expose the quilt or fabric to heat (hot car, hot sunny window, etc).
Erasing the marks are super simple and the reason I love these pens. A lot of marking pencils are really difficult to remove, and a lot of pens don’t stay in place long enough to get your quilting done.
The Fine Line Pen washes off with water. Fill up your bathtub with lukewarm water and let your quilt soak for 30 minutes. This will remove the chemical completely and ensure the marks never come back. After soaking, you can block your quilt if it’s a wall hanging, or spin it in the washer and dryer if it’s a bed quilt.
For the Fons & Porter Ceramic Pencil you can easily brush off the marks after quilting or erase them with the included eraser on the end of the pencil. Make sure to erase or brush off the most visible marks, then launder your quilt the way you plan to treat it from then on.
So why do we need to mark our quilts?
Many designs do not require marking at all. All of the designs from this project were specifically designed not to require marking. Instead they’re intended to be memorized, then applied free hand over the surface of your quilt.
But there are times we want a specific design, a specific flower or feather design to exactly line up in THAT place and the only way to get it there is to mark it!
Another thing that’s super helpful about marking designs is it’s a great way to learn. I’ve been watching my son trace letters in kindergarten and after a line of tracing, he can always produce the letter himself with more precision. Free motion quilting designs work the same way!
So if you are struggling to free hand quilt a design, like stippling, it might be a good idea to mark the design on your fabric and try quilting on the marked line instead. You’ll be able to see where you’re going, how to get from the beginning to the end, and still gain loads of practice moving the quilt and controlling your speed while free motion quilting.
The point is precision. We mark a quilt when we want an exact design in a precise place. When precision isn’t an issue, we don’t need to mark, but it’s always a nice option to have around.
So that’s it for today! Make sure to check out the Mark Your Quilt Kit if you’re in need of a new set of marking pens that will mark easily, and be removed easily too!
Let’s go quilt,
Leah Day


