
Question Thursday #36
Why is this continuing to happen?!
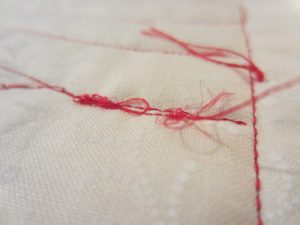 |
| Photo from Pat at Color Me Quilty |
Full Question: What am I doing wrong??? Could the bird’s nests, skipped stitches, broken needles be operator error (This mainly happens when I stitch backwards)? Could it be that the bigger quilt is pulling? Should I take the machine in for a check-up? It seems I can get rid of a lot of the problems, but them never really completely go away.
First off, Pat has already systematically diagnosed this problem as she outlines right here. Each change and modification she’s made has shown some improvement, but even still, issues are still cropping up.
And this is a pretty weird problem to happen – quilting on a normal practice sandwich and breaking needles.
Put it this way – needles don’t just break randomly.
I can bet on breaking needles if I stitch through a super dense area of a quilt, or very fast over an area of multiple seam allowances, or if I squarely hit something I shouldn’t, like a pin.
But just normal quilting over a practice sandwich of 2 pieces of fabric with batting in the middle? No. Needles have no reason to break here.
So why are Pat’s needles breaking?
There is actually one other thing your needles can hit while quilting – the edges of your needle plate. Whether you’re using a single or wide hole needle plate, this is metal plate forms the base of your machine and is what your needle drops down into whenever it forms a stitch.
When working correctly, your needle raises straight up, then sinks right now into the machine in a perfectly straight line. However, if you’re dealing with a big quilt, and if you’re putting a lot of tension and pressure on that quilt, you can potentially bend your needle as you quilt in a particular direction.
If you bend the needle too far, as it drops down into the machine, instead of fitting perfectly into the needle plate, it’s going to hit the edge. And break.
Unfortunately if you do this enough times, or even one time with enough force, you can potentially throw off entire top of your machine. You can also ding up your needle plate pretty badly. If you hit it just right, you might create a sharp edge on the surface of your needle plate, which if your thread rubs against it, will cause it to shred.
All this doom and gloom isn’t really comforting, I know. I don’t know any quilter that says “I can’t wait to have my machine serviced!” I can’t stand it because it’s time consuming and a bother.
But, it’s still necessary. If you break needles more than 5 times on a quilt and you’re shredding thread constantly, that’s a sign it’s time for a tune up. A good repair man will return your needle to perfect center position, remove any burrs or sharp edges from your needle plate, and sort out any timing issues that have cropped up from the jarring impact of the needle down into the bobbin case.
Now – how do you avoid breaking needles in the first place? How do you avoid having these issues which can be a real pain to fix?
#1. Don’t bend the needle – You might not even notice you’re doing this because it’s subtle. You might be slightly pulling the needle forward or backward only 3 or 4 milimeters, but that could be enough to cause it to come in contact with the needle plate.
Just pay attention to how you’re pulling and pushing the quilt at all times. Try not to force it in a direction, particularly when the needle is 1/2 way in or out of the quilt. When the needle is out of the machine, but still inside the quilt, it can bend if you’re pulling on the quilt significantly.
#2. Avoid certain directions – Is your thread breaking every time you stitch backwards? Stop stitching backwards
I know it sounds crazy, but I’ve had multiple machines that it was just impossible to quilt in that direction and you can make allowances for it. It seems limiting, but ultimately you will have fewer problems if you just keep rotating the quilt and avoid the problematic directions.
#3. Reduce the drag, increase mobility – Most of these issues will be greatly reduced if your quilt is easier to move. A drop down, flat bed sewing machine table can make a dramatic difference. There will be far less strain on your needle and thread if the quilt is easy to move and doesn’t require an enormous amount of contortion to get to each new area.
If you’re wondering if it’s the quilt or your machine that is causing the issues – take a practice sandwich and practice the same designs. If things suddenly improve on a 12 inch square, but go crazy on the real quilt – you have your answer. It’s the drag and strain on the needle that’s causing the issues.
Now let’s answer another question about stitching issues from Becki Robbins:
Will loops on the back of my quilt damage its integrity?
Full Question: I just finished FMQing my daughter’s quilt and I see this a lot on the back, only the loops aren’t huge. They are just barely loose enough so that the stitches don’t look like stitches (the top thread is just barely wrapping around the bottom thread so that from the right distance it just looks like the bottom thread is just laying on the surface of the fabric). Of course I didn’t notice this until I was finished with the danged thing. Should I pull it out? I don’t think I (or my daughter) really mind it that way because it’s on the back … but I don’t want to leave it there if it’s going to affect the sturdiness or washability of the quilt. Thanks!
My guide on loops / severe tension issues is simple: give the non-looping thread a tug. If you can pull it out easily, you’ll need to rip out that stitching and quilt it again.
Chances are the loops were caused by a missed thread guide or tension disc. Sometimes the machine still stitches normally and makes no noticeable sound, even though the stitches are totally not working properly.
But if one thread is looping so severely that you can easily tug and pull the opposite thread off the quilt – that stitching is just not secure.
If it’s over a very small section – a block, or a section of sashing, then it might be okay to leave it. The entire quilt? Probably not.
One solution for Becki that would not involve hours of ripping would be to baste the quilt with a new backing to cover the loops and to openly quilt the quilt again – stitch it in the ditch and very generally go over the previous stitching.
It doesn’t have to be densely stitched because technically the layers are already together, but this would hide the looping side and secure the layers together.
Now for a question about from Karin at The Quilt Yarn:
If you were to stitch the design in the border would you stitch off the border into the batting traveling to the next point to re-enter your border…would this work?
Yes! That would most definitely work. By quilting off the edge of the quilt, you reduce the chance of creating pleats or excess fabric in the borders.
When it comes time to quilt back into the borders from the batting, just make sure to really squish the fabric down and flatten it to ensure it doesn’t create pleats as you stitch back to the inner edge of the border.
And one last question from Sandra about pressing seams:
What is an easy way to press seams open?
Full question – When you press seams open, do you use a regular size iron? I recently completed a rail fence top with lots of seams and decided to reduce bulk by pressing open. It was really a chore to get all those small seams pressed open. Any hints on how you accomplish this?
The most handy, readily available pressing tool available to you at all times is your fingers!
Get in the habit of finger pressing the seam allowances open, then take them to your regular iron to give them a solid pressing.
Finger pressing first also adds a bit more accuracy and openness to the seam because you can FEEL the stitching and really spread the fabrics apart.
When you then hit the seam with your iron, it will mostly be a continuation and further flattening from what you started with finger pressing.
Yes, there are many wooden pressing tools on the market – Alex Anderson’s 4 in 1 tool and many other pressing tools. I have one of these at every machine and they work great, even even with them, I generally start the process by pressing the seams open with my finger tips first.
Now that’s it for this week! If you’re feeling super frustrated by a quilting issue going on with your machine, rest assured you are not alone. Keep working at the issue and you will find a solution.
Let’s go quilt,
Leah
Some interesting questions this week!
A further thought on needle breakage. It might be that the needle should be the next size larger which would cut down on the possibility of the slight flex and hitting the throat plate. With practice, coordinating machine speed with hand/quilt movement more smoothly will, also, go a long ways to lessening this situation. One of my machines does not do well stitching sideways to the right. Solution: I avoid that movement. Problem no longer exists!-D