Unboxing, Threading, and Sewing on the Janome 1600 Sewing Machine
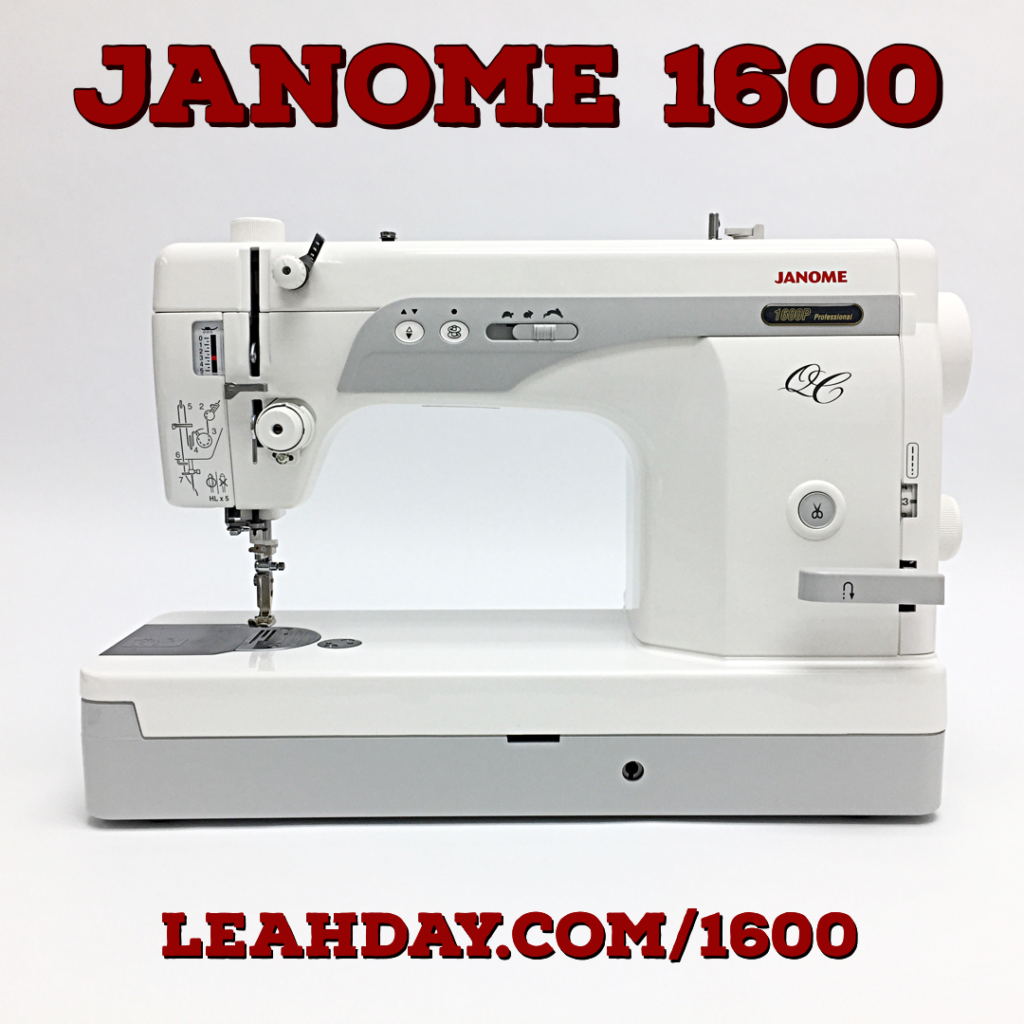
I’m sharing my first video on the Janome 1600P sewing machine today and how to thread it up and start sewing! This spring I became a dealer for Janome machines and despite life (and my house) being crazy, I couldn’t wait to begin playing with these new home sewing machines. See what comes in the box and just how fast this lockstitch machine can sew in this new Machine Monday tutorial:
Note – I’ve recently updated this post with affiliate links to Amazon.com. I make a small commission if you decide to purchase a Janome 1600 sewing machine or feet from these links, at no additional cost to you.
Click Here to check out the Janome 1600P. This home sewing machine is capable of 1600 stitches per minute. It is a straight stitch machine – no zigzag, no decorative stitches. But as I explained in the video, this makes this machine much better at precision sewing and machine quilting!
Unboxing the Janome 1600 Sewing Machine
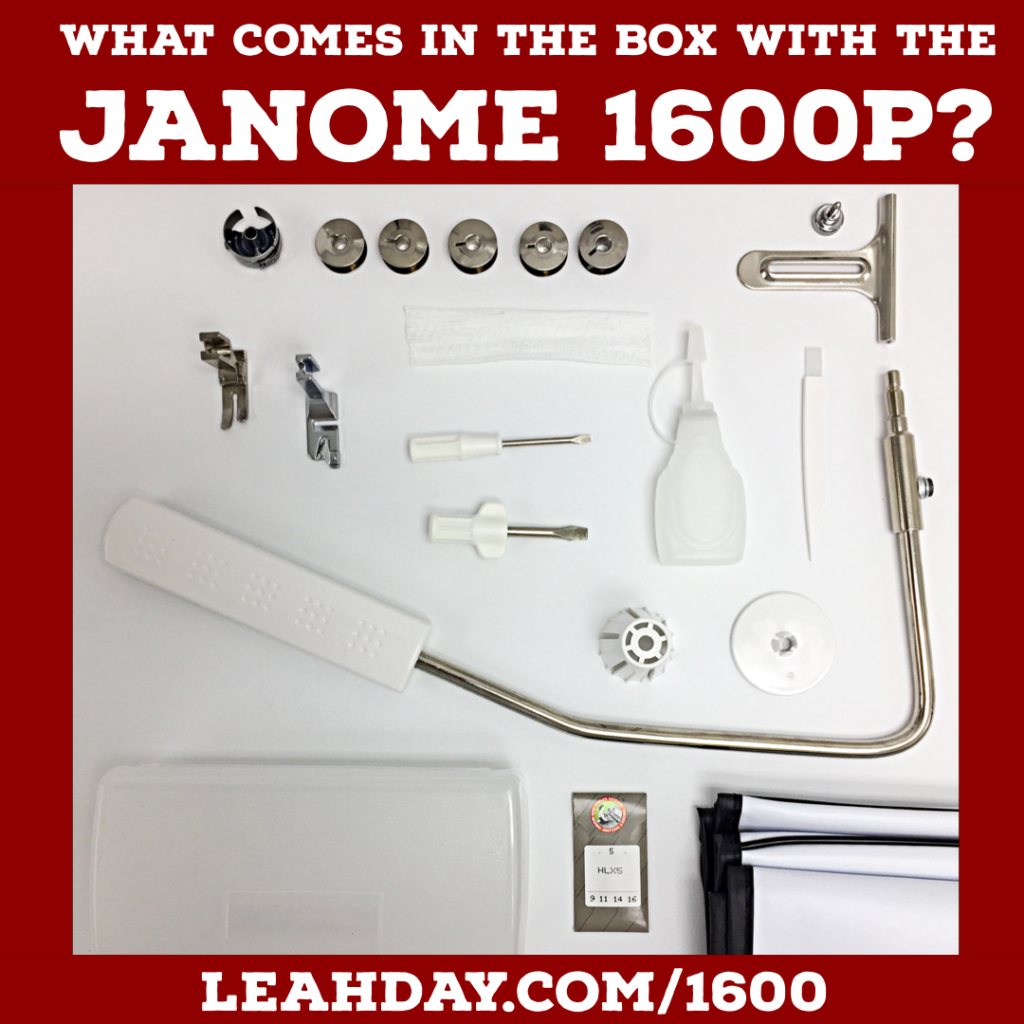
Here’s what comes in the box with this home sewing machine:

Here’s a detailed list of everything included in the box:
- Janome 1600P sewing machine
- Electric cord and Foot Pedal
- 5 metal bobbins and bobbin case
- Seam Guide
- 2 Presser Feet
- 2 Screwdrivers
- Thread net
- Bottle of Sewing Machine Oil
- Cleaning Brush
- 2 spool caps
- Knee Lifter
- Accessory Box
- Sewing Needles
- White and Black Machine Cover
Note – ALWAYS KEEP YOUR SEWING MACHINE BOX AND STYROFOAM! If you ever need to ship the machine back for repairs, or if you ever decide to sell your machine online, it’s always easier to pack it up and ship it in the original box.
Janome 1600P Sewing Machine Presser Feet
Standard Straight Stitch Foot – this is a standard straight stitch presser foot with very narrow sides. This is the perfect foot for sewing and when used in combination with the seam gauge, you can sew any width of seam easily on this machine.
Rolled Hem Foot – this foot is designed to roll the edge of the fabric over and stitch to create a delicate finished edge on a single layer of fabric. I would use a foot like this to create a narrow hem on a flouncy dress or skirt. I’ve also used this type of foot to hem table napkins too.
Because of the feet included, out of the box the Janome 1600P is best suited for sewing clothing. But that doesn’t mean you can’t find more presser feet and accessories sold separately that make this machine terrific for quilt piecing and machine quilting too!
Setting Your Bobbin Case Tension
The first step to sewing on any new sewing machine is to wind a bobbin so I shared all the steps to threading the top of the machine and winding a bobbin with Aurifil thread. I use Aurifil for quilt piecing and sewing garments. I use Isacord thread for machine quilting.
The Janome 1600P has a side loading bobbin case that you pull out, place the bobbin inside, and then insert into the side of the machine. So after winding a bobbin, you’ll want to check the tension of your bobbin case and make sure it’s allowing the thread to slide out smoothly, but not too fast.
I check my bobbin case tension by doing a Yo-Yo Test. I place the bobbin in the case, then place the case on my hand. Then I grip the end of the bobbin thread and lower my other hand. I want the bobbin case to slowly slide down as I jiggle the bobbin thread.
If the case doesn’t move, that means the tension is too tight. Loosen the tension by turning the bigger screw on the bobbin case counter clockwise.
If the case rolls down super fast (no jiggling required), that means the tension is too loose. Tighten the tension by turning the screw clockwise.
Note – DON’T DROP YOUR BOBBINS OR BOBBIN CASE! The bobbins and bobbin case for the Janome 1600P are metal and will dent easily and then not work as well. So always do the Yo-Yo Test over a table, possibly over a bath towel so your bobbin or case will not fall and bounce on a hard floor.
Threading the Janome 1600P
I shared a detailed walk through on how to thread the Janome 1600P and focused on the tricky spots. One of the most confusing areas is the slot with three holes before the upper tension guide. For most threads you only need to thread the first and last holes. Always thread this area with the thread running from back to front through the holes.
Always make sure your foot is in the UP position when threading a home sewing machine. This opens the tension discs and allows the thread to slip between them.
Another tricky spot is the needle. The hole of the needle faces the left side of the machine instead of the front, which is more common. Just make sure to thread your needle from the left to right. Using the built-in needle threader will make this a bit easier to remember.

Fun Features on the Janome 1600P Sewing Machine
Here’s a few of my favorite features on the Janome 1600:
Knee Lifter – This bar inserts into the front of the machine and allows you to lift the presser foot with your knee. You won’t have to take your hands off your project to lift the bar at the back of the machine. Instead just nudge the knee lifter and keep your hands on your fabrics.
Built-in Spool Stand – I LOVE this feature! I use Isacord and Aurifil thread and both feed better when pulled vertically off the spool and into the machine. Having this built into the machine saves space on your sewing table and will result in fewer thread breaks overall.
Needle Up / Down – This button on the front of the machine will quickly lift or drop your needle and then the needle will always end either up or down. This is essential for machine quilting so every time you stop, the needle ends in the down position and locks the quilt in place.
11 Pounds of Pressure Dial – There’s a dial on the top of the machine that will control the pressure applied with your presser foot. The Janome 1600P can put up to 11 pounds of pressure down on your project. This definitely isn’t something you’ll need every day, but will come in very useful when sewing thick, bulky, or slippery materials.
Needle Threader – Quickly get your needle threaded so you can start sewing!
Thread Cutter – This thread cutter cuts both the top and bobbin thread at once. If you use this feature while quilting, first lift your presser foot, slide the project away, then hit the thread cutter to leave nice long thread tails.
Whew! That is a lot of features packed into one very simple, streamlined machine. Remember, the Janome 1600 is a lockstitch machine. This means you can only select the stitch length because you can only stitch a straight line. There is no zigzag or decorative stitches of any kind.
But what you lose in fancy stitches, you gain in speed! This machine is capable of stitching 1600 stitches per minute, which will be really useful if you ever decide to put this machine on a quilting frame or sew garments professionally.
Let’s go quilt,
Leah Day
P.S – Yes, we will be back with more Mini Block Monday tutorials next week! I’m planning to alternate Mini Block Monday with Machine Monday tutorials so we can continue learning precision piecing and geek out on new machines as well.

I second Leah’s commet about not dropping the bobbin case. My sewing machine has a horizontal bobbin so no bobbin case. Hoswever, my longarm has a bobbin case. Even though it’s in a carpeted room, the bobbin case was dropped and apparently damaged to where the bobbin didn’t spin and it had to be replaced. It was over $60 to replace it, so be careful with it.
Yes! Thank you for sharing Gina!
Thanks for the great info!
Any chance there is a double needle attachment for the Janome1600p?