Ruler or Walking Foot Quilting?
Click here to find the pattern for this Scrappy Tracks quilt block. Yep, you can still join in the fun of this scrap-happy quilt along and make a crib, throw, twin, queen or king sized quilt!
Click here to find both the walking foot and ruler foot I was using in this tutorial. This foot set is compatible with Eversewn Sparrow sewing machines as well as any machine that uses low shank feet.
Click Here to find the Slice Quilting Ruler. While this ruler didn’t work as well for wide spaced lines, it works great for echo ditching and you can make beautiful 20 petal Dresden Plates with it too!
Simple Ruler Quilting Design
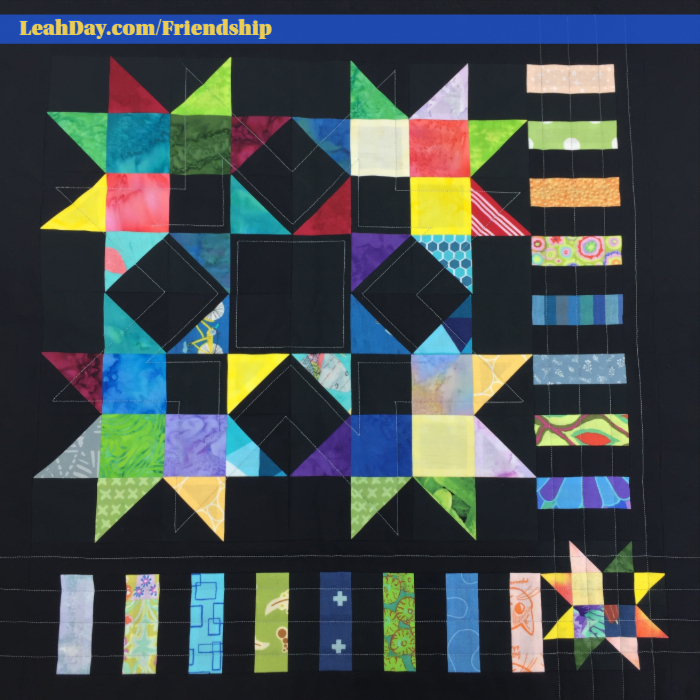
My quilting design began simple enough with echo ditching in the center square and around the points of the center star.
The key with ruler quilting is to keep your foot aligned with the edge of the ruler. There are etched lines on the back of the ruler to help you position it and space the lines accurately. Always remember to add 1/4-inch from the edge of the ruler – that’s the distance between the edge of the foot to the needle.
The Slice Ruler is a wedge shape and it worked great for the echo ditching. But when I switched to a wider spacing, it was challenging to line up the design.
I have a new Ditcher Ruler coming out very soon, but I didn’t have it when shooting this video. It is a rectangular ruler with more lines to make spacing lines like this much easier.
Walking Foot Quilting Saves the Day
But it’s good to know there are alternatives! I ended up marking the remaining lines on my quilt. I then quilted on the marked lines and achieved the perfect spacing I desired without so much fiddling or math.
Walking foot quilting is a wonderful type of quilting because it evenly feeds the quilt through the machine from the top as the feed dogs feed it from the bottom. It is a bit slower, but has fantastic results!
I love how this design turned out, emphasizing the star created in the center of the four Scrappy Tracks Stars. Be looking forward to another quilting idea next week as I quilt this block again on my longarm.
Let’s go quilt,
Leah Day
Check out more videos from the Friendship Quilt Along
Piecing Tutorial: Scrappy Tracks Block
How to piece Half Square Triangles
Fabric Preparation Tutorial – How to Cut Squares from Scraps
Find ALL Friendship Sampler Quilt Along tutorials linked up here!

