
How to Piece a Checkerboard Tiles Quilt Block
Click here to find the Checkerboard Tiles quilt pattern. Remember you can join in the Friendship Quilt Along any time and work at your own pace. The videos and tutorials I’m sharing will remain online forever so you can begin anytime!
How to piece the Square-in-a-Square Units
Yesterday I shared tutorial on how to piece the Square-in-a-Square units we need for this quilt block. Click here to find that tutorial.
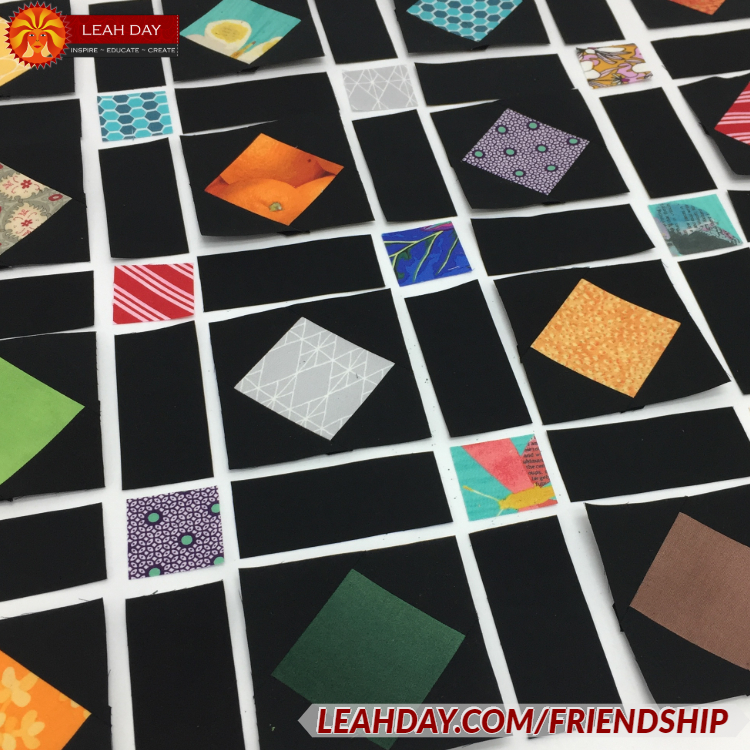
To piece this Checkerboard Tiles block, your first step is to make a mess of Square-in-a-Square units.
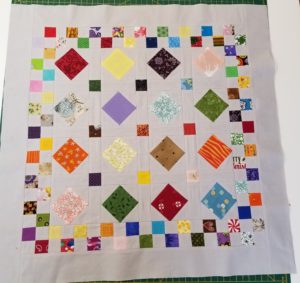
Once you have all of your Square-in-a-Square units pieced, arrange them with the small strips of fabric of the background and the tiny 1 inch scrappy squares. Piece the units together into rows then piece the rows together to create the center block.
The nice thing about piecing the rows together as you really don’t have to be picky about your piecing. Because the little squares are surrounded with background fabric, it doesn’t matter if the seams match up perfectly.
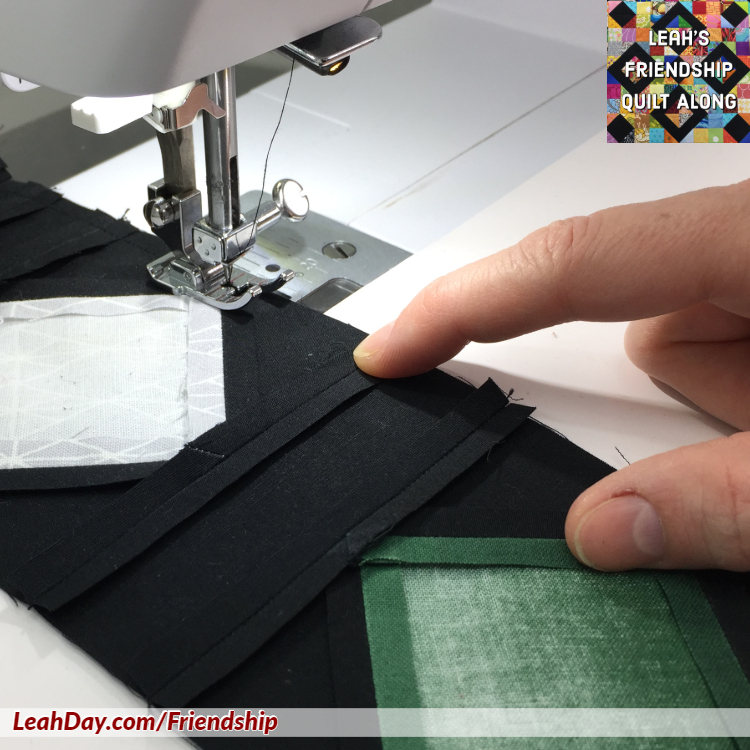
There are no pins holding these rows together because it didn’t really matter if the seams matched perfectly.
I pieced the rows together just using fingertip pressure to hold the seams . I love it when I can save a little time, and I don’t have to pin every single seem perfectly.
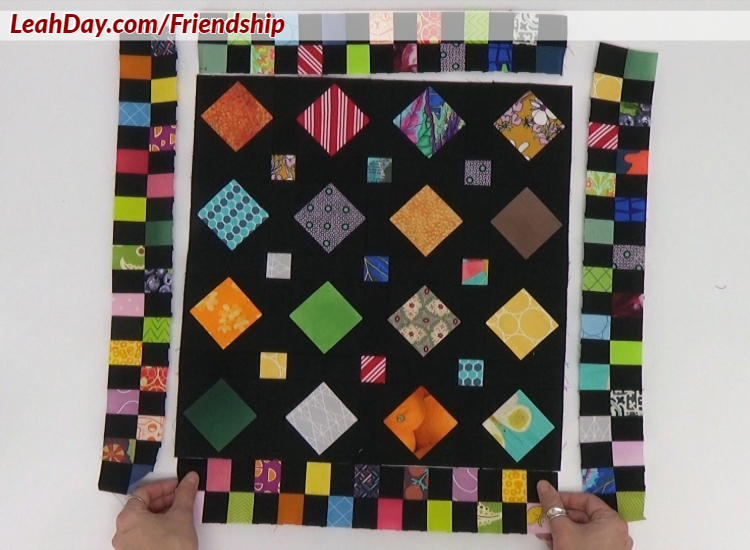
Tricky Checkerboard Borders
Unfortunately, my desire to save time ended up costing me a lot more time when it came to the scrappy checkerboard borders.
In this case I pieced my borders the opposite of the way I advised in the pattern. In the pattern I instruct you to piece the small squares together in sets of two. Then piece the units together to create the long borders for the block.
By piecing it this way you are less likely to end up with a border that is stretched out of shape or fighting itself to fit together.
See – this is what I get for trying to save time!
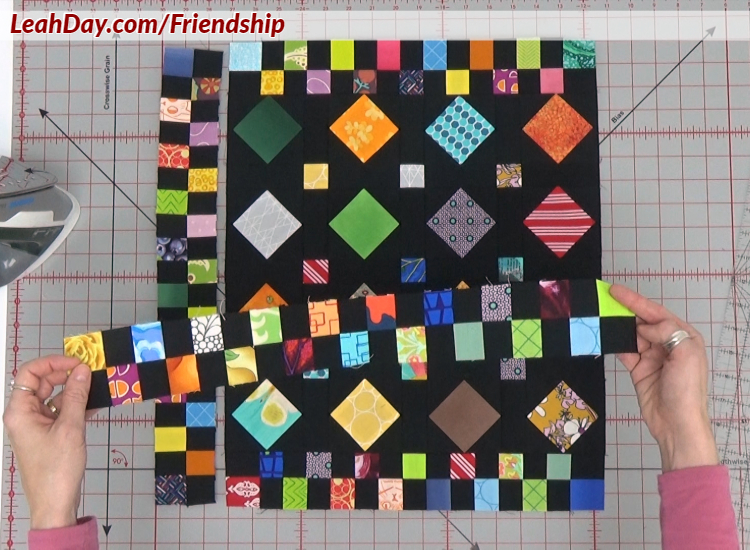
Unfortunately, I was in a hurry and trying to use up pieces I had already pieced. I made my borders the opposite way, piecing long rows of single squares together.
Then I pieced those two rows together with a very long seam down the middle. No, they didn’t fit together properly and this created a very noticeable curve in one border.
I also discovered that my two shorter borders did not end up the right size. Either I did not cut these units accurately or I was piecing with a bigger seam allowance that resulted in these borders being ¼-inch smaller than needed.
How to Fix Short Borders
I had to repair all four borders for this quilt block. First, I ripped off one Fabric A and B piece on both ends of each border strips.
To fix this issue, I had to rip off the ends of all the borders first.
I needed extra length to make up for the space I was missing. I pieced eight Fabric A and B 1½ x 2½-inch strips together to create an extra long unit for all the border ends.

It was a lot more work to fix these borders than just piece them correctly from the start!
Then I measured the block which I’d pieced at the correct size, but it’s always good to check. I trimmed the borders down to the same length, making sure to center the ruler over the strip so I had an equal amount of extra fabric to both sides.
Why Piece it Long to Cut it Short?
I love Laurie’s block and how the colors pop with a white background too!
Why did I add so much extra fabric and why did I piece it to both ends of the borders? Extra fabric in this case is always helpful. If you accidentally cut one end too long, at least you have extra fabric on the other end.
And adding the long strips to both ends meant I was able to center the strip on my ruler. This cut the extra fabric I needed in half so the corner squares were only 1/8-inch bigger than they should be. This is far less noticeable than having one square in one corner turn out ¼-inch longer than needed.
I ended up having to do the same thing for the longer borders. This has been a good lesson that it never pays to cut corners. I know this wouldn’t have happened if I’d pieced the borders as I wrote it in the pattern.
I hope you enjoyed learning from my mistakes this month and that you found this helpful! I can’t wait to quilt these Checkerboard Tiles blocks and share a cool idea for stitching over this super scrappy happy design.
Check out Laurie’s awesome block on the right!
Click here to find the Checkerboard Tiles Quilt Pattern and find all of the friendship quilt along tutorials I’ve shared so far.
Let’s go quilt,
Leah Day
Check out the other tutorials I shared for this Checkerboard Tiles quilt block:
Hi Leah, thank you for sharing your border issue with us. It would have been easy to edit that little booboo out so I appreciate you letting us see how you fixed the problem. I would like to share my checkerboard tiles block with you. I am stoked that it turned out so well! There are couple of “design elements” (a.k.a. mistakes) and a couple of my points are “organic” but I am thrilled with the blessed little 1 inch squares in the border!!! I am enjoying the journey and loving the quilt. Thank you.
Thank you Laurie! I’m so happy you’re enjoyed this block. Please send me an email here and you can send me a picture of your block! https://freemotionproject.com/contact-leah