
How to Piece Quarter Square Triangles
We have two new quilting units to learn this month for our Patchwork Mosaic quilt block! Learn how to piece Quarter Square Triangles, sometimes called Split Half Square Triangles in this new quilting tutorial:
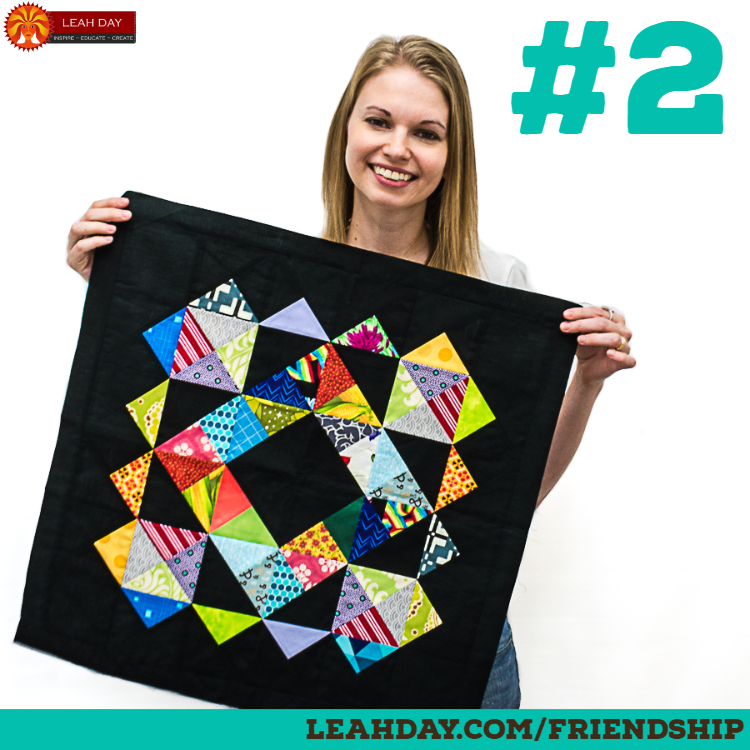
Click Here to find the pattern for the Patchwork Mosaic block. This block will help knock out your scrap stash or your collection of 5-inch precut squares. You’ll use up 14 squares to make this quilt block.
What is a Quarter Square Triangle?
This is an asymmetrical quilting unit pieced with a combination of a half square triangle and a single square of fabric.
You end up with two smaller triangles on one side and a nice big triangle in one corner. As you can see these are asymmetrical so the resulting units will be mirror images of one another.
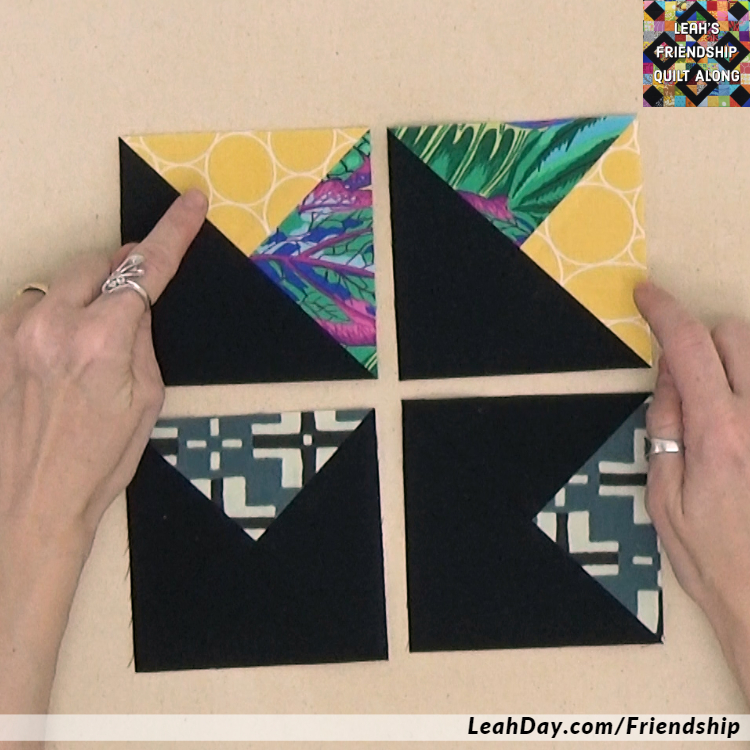
You will get two different asymmetrical shapes for every set of fabrics you piece!
You’ll also get a different effect depending on what fabrics you choose. The top units were created with two scrappy squares, and then I pieced a square of black background fabric.
The second set were pieced from a scrappy square and a piece of background fabric. Then I pieced a second square of background fabric to create a totally different look.
How to Piece Quarter Square Triangles
The first step to making Quarter Square Triangles is to piece a set of Half Square Triangles. Click Here to find a detailed tutorial on how to piece HSTs.
Cut the two half square triangles apart and press the seam allowances open. But don’t trim the units down. They’re going to come out at a weird 1/8-inch size, but don’t worry about it.
Now we’re ready to turn these into quarter square triangles! We do this by grabbing another square of fabric and place it right side up on your table. Then take one half square triangle and place it right side down on top.
Note: Your background square will be cut slightly bigger than the half square triangle so you don’t have to mess with a 1/8-inch measurement.
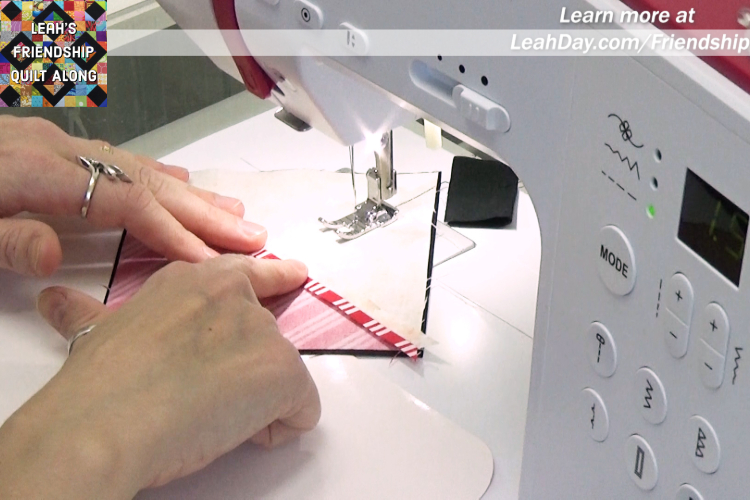
Mark a line across the half square triangle from corner to corner, perpendicular to that seam we just stitched. Now take this stack of pieces to the machine and stitch exactly 1/4 inch to either side.
General Quilt Piecing Tips
I piece and quilt on an Eversewn Sparrow 20 machine and use this patchwork foot. I love this foot because it measures an accurate ¼-inch to both sides of the needle.
You don’t need a fancy machine to make Quarter Square Triangles!
To get the machine ready for piecing, I lower the stitch length to 1.5 mm to make a nice tight consistent stitch and that allows me to press my seam allowances open.
I also always lead with a scrap charger which sorts out any issues my machine may run into as it begins stitching. Instead of gagging on my quilt pieces, it gags on this little scrap! This also reduces bobbin thread waste, which is a great thing. Who loves to wind new bobbins? Not me!
Cutting and Trimming the Quarter Square Triangles
After piecing to both sides of the center marked line, I cut along the line to cut the two QST apart. I finger press the seam allowance open, then press the unit flat with a hot, dry iron.
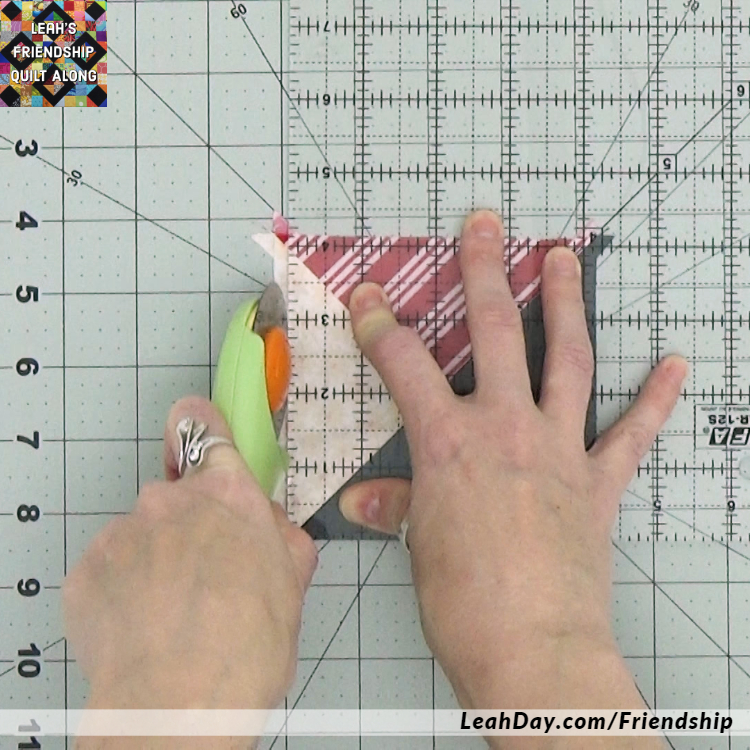
The last step is to trim the Quarter Square Triangles to get them to the right size for your pattern. For trimming, I love using a self healing cutting mat that spins (yep, that’s an affiliate link). I can get everything in place and just turn the mat without having to reposition my ruler.
First line up the diagonal 45° line through the middle of that quarter square triangle. Also check the second diagonal line and make sure it hits the corner of the size of square you’re wanting to make.
Rotate the ruler and always cut with your dominant hand on the side that matches your hand. I’m left handed so I always cut along the left side of the ruler.
Careful trimming is the key to finishing your Quarter Square Triangles,
Don’t cut across the top of your ruler because your blade can easily bounce over the edge and slice off the tip of your finger!
Careful trimming is the key to creating perfect Quarter Square Triangles. I always design my quilts with bigger shapes than needed so you can trim the units down to exactly the right size.
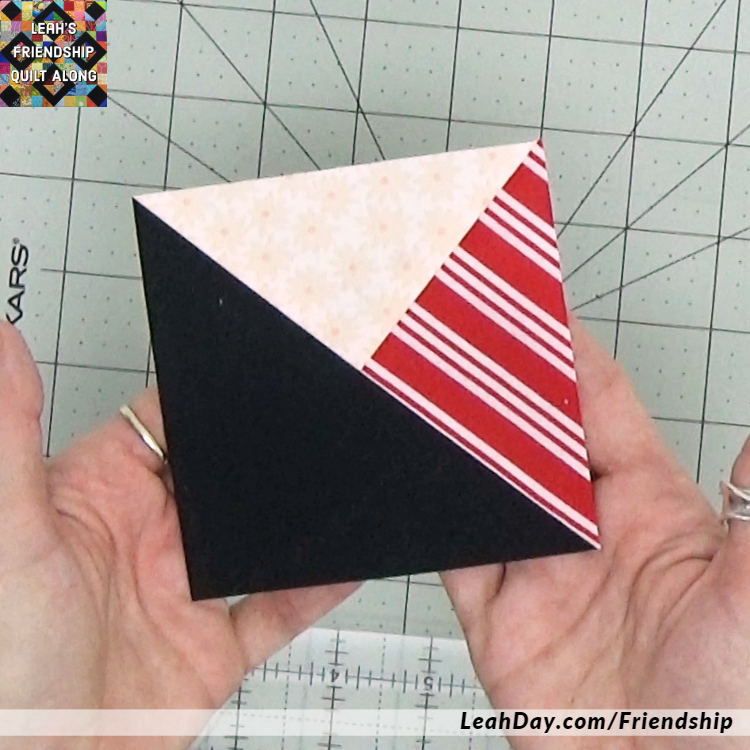
Ta da! This unit will look very different depending on how you first piece the Half Square Triangle first. Play around with combining different fabrics to see what you can get!
Would you like to make a fun quilt block to experiment with Quarter Square Triangles?
We’re going to piece and quilt this beautiful quilt block this month!
Click Here to find a fun block pattern and have a blast transforming 14 squares of scrappy fabric into a fantastic Patchwork Mosaic!
Let’s go quilt,
Leah Day
Thank you for the 1/4 square tutorial. I generally stay away from them because they don’t square up, but this tutorial shows how to make them nice and square. I will try it!
I know what you mean Kathi! I think the key is piecing from a larger square that leaves you plenty of room to square up the unit perfectly at the end. I do think a fresh spray of starch on the fabrics helps keep that diagonal seam under control too. Enjoy!