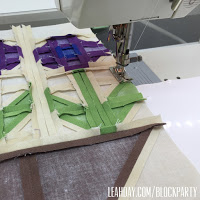
How to Piece a Pansy Patch Quilt Block
Click Here to find the pattern for Block #5.
We’re back to piecing this month with this fun little block that combines three pansy style flowers. My #1 tip with this block is to be careful in your cutting. Cut each fabric into the required shapes and label everything so you don’t get confused.
After cutting everything out accurately, create your half square triangles next. Here’s an extra tip video to help you out.
Once you have your half square triangles created you can build the units of the Pansy Patch block very easily. See what I mean in this new video:
Click Here to find the pattern for Block #5.
Uggh! I don’t know what happens to my brain when I’m shooting intros and exits. Did you hear when I said we’re piecing a Triple Tulip block? Unfortunately I didn’t catch that until it was too late, but don’t worry – this is definitely the video for the Pansy Patch block!

Important tip – If you arrange all the pieces of your block on a table near your machine, you can return the units continually to the layout and make sure it’s going together properly.
I find a good setup is to have my machine set down in a flatbed table with extra tables surrounding it to expand the surface. I keep a homemade hard pressing board set up to the left of my table so I can quickly press the seams open on each unit as I piece.
I arrange the pieces of the quilt block on the pressing board, continually adding new units as they are pieced together. This way I stay on track and don’t get confused, even if it takes several days to get the Pansy Patch quilt block pieced together.
 Do you have any questions about piecing this block? Feel free to ask in the comments below!
Once you get the block together, it will be time to quilt! I can’t wait to teach you how to quilt this block with spirals, Sharp Stippling, and the big flowing feathers in the vase. Be looking for the quilting video coming out next Monday!
Let’s go quilt,
Leah Day

