
Quilting Basics 12: Turned Edge Applique
In this Quilting Basics tutorial, let’s learn how to create a turning template so you can turn the edges of your fabric to create a perfect circle every time.
Click Here to find the pattern for Block #2.
Just like creating the cutting template, I took a bit of a shortcut with this template making process by printing the circle design directly onto freezer paper sheets. Just make sure to print using an inkjet printer as laser printers get way too hot for this type of paper.
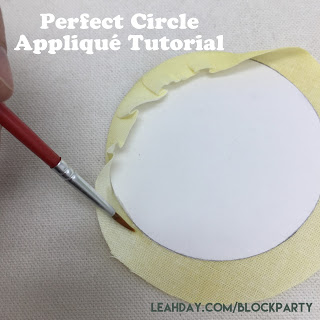
This technique does require a few things you might not have handy in your sewing room. I use the cap of…something…I’m not sure where that little plastic cup came from because I’ve been using it for years as my little starch cup. I also keep a small paintbrush handy so I can paint the starch on the edge of the fabric.
Why use a paintbrush? Starch can be really hard to control in a spray bottle, and even harder in an aerosol can. You don’t want to get all of the fabric wet at once, and you especially don’t want to get your turning template wet because then it will get soggy and make a big mess with your fabric.
Another thing that’s super important and cannot be overstated is giving yourself more than enough fabric to turn. Yes, I’m telling you to waste fabric!
The more fabric edge you leave around the template, the more you have to hang onto. As you can see in the video, I’m hitting the edge with my iron, then pulling it up and over the template. The fabric heats up, so the more you have to play with, the better.
So if you want to create a 3 inch circle, cut yourself a 4 inch square of fabric. That way you have at least 1/2 inch all around and a bit more fabric in the corners of the square to turn the shape easily without burning your fingertips.
And one final key to this process – patience. The first time I tried freezer paper applique, I didn’t leave enough fabric around the edge (stubborn) and I didn’t cut the template smoothly (rushing) and I ended up with a really weird looking applique (disappointed).
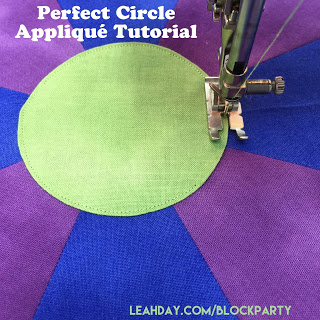
Take your time with this process and work slowly. You only have to make ONE circle for the Pointy Eight Dresden Plate, so take your time learning how to turn the edges nicely.
Next Monday we’ll learn how to place this perfect circle applique on our Dresden Plate quilt block and stitch it in place.
Is this the only way we can make circles? Absolutely not! There are a hundred different ways to do things in quilting and I want to give you a variety of techniques to play with this year. In few months we’ll learn how to fuse circles instead so you can learn how that process works as well.
What do you think? Do you like turning the fabric under like this? Do you wish it was fused instead? Share your thoughts in the comments below!
Let’s go quilt,
Leah Day
Cool! I was thinking I could use my sizzix dies to cut the freezer paper circles out. Love that you can also reuse the templates. Great video Leah.
I use Templar heat resistant template plastic, instead of freezer paper, also I have a small iron, made by dritz, that fits into the palm of hand and is the perfect size for pressing the appliqués. I use a larger water color paint brush, as it holds more starch.
My favorite way I've done it before is to see two circles together, right sides together, and then cut the back circle to turn it (which gets hidden on the inside so not a big deal). But that's a lot of extra fabric to waste and quilt through. I already turned this (haven't appliquéd yet) but I really like this method! It may be my new favorite but I'll hold judgement until is appliquéd.
I have your templates. How do you use them making the circle for this as unable to iron with the plastic template there.
You can trace the circle template onto freezer paper, then cut it out, or you could cut the freezer paper out directly with the template. You'll need a very small rotary cutter – 28 mm or smaller so you can cut the circle shape smoothly. I find this easier to do with scissors especially for the smaller circles so I trace using the template, then cut with scissors. Does that make sense?
Yes. Thank You!