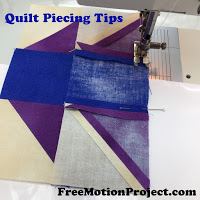
Quilting Basics 2: Quilt Piecing Tips

Yesterday we learned how to prepare our fabric for quilting by prewashing, squaring, and cutting it into strips in the Quilting Basics #1 post. Today I want to share some tips for piecing your quilt blocks accurately and with perfectly matched seams.
- Developing a system for pinning fabrics so you know what seam to stitch when you get to your machine.
- Piecing with a short stitch length (1.5 mm) so your pieces are locked together.
- Press seams open
- Always start and end with a scrap charger so your machine doesn’t gag on the back of your actual quilt pieces.
I believe pressing seams open is very important because it makes the block flatter and easier to quilt over. It also makes joining seams more consistent and faster because you don’t have to constantly plan ahead to know which direction both seams should press towards.
The main concern with this technique seems to be from seam strength. How can we press seams open, then stitch right in the ditch? Won’t this make everything weaker?
This is why I piece with a very tight stitch length of 1.5 mm as mentioned above. With that tight stitch length, the patchwork pieces are locked together securely and will not come unraveled or allow batting to poke out after the quilt has been finished.
I also find that pressing seams open creates a more accurate quilt block. All quilts build on simple units and math. If you create small units and they are all 1/8 inch off and you require 8 units to make a block, your block will measure 1 inch off by the time it’s pieced together. See how much that can add up over time and space?
What do you think about these piecing tips? Do you like pressing seams open or to one side? Why? Please share your thoughts in the comments below!
Let’s go quilt,
Leah Day


Oops…by awl, I meant the bone awl that's in my basket-making tools, not the pointy tool that makes holes in leather. I also use my wooden point-turner, used in garment-sewing, to open seams.
Great video, Leah! One thing, for those of us with fingernails that tear or break easily. To open the seam before pressing, instead of using your fingernail, use the pointed end of an awl and run it once down the seam while exerting some pressure. Thanks for these videos!
That's a great suggestion Linda! Thank you for sharing!
I wondered if you use or did use the finger presser you got in the quiltybox once upon a time? I am with Linda and barely need to look at my nails for them to break or tear.
Yes, a finger presser like that clover tool can definitely work instead. Just keep it handy so you can quickly grab it to press seams right at your machine.
Following your advice when making the building block quilt from the 2014 quilt along, I started shortening the stitch length to 1.4 mm (no 1.5 mm on my machine) and pressing open. It is so much nicer. When I did the paper pieced blocks, it really bugged me that I had to press to one side. The difference was really obvious!
I understand what you say about the strength coming from the shorter stitch. However when I mentioned this to a fellow quilter she worried that I cut up the fabric similar to serrating the paper when paper piecing. Do you have any thoughts regarding this issue?
Thanks!
P.S. I am not likely to start pressing to one side unless I absolutely have to because of piecing technique.