
Building Blocks Piecing Tips
Let’s review what I mentioned in the video and share a bit more details just in case you need more information:

Patchwork foot – I’ll be using an old Bernina 1230 to piece my blocks so I’m using the 1/4″ patchwork foot for piecing. This foot is wonderfully designed to help you stitch accurate 1/4″ seams both to the left and right of your needle.
What to look for – if you don’t have a patchwork foot, the best place to find one is with your dealer. Make sure to ask if you need to reposition your needle in order to use the foot. Some machines require a needle move, some don’t, and it’s good to know what is required to get the most accurate stitch.
What if you don’t have a dealer / no patchwork foot available?
In this case, you’ll need to do a bit more work, but you still can most definitely use your machine to piece accurately!
Option 1: Needle Adjustment – Place your normal zigzag foot on the machine and adjust the needle over to the right until you have exactly 1/4″ between the edge of the foot and the spot the needle is piercing the fabric.
 You might even want to piece two scraps together and then measure the resulting seam allowance. You really can’t fudge this setting – you need a deadly accurate 1/4″ or your seam will end up either too big or too small.
Once you find the right placement and perfect location for your needle to go, make sure to write down this info so you don’t forget exactly how you need to adjust your machine in order to piece accurately.
Option 2: Generic foot – Run some Google searches for your machine name and the word “shank.” You’re looking for information on whether your machine fits a universal generic high or low shank foot.
If you can’t find this information anywhere online, chances are your foot isn’t compatible with these generic feet. In that case, go with Option 1.
Thread – For piecing, I’m going to be using Aurifil 100% cotton. This 50 weight thread is super thin, but super strong and virtually lint free. I matched my thread color to the Fabric A color (blue) used in my quilt because in block #10, some of this piecing thread will show on the outside edge of the basket handle.
We need a strong, thin thread for piecing so the pieces of cotton fabric are held securely together. The thinness of the thread is important because a thick thread can actually shrink your seam allowance, making it more difficult to match the seams in your block.
Lint is also a serious issue with cotton thread because a super linty thread will be spinning around both in the top and bobbin of your machine. Over time, this will create giant dust bunnies which could lock up your machine completely!
If you don’t have a choice about the thread you’re using, just make sure to brush out your bobbin area with every bobbin you change. Read your manual and learn how to pop off or unscrew the needle plate so you can get into the nitty gritty area all around the bobbin case.
Whatever you do DON’T use those cans of spray air to blow the lint out of your machine. This actually blows the lint further in, locking it against the moving parts of your machine, and it WILL break your machine!
My dealer once showed me a picture of a machine less than 1 year old that was 100% locked up – the needle could not move up or down a bit. The quilter had been blowing the lint further in, not brushing it out, and the machine was completely ruined.
So enough horror stories about lint, let’s move on to machine settings!
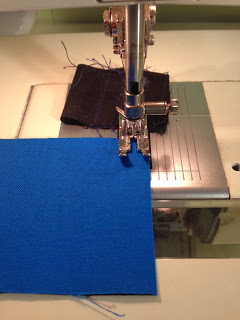
1.5mm stitch length – I always set a small stitch length on my machine because this locks the stitches tightly together and ensures the pieces will never come apart.
Locking the pieces so tightly together also allows us to press the seam allowances OPEN like this:

Pressing these seam allowances open will reduce their bulk and thickness when it comes time to quilt over the block. It is far easier to quilt over the block, and stitch in the ditch when the seam allowances are pressed open rather than to one side.
But won’t this DAMAGE my quilt???
Yes, I’ve heard this a hundred times too, and I regularly get chewed out via email about it (I’m not kidding! Lol. Some people really need to get a life!)
Apparently law #3 of the Quilt Police states pressing seams open is wrong, wrong, wrong. The theory here is if you press seams open, then quilt right in the ditch, then your needle MIGHT pierce one of the piecing stitches and break it, creating a HOLE in your quilt.
All I can tell, show, and teach is what I do myself. I’ve always pressed my seams open and I’ve always stitched right in the ditch and not one of my quilts has gotten a hole, fallen apart, or suffered in any other serious way for working this way.
The flip side I’ve found is pressing to one side results in a noticeable lump in the quilt where the two seam allowances are layered on top of one another. It’s so noticeable, it’s very common to get thread breaks while quilting over theses sections.
But the choice is definitely yours – to press seams open or to one side. Just do understand that by using a narrow 1.5mm stitch length, your blocks will be solidly locked together, almost impossible to rip apart, and definitely okay with pressing seam allowances open!
Marking Pencil – We will be marking lines for both piecing and quilting through this project, so it’s time to invest in a marking pencil that produces a fine, bright line that you can see clearly, but also erase easily.
I personally prefer the Fons & Porter Ceramic marking pencil for medium to dark fabrics and the Fine Line Water Soluble Pen for light fabrics. Both devices create fine lines that are easy to follow while quilting, but also easy to remove after the project is complete.

No matter what you use – TEST IT! Mark some fabric, then try to remove the marks by following the instructions on the pen or pencil package.
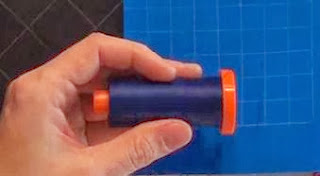
Scrap charger – One last thing that I use while piecing that I forgot to mention in the video is a scrap charger, which is basically a 2 inch square of scrap fabric that is folded in half.
I stitch through this little scrap of fabric first, and stop stitching when my needle stitches off one end. This way my presser foot is ever so slightly lifted on the 2 layers of scrap fabric.
I can then slide the two pieces I’m stitching together under the foot, get it aligned with the right side perfectly and the next stitch the needle makes will be exactly where it needs to be.
This also ensures that any gagging and thread nesting the machine decides to do will be on the scrap fabric, NOT on the pieces I’m stitching together.
An alternative to this scrap charger idea is Bonnie Hunter’s Leaders and Enders, which basically achieves the exact same goal, but with the added benefit that you are piecing small scraps together to eventually piece an entire scrappy quilt.
So that’s it for this extra piecing tip post! If you have any questions make sure to post them here and I’ll be sure to respond and even update the post if something big is missing.
If you haven’t already, pick up a copy of the Building Blocks Quilt Pattern so you will be ready to piece block #1 with us this Monday!
Let’s go quilt!
Leah Day
Leah, I LOVE denim rag quilts. Would it be possible to complete this project with a denim backing, and instead of joining with binding strips, I would simply join the blocks with the raw edges to the denim side. Also, would it ruin the look of some of the blocks if I use a 1/2" seam to join the blocks? Or could I adjust the original pieces so the finished block is 1/4" larger than your pattern? FYI, if I choose to use batting, it will be 1" smaller than the backing pieces. Thank you!
Hi Barb – Hmm…this is a bit beyond the scope of the pattern, but yes, I do believe this pattern will be perfect for your denim rag quilt idea.
The blocks are actually pieced to 10" but only quilted within 8", so you will have 1 inch of play all around. If you trim the blocks to 9 inches, that should give you the 1/2" seam allowance all around the block to connect using your denim rag quilt method.
Does that make sense? I can't wait to see what your quilt looks like when it's finished!
Cheers,
Leah Day
I wanted to share a picture of my first – ok not really my First -maybe my 6th or 7th try at FMQ. But it seems I need to have a blog to be able to post pictures. Is this correct?
Hi Leah,
In reading ahead on the piecing instructions, it seems to me that first sewing the original sized strips together, and then cutting and piecing those, would be a bit more efficient. For example, in the Fantastic Rail Fence block, piecing all the strips together in the designated order, and then cutting into blocks, would be a bit faster than cutting the strips and piecing each block separately. I'm just curious if there is a "best practices" reason not to do this? You know, like those strips are more likely to pull apart during quilting? Or if you are having us do it the other way as part of the "piecing practice" of this quilt's construction?
Thanks!
Pati
PERFECT!!! 🙂
Thanks, Leah
Miss Mango – You can also post pictures to facebook and flicker, then share the link to that photo instead. You don't HAVE to have a blog, but it's super fun and easy to set one up so consider it as something fun to do this year. If anything, it will serve as a useful record of your progress!
Cheers,
Leah Day
Pati Vitt – When it comes to piecing, there's probably 100 different ways to cut and piece all of these blocks. To a degree, there isn't a "right" or "wrong" way either, so for the most part I picked methods that either were easier to describe / shoot photos for, or made the most logical sense to me.
However, if you see a case for an easier way to do something, and you wish to piece a block your own way, definitely do it. When there's a situation like you described – seam / durability issue – I'll make note of it in the video.
Just remember that piecing is never a cut and dry thing – there's never just one right way to do this. There's 100 different right ways!
Cheers,
Leah
Hi Leah,
Just getting started and watched your video. Noted that "Recommended Materials" on Page 5 says to Match Aurifil 50 wt to Fabric B and the video say to Match to A. This is my first attempt at Patchwork and quilting so I'm rather obsessed with reading all the directions and watching all the videos. My brain says it really doesn't matter, but my OCD says better ask. LOL
Hi Linda E. – In all honesty, it doesn't matter which fabric you match the thread to. I ended up matching to Fabric A because it will show up a bit on the surface in block #10. I will make sure to update that section of the pattern so the video doesn't conflict and cause confusion.
Thanks for catching it!
Leah Day
I can't find the list of your older articles, but I thought before you had recommended using the same thread for piecing and quilting (Isacord thread). Have you changed your recommendation or have I misremembered? I used thread I bought from you for piecing and quilting and it seemed to work well.
Thanks,
June
June D – No, I've never liked piecing with Isacord thread. It certainly can work, and if you like it, go for it!
My personal feeling is it just doesn't STICK to the cotton fabric in the same way cotton thread does. Does that make sense?
Cheers,
Leah Day
My last project was pieced with Isacord, and I found the Aurifil much nicer to use tonight. The thread sunk right down into the fabric. Also, I had been using a charger on the last project, but realized I had a straight stitch plate. Lo and behold I don't need the charger when I'm using this plate!
I'm so excited about this quilt along. My fabric arrived today and I'm ready to start cutting. I read the statement of pressing seams open. The only problem I have with that is that I need to be really careful at the edges because I don't backstitch and the seams tend to open when they are trimmed during straightening. This probably will not be an issue as we are going to be quilting them right away. Do you have any tips on how to prevent the seams from opening?
Ms Moom – I never have an issue with the fabric opening at the edges. Have you ever used a scrap charger that I mentioned at the end of the article?
One thing I noticed while teaching Josh was how differently he touched and handled the fabric – fairly roughly. I'm always light handed and never pulling, tugging, or even picking a piece up fast. Usually a stack of pieced blocks are carried in a stack or on a cutting board. I rarely carry a block by the edge. Does that make sense?
These are small, subtle things, but they do make a difference!
Cheers,
Leah
Ms MoomMist, are you talking about your seams opening at the edges of the blocks? If so, I think you will find that the shorter stitch length of 1.5 that Leah recommends will solve that!
Hi, I'm Lissa. I just downloaded the pattern and can't wait to get started. I plan on having more colors though. I've never done a quilt-as-you-go quilt so I'm interested in seeing how this turns out. Thanks for creating this pattern for all of us.
I pieced all three of my blocks, but not one of them meet up in the middle. Is there a trick to getting the seams to match up?
Hi Ccquilts – Take a look at the video on making the four patch block (#1 – Piece a Four Patch). I carefully line up the seams, pinch to hold them in place, then pin above the seams to secure. I often forget to take out my pins and stitch over them so the seam doesn't shift as it's stitched. It's up to you if you want to rip that seam and restitch it. Your quilt will be beautiful, warm and cuddly no matter what!
Cheers,
Leah Day
LEAH PLEASE HELP!!!!
I just sewed the strip pieces for block #2 for the 9 patch blocks. I measured and marked every seam with a ¼” seam allowance line on the fabric. I double and triple checked the cut measurements;
The pattern says that Fabric A is supposed to be cut 2.5” wof; Fabric B also cut 2.5” wof
Then sew an ABA strip together & then cut 6 pieces at 2.5 wide x 6.5 long of ABA then cut 3 pieces of BAB strip at 2.5 x 6.5 making a total of 3 blocks with a unfinished size of 6.5” ….I am now on my 2nd attempt to do this…
I just finished 1 block (out of 3) and they are supposed to end up 6.5 square .again still am getting one side measures 6.5 and the other side measures 6.25.
This is the SAME thing that I did last night I ripped all that out checked and sewed and measured everything again then re cut and re sewed the strip and pieces and I am still not getting the finished size 6.5“ sq
NO one else in the entire group said they had this problem they said they followed the pattern completely and came out 6.5..
I am so perplexed! and feeling so stupid. I am hoping you can tell me what I am doing wrong.
Thanks
Denise Lawrence
Hi Denise – When you cut your strips from the ABA and BAB units, are you cutting them 2.5 inches wide?
From what it sounds like, this is probably what is going wrong. You're welcome to shoot a picture of the front and back of your blocks and share them on the facebook group and I can take a look to double check.
Leah, I measured all the pieces again and I found my mistake. One strip I had cut 2.25 all the others I cut 2.5. The second block came out perfect 6.5 x 6.5!
So lesson #1 mark ruler with tape. Lesson #2 Very Important don't sew too late at night makes it too hard to think! LOL
Thanks for your reply.
Leah,
I set my stitch length at 1.5 but what about a tension setting?
I seem to get a bird nest and/or spider web designs on the back of my practice square. I have my top thread with very little tension and the bobbin tension is set on low as well. Any suggestions?
Thanks!
Mabel
Hi Mabel – Check the manual of your sewing machine for a diagram on proper tension. Usually the middle tension setting for the top works nicely, though this is different for every machine.
Hi Leah, I am doing ok on the blocks but I find(in #2 blocks) that I end up with some of the material bunching on the outside edges. Do you stitch the outer edges before or after the inside stitching? Should I spray glue the 3 layers to avoid this? Thank you.
Jacqueline Satterlee – I usually try to knock out some inner lines first and that helps to spread the fabric from the inside out so less puddling and pleating happens.
It is a good idea to baste your quilt securely with pins or spray, whatever your preference. I personally use straight pins and Pinmoors.
I hope that helps!
Leah
Thank you Leah. I have to stop myself from taking shortcuts 🙂 Yes, that helps.