45. Learn how to Foundation Piece Diagonal Curves
When I piece it’s usually out of the desire for that simplicity of just 1 + 1 = 2. I don’t have to think about it, I don’t have to agonize over it. Just send the fabric through the machine, feel it slide through my fingers, and every time I stop, magic! the pieces have gotten bigger!
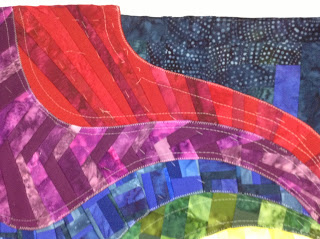
Foundation piecing the sections of hair for Express Your Love was exactly like this: magical. In the beginning I was a bit worried this grand idea wouldn’t work out, but in the end, it worked perfectly and I’m loving this luscious texture created by so many pieces of fabric all pieced together happily:

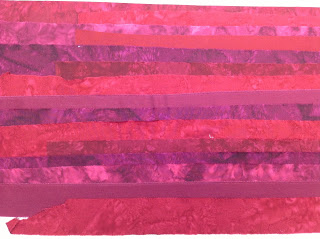
So today we’re going to get started with the red section of hair which I used for the top most and bottom most hair sections. You can start where ever you want and use whatever colors you want for this project. Go through your scrap bin and see what you have. For this style you will want long strips between 1 – 2 inches wide.
I don’t really know how much yardage this would translate into…maybe 1/8 yard of 4 fabrics? That should be way more than enough. Really this is best suited for scraps because you can use up so much in one lock of hair.
To get started, first prepare your foundation. As I said in that post, the French fuse is optional. I thought it would be necessary because my foundation fabric was relatively thin, but once I got going, I could see it wasn’t 100% necessary.
Next get all your strips laid out so they’re easy to sew on one by one. You’ll want a nice variety of shades of your chosen color so tear some strips from yardage if you need to.

Another thing that might make this process easier is to set up a pressing board next to your machine. Pressing between each strip keeps things nice and flat and reduces any chance of rippling fabric as you work through the hair.
Now let’s watch the video and see how to foundation piece strips in diagonal lines and angle the straight strips around a curve.
I use this most simplistic method to foundation piece two locks of hair. I liked this method a lot because it didn’t require a lot of prep, the finished piece wasn’t nearly as bulky as some of the others I tried, and it pieced together very quickly.
One thing to note is to always leave the seam allowance around the foundation! You want more fabric hanging off the foundation edges rather than too little. You will need 1 inch around the foundation shape on all sides to turn it easily!
What do you think? Is piecing your go-to task when you’re feeling blue? What is your favorite thing to make when you want to feel better?
There is no doubt in my mind that quilting is a healing craft and can provide comfort just in the simple act of stitching two pieces of fabric together. Make something out of nothing and stitch yourself back together once again.
Let’s go quilt,
Leah Day
Other Foundation Piecing Posts:
Prepare Your Foundation
Red Diagonal Section
How to Create a Scrappy Mix of Colors
Orange Triangle Section
Yellow Log Cabin Section
Green Mosaic Section
Blue Double Scrappy Section
Purple Braid Section

Thanks Leah, that was really informative. I've use scraplique techniques before, but not on a foundation like this. It looks like a nice easy way to get the angles you want.
My favourite thing to make when I am feeling blue is something new. I find the design and planning of a new project brings me the most happiness. The idea is fresh and developing. The fabrics are whole and inviting. And the hope of making something beautiful…. Peaceful!
Leah, I noticed that you were getting some machine chatter in this video. I also noticed that the bobbin area was open. The chatter will be cut if the bobbin case is closed. Thanks for your wonderful projects and all that you so willingly teach us.
You are a great teacher- look forward to the next video!