
12. How To Dye a Wholecloth Quilt
Hold onto your hats! It’s time to change gears a bit on our project this year. I warned you from the beginning that I was not going to work in a linear fashion with Express Your Love. I have no desire to make this quilt along a dedicated step-by-step boring tutorial. Instead I’m going to throw a wrech in the whole mix and focus for the next few weeks on an entirely different quilt: Duchess Reigns:
But don’t worry! You can easily apply all the information you’re learning here to Express Your Love. You’ll just have to be creative, stop and think and plan and make some decisions on what you want to try on your quilt.
Remember you don’t have to try everything and some of these techniques might be something you’d like to come back to some other time. There are no rules here, so just have fun!
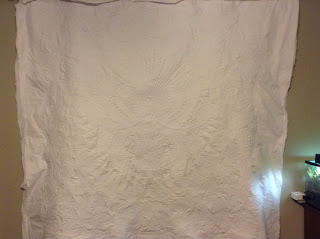
For today, I’d like to share with you a long video about the entire process of dyeing this wholecloth quilt. She’s 65 inches square, plus another 12 inches of extra fabric on all sides, which makes her pretty monstrous to be dyeing at this stage.
 |
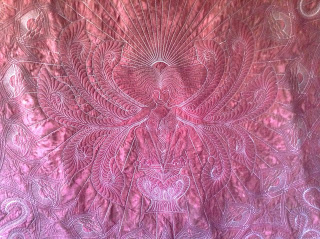
| I’d always planned to dye this quilt so you could actually see her complex motifs and designs |
But dyeing is exactly what I’d planned to do from the very beginning. After running a few tests, I found the best spot to dye her was right in the middle of the quilting process. So here’s what has happened up to the beginning of this video:
1. Quilt Designed
2. Fabric marked using Fine Line Water Soluble Blue Pens
3. Fabric basted with 1 layer of Quilters Dream Polyester Batting in the Deluxe loft
4. All the marked lines were quilted with YLI Water Soluble Thread
5. Batting was clipped away from the background sections, leaving extra batting only in areas I want puffy.
6. Quilt was basted again, this time with Quilter’s Dream Poly in the Select loft.
7. Quilt was outline quilted again, this time with Isacord Polyester thread in Silky White.
So it’s at this point that the video starts. Enjoy!
So here’s the list of steps in the video:
1. Quilt was soaked in warm water bath to remove all water soluble products (pen marks and thread).
2. Quilt was spun twice in the washer to remove extra water.
3. Quilt was soaked in a soda ash and water mix then spun again in the washer.
4. Tons of dye was mixed while the quilt soaked – 10 g of Dharma Trading Maroon dye to 250 ml of water – I believe I ended up mixing up this ratio 11 times.
5. Quilt was spread out over tarp covered tables and dye was squirted over the front and left overnight.
6. The quilt was spritzed with water the next morning when it looked like it might dry out.
7. After 24 hours soaked in dye, I squished the quilt in to the washer and ran it through a super wash cycle 3 times until a fat quarter of fabric came out white.
8. The quilt was soaked again in soda ash and dyed again with the back facing up.
9. After 24 hours the quilt was washed again 3 times until the fabric scrap came out white.
10. The quilt was dried and hung on the wall for the final video, looking like this:
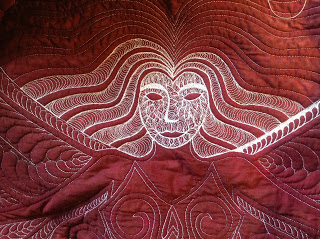
I’ve already taken it off the wall and begun filling! This is a slow process, but already her face is starting to take shape:
So you can see, this isn’t a super quick, instantaneous process, but it certainly produces results!
Duchess Reigns is now in the filling stage and I plan to use many beautiful filler designs over the surface. For the next few weeks, we’ll be learning how to use designs on this quilt rather than Express Your Love, but remember – it all works the exact same way, so watch, practice, and apply these new designs and techniques wherever you like best!
Let’s go quilt,
Leah
Oh, girl! I would have been so nervous dying it after all that quilting. You can add bravery to one of your many great attributes!
Absolutely Stunning
Leah, wondering why you did not choose to dye this in your washing machine. It is beautiful, but seemed like a lot of hard work.
You are such a gutsy lady, not to mention an amazing artist!
Love it. I need to play this way. Thanks for sharing.
My heart dropped when you said you were going to dye her! But wow what a difference love the video!
No, thats not an option for me. I'm really nervous about quilting a really ig quilt and washing them afterwards. But dyeing? This huge quilt? Never…
You did a great job!
Katharina
Amazing. So the dye doesn't change the color of the Isacord thread at all? It looks still white in the pictures.
I really enjoy watching all of you videos….I play them in the background on my desktop computer as I sew and I noticed that you recently have the videos looped so another will play after one finishes and I like that!It makes me feel like I am quilting WITH someone as I sew :0)
Great video and your quilt is gorgeous!! But I too am curious as to why you didn't simply dye this quilt by submerging it in a large tub, bucket, etc. instead of with a small bottle. Of course, I have NO experience with dying fabric, so I'm not criticizing, I'm just plain curious. 🙂
Leah, this has turned out absolutely stunning! I hope one day I have the courage to dye a quilt!!!!
Not for the faint of heart! Along with Joni and Sue, I wonder why you chose this method to dye — but I'm light years away from doing something like this, so I'll just pick my jaw up from off the ground and admire. Can't wait to see the next blog of progress!
WOW!!! Leah … realy you are amazing! Thanks for sharing this! Turned out absolutely stunning! Congrats!
Leah, I just love your teaching and designs. I am taking one of your Craftsy classes and the content is amazing. Thanks for all you do for us. I am really enjoying the Duchess Reigns and the Express Your Love processes.
Thank you!
PJJ in Oregon
This makes perfect sense to me! It's like an "AHA". . first of all. . if you used maroon fabric to begin with. . you would have had to use chalk or some other quilting method (that's not as nice as water soluble blue line). . and if you have to soak the quilt to get rid of the water soluble thread ANYWAY. . you might as well go ahead and dye it!! Plus, dyeing gives you those amazing UNIQUE results that noone else will have! I freaking love it, thanks for sharing. .and this is on my TODO list for SURE now!
What a great tutorial. You do such a nice job with all your videos. I continue to be amazed at your talent and your generosity in sharing that talent with us. Thank you so very much!