
Quilt Along #37 – Jagged Lines
It’s time to quilt along and learn a new Edge to Edge Design called Jagged Lines!

This design follows the same rules and basic steps as Flowing Lines, except now all the lines are straight and angles sharp. It will still work wonderfully in any sashing or border area so let’s check it out being quilted in the sashing of the Batik Beauty Quilt:
I received a great question last week from someone commenting somewhere (sorry, can’t remember where or when!) about turning corners with any of the Edge to Edge Designs we’ve learned so far this year.
There’s actually a lot of different ways to do this. You could turn the corner by quilting a large triangle shaped gap over the corner to turn the full 90-degrees like this:
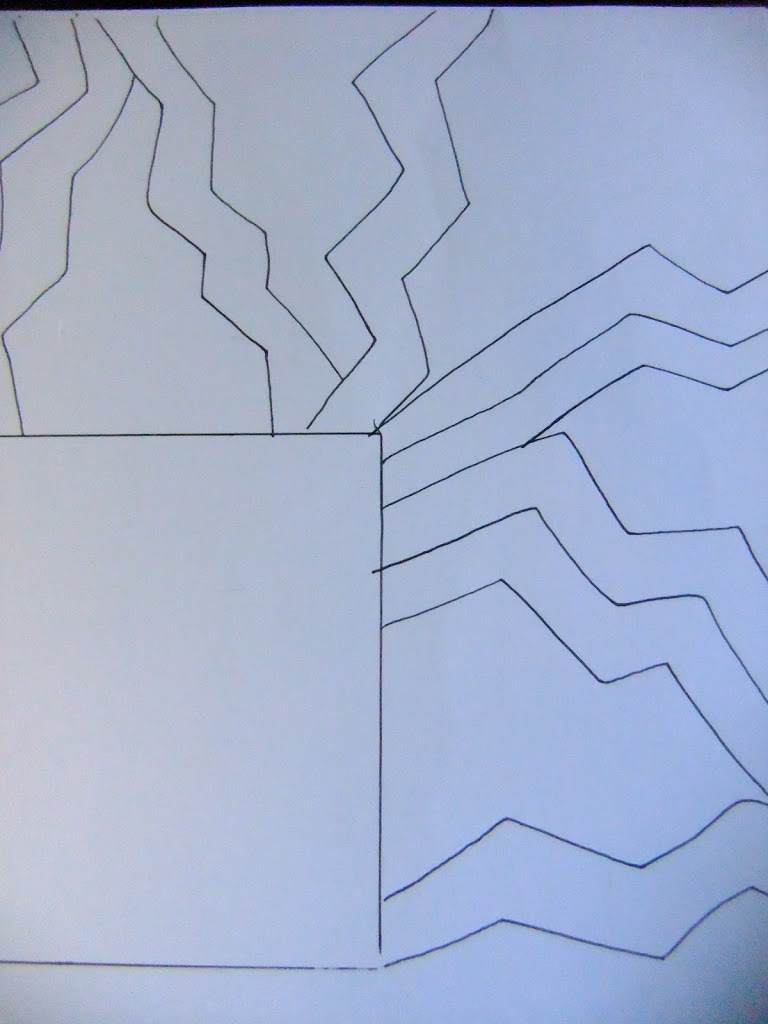
The trick here is making sure you make the gap wide enough to turn the line fully from horizontal to vertical around the corner. This would probably be best for borders where you’ll only turn 4 outer corners.
So what if you want to stitch this design throughout both the borders AND sashing? How do we make that consistent?
How about using more jagged lines across the sashing gaps, then expanding the design in those directions like this:
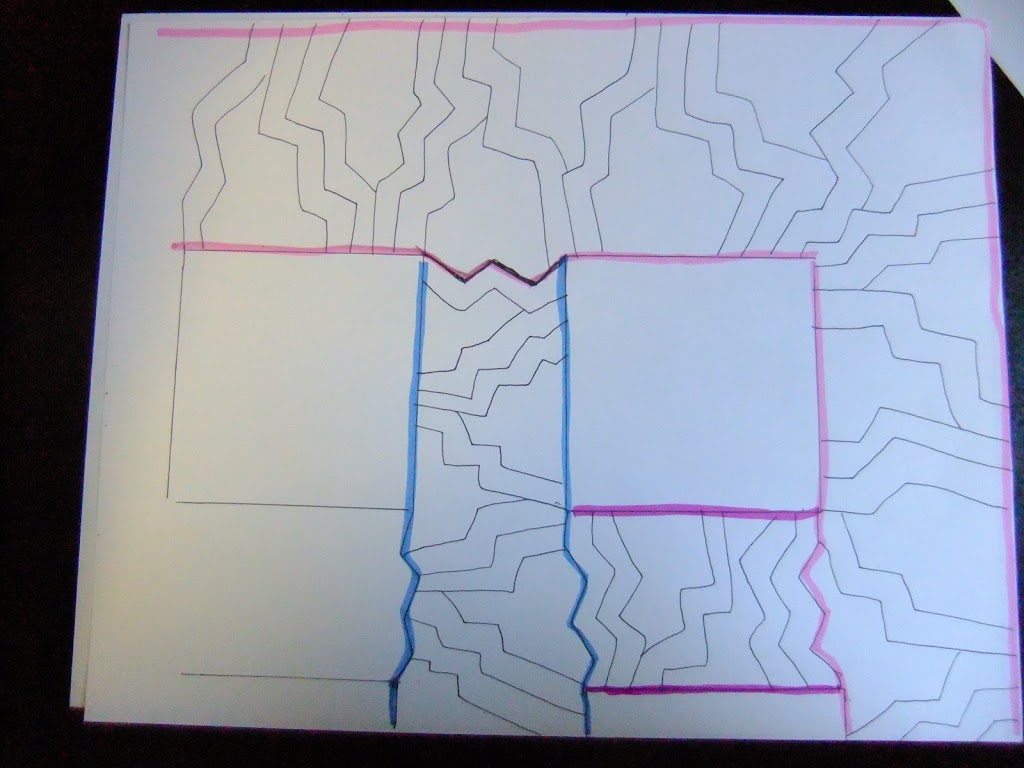
Basically you would quilt within the sashing first with long vertical or horizontal rows (blue). Then wiggle into the weird spaces running in the opposite direction you didn’t fill before (purple). Then at the end quilt around the border with more jagged lines around the border (pink).
Of course, if you really wanted it all perfectly lined up, you could just split the design in the middle of the cornerstone spaces like this:
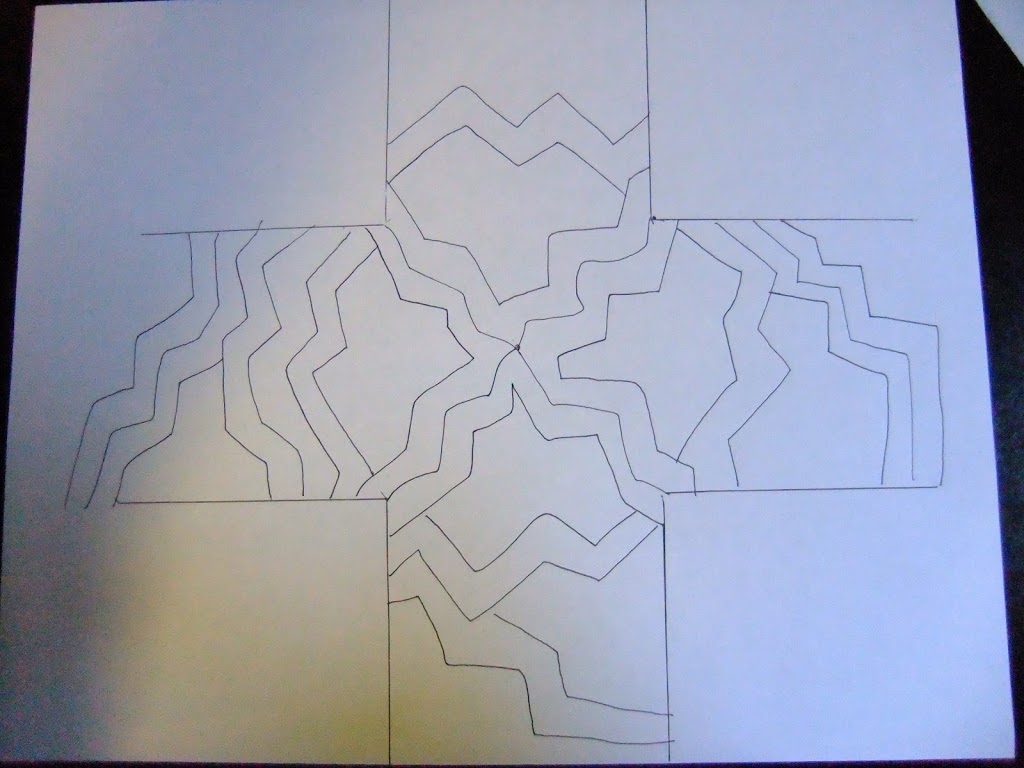
Basically a cornerstone is a square in the intersection of two sashing lines. It’s easier not to piece them in, but that doesn’t mean you can’t pretend they are there in the quilting!
For this method, you’d need to mark the center of the cornerstone with a dot as you see above and wiggle your lines to intersect with it, forming an “x” across the sashing area. Then base your Jagged Lines from there, running in whatever direction you wish until you reach the next sashing intersection.
Well that is 3 ideas right off the top of my head! There’s probably a 100 more ways to do it, so play, have fun, and make sure to share your experience with jagged lines next week.
Keep in mind that you’re posting your progress from LAST week on THIS week’s post. This way you have time to watch the lesson, play with the ideas, then post your progress to the next quilt along. I hope that makes sense!
Let’s go quilt!
Leah Day