Quilt Along #26 – Painting a Quilt
It’s Quilt Along time yet again and it’s time to change things up a bit. Instead of a new design or free motion quilting technique, this week we’re going to learn about quilt painting!
Why painting a quilt? No, it’s definitely not a traditional quilting technique and probably isn’t something you would use on a bed quilt. However, if you’ve ever had a craving to make an art quilt or over-the-top wholecloth, this is most definitely a technique you should have in your handbag.
This is also something I’m doing right now, in real life on Emergence and with James’s help, we’ve put together this video:
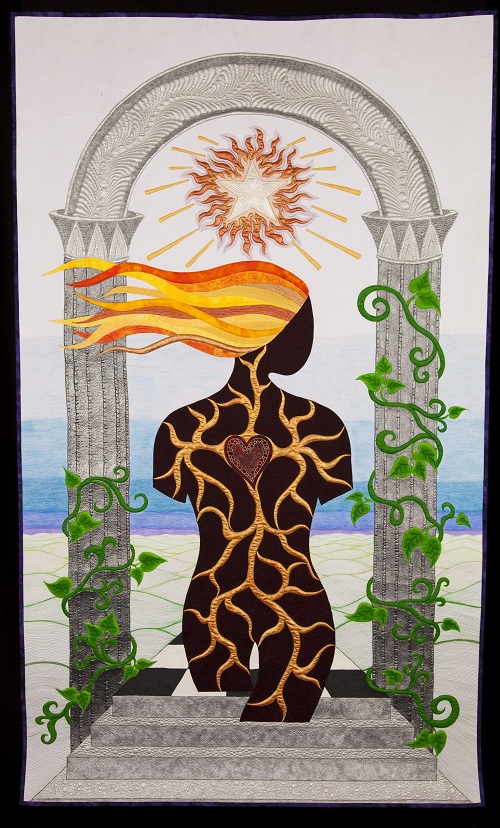
I promised close up photos of this quilt, so here she is! This is Emergence right after the video was taken. I’m working to cover the curving lines of her body with Jacquard Lumiere Textile Paint in Pearl White:
This is really as simple as putting paint on your paintbrush then carefully brushing it into the area you want it. Because the quilt is fully finished and quilted, the areas needing paint are pretty obvious and it’s easy to stay within the stitched lines as I apply the paint.
Here’s another shot with more paint applied to her body:
For her outline, I’ve used a slightly different technique. Using a dry paintbrush with only a tiny amount of paint, I’ve created a soft glowing effect by brushing the paint from her body outward. The result is more paint closer to her body and less paint around 1/4″ out.
After the section is complete, it adds a thicker definition to her body, making her stand out better against the other colors and textures within the quilt.
In the background, the purple, green, and blue color is all created with thread. It’s hard to believe this piece of fabric was once just a large piece of black kona cotton, but that’s all it was!
When it comes to painting a quilt in this stage, it can be pretty scary. If I drop my paintbrush or accidentally spill paint in the wrong area and don’t clean it up immediately, I could end up with a noticeable mistake in the quilt.
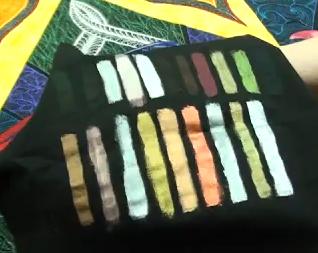
The best advice for this type of technique is to work slowly and carefully and to always plan ahead. Anytime I try this paint on fabric, I first paint a test sample on the same fabric I’m working with:

This way you’ll know what color the paint is going to be when it dries. While this might seem like a silly step, it’s an enormous time saver and can easily make or break your ability to get the right color.
In the video I mention the issues I had with Hot Cast. I painted a small section of the column to test the color. This was a big mistake! This color test should have been done on plain scrap fabric, not the actual quilt. Covering that paint up took 5 coats of lighter paint and it’s never quite blended perfectly.

So always test your paint on scrap fabric first. It will save you loads of time and give you far more predictable results.
Now let’s see what Emergence looks like with her new painted outline:
Yes, a better photo is coming soon. She’s too big to get in one shot when stretched out on the tables so it will have to wait until she’s totally finished.
She may be completely painted, but that doesn’t mean this process is done. Once all this paint dries, I will cover the surface with Delta Creamcoat Textile Medium. This textile medium will be painted on just like the paint with a paintbrush, and when it dries it will seal the paint permanently into the fabric.
While not all quilters or artists feel it’s necessary, I personally feel more comfortable sealing the paint, especially if I plan to soak and block the quilt again. Emergence will probably end up rolled and stored at different points in time, and I want to be 100% sure that none of this metallic paint will rub off on other areas of the quilt.
That’s it for quilt painting! No, it’s not the fastest technique, but it is pretty much the only way to add extra color at this stage of a quilt without sacrificing the quilted texture.
Instructions for Linking Up Your Blog:
1. Write your blog post. Publish it on your blog.
2. Copy the link of the specific blog post. This is not just the link to your blog itself (www.freemotionquilting.blogspot.com), but the link to the specific post: https://freemotionproject.com/2012/01/quilt-along-2-quilting-in-rows.html
3. Click the blue link up button above and paste your link into the box.
Keep in mind that you’re posting your progress from LAST week on THIS week’s post. This way you have time to watch the lesson, play with the ideas, then post your progress to the next quilt along. I hope that makes sense!
Let’s go quilt!
Leah Day

Beautiful! I recently took a craftsy class on quilt painting and I plan to incorporate it into more of my quilts. I am glad you have weighed in with your advice too.
And OMG the stitching in the close ups is phenomenal. Wow.
Leah your “Painting a Quilt” video is outstanding. Previously, I assumed I did not have the artist ability to paint a quilt. Now, having seen, in detail, how you painted your quilt, I am willing to try to paint a quilt too.
Thank you!
ArtsySharon
Wow Leah! I think it's one of your best! I hope you put it in a show 🙂
Thank you Leah. Love these insights. This is an area of quilting I'd really like to try and this just inspired me to go for it!
SewCalGal
http://www.sewcalgal.blogspot.com
I have a question, how do you hang quilts that you don't want to add a sleeve to & don't want to place quilt hangers all over you house (do to the fact you never know what size you may put up there next)?
Mary Sue
I could only watch short portions of your video at a time, due to lack of breathing! I found myself holding my breath seeing paint that close to a quilt!!! Gorgeous, Leah! Thanks for sharing.
Amazing work! I have jaw dropping envy over your work in Emergence, really, mind blowing.
I linked up one of my older blog posts simply because when you mentioned the bit about teaching the next generation it made me realize that I am teaching my daughters simply through example. The particular quilt in my blog has painted applique butterflies done by each member of my family. We used acrylic paint & textile medium mixed in a 1:1 ratio. The girls loved doing this project and it was simple and easy for them to do, it also created a love for creation and inspired their imaginations to explore in different directions.
I really hope you enter Emergence in to a quilt show. And if you do, can you pick the one in Paducah? I'ts only 2 hours from me and I'd really love to see it up close in person. Seriously!!!
Terrific video ~ loved seeing you and James in the production of "What, Painting a quilt?". He sounds so much like you! Right on cue James, good job!
Your quilts are beautiful ~ the threadwork that adds such design and color is fantastic! Thank you for sharing each week Leah.
Godspeed,
mary
Hi Leah, Loved the Emergence quilt painting tutorial. That is so Beautiful! You are so gifted. I admire your creativity. I wonder if you have a design for us wanna be's to try. I would love to make one. I have no artistic skills, but I love to learn.
Thank you for sharing your creativity. It is just Stunning.
Linda