Quilt Along #23 – Branch Out with Bare Branches
Time to get back to the Quilt Along and this week let’s learn a brand new design!

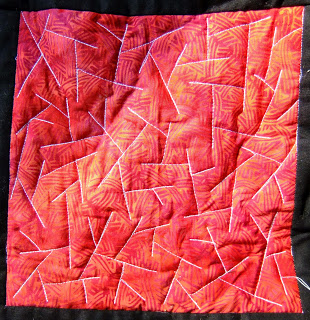
Bare Branches is formed by branching out with a straight line, then travel stitching back to the middle of the branch, then stitching out again in a different direction with a new straight line.

A picture might be worth a thousand words, but a video is worth a million! Let’s see how to quilt several versions of this design in free motion:

If you like this design a lot, you should definitely check out the new book 365 Free Motion Quilting Designs, which contains 365 awesome designs for free motion quilting. Click here to learn more about this book.
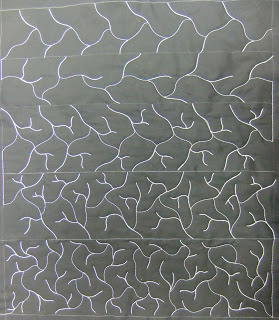
When it comes to stitching Bare Branches, it’s good to start with a few simple rows of repeating shapes. Here are the shapes I stitched in a practice fat quarter sized quilt sandwich:

The trickiest part of this design is all the travel stitching. This is the first filler design we’ve learned this year that requires travel stitching, so don’t be surprised if you have to SLOW DOWN quite a lot to quilt it.
On the plus side, using a design like this in a quilt will really stretch your ability to travel stitch in any direction, at any time. This is a challenging technique, but it’s a fundamental one, so much like playing scales on the piano, Bare Branches is a good design to stitch simply to hone your free motion quilting skills.
Another cool feature of this design is how nicely it will show up on your quilts. The area of travel stitching have 2 or 3 threads running over the same area. This is a bit like bolding a word when you’re writing.
All the other designs we’ve learned this year don’t have any travel stitching, so they will appear very light on the surface of your quilt. Only one single line of thread is running through that design so it’s not going to stand out nearly as much as a design with multiple threads layered together.
Which designs stand out the lightest in this quilt? The ones with heavy travel stitching!
Instructions for Linking Up Your Blog:
1. Write your blog post. Publish it on your blog.
2. Copy the link of the specific blog post. This is not just the link to your blog itself (www.freemotionquilting.blogspot.com), but the link to the specific post: https://freemotionproject.com/2012/01/quilt-along-2-quilting-in-rows.html
3. Click the blue link up button above and paste your link into the box.
Keep in mind that you’re posting your progress from LAST week on THIS week’s post. This way you have time to watch the lesson, play with the ideas, then post your progress to the next quilt along. I hope that makes sense!
Let’s go quilt!
Leah Day

So in love with my copy of your book!!! Hugs, Doreen