Quilt Along #16 – Zippling
It’s time to Quilt Along again and today we’re set to learn Zippling, a super fun zigzaggy design!
Is it just me, or are we all feeling a little strained by spring? May is always a super busy month, almost as busy as December, but without the big holiday at the end to build up to. At the beginning of this project, I planned on taking May and December off from the Quilt Along simply so we could all catch up on projects, spend some time outside, and allow this part of the year its busyness without trying to fight it.
So after much hemming and hawing, I’ve decided we’re going to take a break from the Quilt Along for the month of May.
I’m needing to spend some time with my family, to see my little guy graduated from preschool (yikes, where did the last 5 years go?!), and finish up several UFOs, including that unfinished book of 365 designs that seriously needs to get DONE!
So even though a break is disappointing, you’ll have something great to look forward to: the 365 book is coming by June!
Now with that announcement out of the way, let’s learn how to quilt Zippling:
Difficulty Level – Beginner.
Design Family – Independent.
In this video I quilted over this purple and black cheater cloth panel printed by Spoonflower and basted with Pinmoor pin anchors.
Last week we worked on Sharp Stippling, a design with only a subtle rule change from regular Stippling: the addition of sharp points.
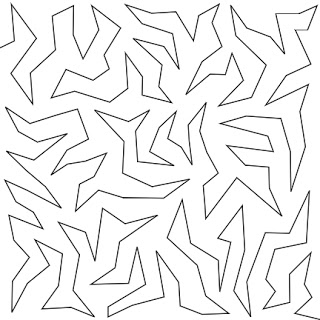
Now let’s add one more rule change: sharp points and straight lines. No Curves Allowed!
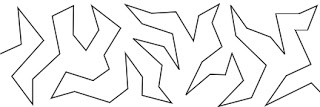
So to practice the most basic version of this design, you would stitch a row of V shapes like this:

Once you get comfortable with this, simply add extra zigs and zags to create a complex version of the design:

Don’t fret if your lines aren’t perfectly straight. Quilting a new design is always a work in progress and doesn’t have to be perfect.

Also don’t fret if you absolutely hate this design. As a beginner, I hated straight lines and sharp angles because they felt very rigid and – hopefully this makes sense – very distracting.
What I’m referring to is the FLOW of a design. If you’ve gotten truly comfortable with a design, you’ll no longer have to focus and actively think about creating it. The design will literally flow from your hands onto the quilt.
A flow state is a psychological term for that state your body can get into, almost like meditation, when your mind is so intensely focused on a task that all emotions, judgement, and criticism is wiped from your mind. Even though you are so intensely focused, you’re not actively THINKING, which means your mind is actually empty of thoughts, engaged only in the movement of your hands over the machine.
This is yet another reason why mastering a hobby is so good for your health – working on a project with single minded intensity, with no bothersome emotions to distract you, with no weighty depression to drag you down, your mind will reach a peaceful, resting state.
But designs like Zippling may be hard to find this state, at least at first. It really depends on how your mind works. If every morning you tend to doodle zigzaggy shapes as you drink your cup of coffee, chances are Zippling is going to feel very natural and easy for you to form on the quilt.
No matter how it feels initially, whether natural and easy or jarring and difficult, stick with this design, and spend some time stitching rows of Stippling, Sharp Stippling, then Zippling to get a feel for how your body and mind react to each design.
It’s extremely interesting to compare stitching a curving line to stitching a zigzaggy line. It might not seem like a big difference, but you may find on an actual quilt you can definitely tell which your body prefers to form. A design you don’t like will literally feel distracting as you quilt it. Your mind will not be able to flow because it will be worrying so much about forming the design correctly.
While it may seem silly to focus on this so much, I believe there’s a very good reason why Stippling is so extremely popular – the simple curves and wiggly shapes feel more natural to more quilters.
Personally I know when I’ve stumbled on a design I don’t like because I literally avoid, and sometimes even dread, working on that area of the quilt. This might not be very evident on a large scale, but working on a tiny scale, day after day, you’ll know very quickly if you intrinsically like the design you’re working on or not.
The wonderful thing about exploring and studying these free motion quilting designs for so long is I know how rapidly your skills can change. And with increased skill, your opinion and feel for a design will change too.
You might hate a design terribly this month, but next month you give it a try again and find that it’s much easier, and in fact you can quilt it quite well all of a sudden.
Always remember that your work and practice with free motion quilting is cumulative. No matter which design you’re stitching, you are stitching, and that is the point!
Instructions for Linking Up Your Blog:
1. Write your blog post. Publish it on your blog.
2. Copy the link of the specific blog post. This is not just the link to your blog itself (www.freemotionquilting.blogspot.com), but the link to the specific post: https://freemotionproject.com/2012/01/quilt-along-2-quilting-in-rows.html
3. Click the blue link up button above and paste your link into the box.
Keep in mind that you’re posting your progress from LAST week on THIS week’s post. This way you have time to watch the lesson, play with the ideas, then post your progress to the next quilt along. I hope that makes sense!
As always, any questions you have, please post them in the comments below or on your blog and I’ll answer 5 tomorrow on Question Thursday.
Time for me to shut up and quilt,
Leah Day

So sad we are taking a break for a whole month, but I also really understand. You can't imagine how much I look forward to linking up and seeing everyone's homework, your new lesson and of course your brilliant answers to our questions. So a big THANK YOU for everything you do to help us. Enjoy your son's preschool graduation! They grow up so fast. I'll be ready when we return.
I too am sad that you will be taking the month of May off, but I know that life calls! Especially in the spring…..hate to take time away from my sewing machine to weed my gardens, but I have to!!! Leah, you are a remarkable young woman and you have definitely opened my mind to a whole new way of FMQ…..so liberating! Thank you! Thank you! I can't wait to get my hands on the 365 quilting designs book when it comes out!!!
Wow! I just can't wait for the 365 book! I printed out all the pictures from Flickr, but it only goes up so far. When I am planning my quilt, I look one design at a time when doing free motion on it and the book will be a big help when deciding what to do. I like the patterns instead of all over designs. Can't wait!
Linda
I am way excited about the 365 days of FMQ book! I look forward to buying the printed version so I can have it by my side while I practice!
And great idea to take May off so we can piece together a practice top to work with in June.
–Christa
Very excited to see the book! We have your FMQ Challenge overt a SewCalGal to look forward to in May, and I definitely have a load of projects in mind to use my newly acquired FMQ skills during the break.
Yay for you! Enjoy your family…and chickens haha.Thank you for being. And for being an inspiration and a motivation for me to work through banishing the time/negativity monster! I will have some fun practice time now and await your return whenever you fancy!
Enjoy your break. Gardening is good for the soul too.
Donna from Canada
Pardon me but if I may, please, I need to back up and ask a microstippling question. I'm new and playing catch up. My thread tension on the back of my work is not even. I know it has to do with thread tension but my problem is balancing tension with speed. Ufortunately, I'm having to use an old husqvarna viking designer se, with an open toe stippling foot that has no spring so the whole action is achieved by a correct balance of tension, speed, and how fast you move your quilt. If I set a slow speed, the machine moves very choppy, even making a chop, chop, chop sound, and the thread onthe back is long and straight and too tight. If I use a faster speed, I have to move the quilt very fast to avoid sewing on top of already sewn lines and the thread on the back is dense and tight. I'm growing frustrated trying to find the right balance. Is this just the wrong machine to attempt this with?
thank you Leah for teaching us so much. I have used the binding method you taught us 6 times already! Once I figured out which way to turn the right tail, it has been so easy!
You have your priorities right in order, enjoy the baby… they grow up so fast! See you at the 2012 challenge, and then back here in June! Are you taking early orders on your book, or are you waiting until they come back from the printers? Godspeed, mary