Dyeing Fabric and a Quick Finish
First off – the quilt! This is Night Scape:
This is a 24″ x 36″ wall hanging created for the Studio E Fabric challenge. It was a challenge to create a wall hanging entirely out of the fabrics they sent me from two different tone-on-tone lines.
While I really liked the fabric, figuring out what to do with it was a challenge! I finally settled on using the blue, purple, black, and green fabrics together to make a dark landscape that I could then quilt over with a variety of filler designs.
Since I figured the company wanted people to actually be able to SEE the fabric in these quilts, I quilted the sky with Flowing Lines, which leaves nice gaps between curvy lines of quilting:
Working on this piece, I’m really starting to see that I need to stop making quilts for awhile and instead focus on experimenting with fillers. While I think it looks excellent, I’m getting a bit bored with my current application (i.e: fill every open space with one design).
It’s easy to get into a rut with any hobby or craft because once you get good at doing something one way, why change?
The challenge really is to keep changing, keep trying new things, and keep an open mind to everything you see.
Case in point is dyeing fabric!
I’ll be perfectly honest: until around 4 months ago, I had absolutely no desire to dye my own fabric. Living so close to Mary Jo’s Cloth Store (literally packed with every color of solid or batik you could ever dream of) means I don’t have to struggle to find the right color or style of fabric.
But then I attended a lecture with Patsy Thompson and…well…just go look at her quilts! Gorgeous, rich, luscious color! I didn’t know fabric could look that way, but once I saw it, I knew I would have to try dyeing fabric.
I emailed Patsy and she hooked me up with a list of links to check out:
- Patsy’s dyeing tutorial – This is excellent because Patsy explains exactly how she gets those gorgeous colors all blended together. It’s also a simple, no-nonsense approach that doesn’t require a lot of tedious steps or a million chemicals.
- The Lazy Dyer – This site rocks! Tons of information provided with excellent photos and I loved the experiments at the end where she showcases how color changes a bit depending on the fabric you use (who knew?!)
- All About Hand Dyeing – Patsy just sent me the link to this site yesterday and I’m already addicted to reading every page. There’s a lot more specific information. I especially enjoy her very clear photos with exact steps to recreate exactly that color or look. This is super important if you dye 2 yards, but then find you need 2 more of the same color!
So armed with information from Patsy Thompson and the Lazy Dyer, I’ve jumped into dyeing fabric with both feet! Here’s a few of my very first pieces:
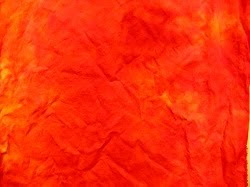 Deep Orange and Deep Yellow
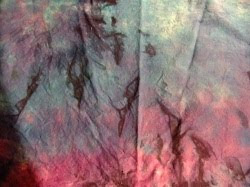 Royal Blue and Grape
1. Dye fabric that is dark enough to quilt over on video – I need DARK fabrics. Seriously dark. Navy blue, black, midnight purple, maroon – deep, rich colors.
2. Achieve predictable graduations – I want to know how to make fabrics blend and bleed together so they go from medium shades to dark shades.
3. Duplicate results – If I dye something once and follow the same steps, the same colors should result. If I get that perfect dark red color I love, I want to know I can find it again using the same formula and set of steps.
So bearing these goals in mind, here’s a few of my experiments:
First I tried making fabric that blended green, blue, and purple together. I also wanted to see the effect when the fabric was wrinkled intentionally like this:
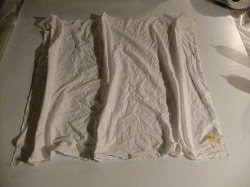 – Before –
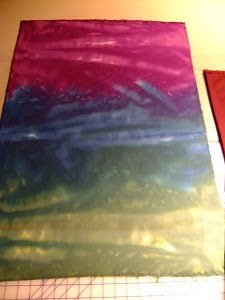 – After –
Now for something really weird! Not all the fabric I dye needs to be used for quilting. I’m also getting back into making clothes, and would love to use fabrics I’ve hand dyed.
Most of what I’ve read says to use only fabric that is Prepared for Dyeing that is usually marked PFD.
But what if you had a ton of white fabric that wasn’t PFD? What if you had white fabric that wasn’t just plain white fabric? What would happen when you dyed something like this:
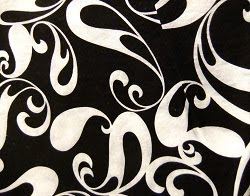 This is Vice Versa by Alice Kennedy for Timeless Treasures. It’s super interesting already, but when you add Deep Orange, Deep Yellow, and Fire Red to it you get this:
 I literally squealed with glee when I pulled this out of the dryer – it’s PERFECT! All the colors swirl together so nicely and I think it will make the perfect fabric for a nice skirt for this winter.
Here’s a few more experiments with printed fabric:
 This is Flor D’ Luna by Gail Foundation and May Wood Studios. A lot more of the white showed with this print, so I dyed it with a combination of deep yellow and deep orange to get this:
 Quite fiery! That might make a nice top to brighten up the rainy winter days to come!
Finally here’s the last black on white print: This is Michael Miller’s Dandy Damask, which actually comes in a lot of different colors, but probably not quite like this:
 The blue and purple dyed on this print actually looks a lot darker and richer in person. This will definitely be turned into a skirt or lounge pants very soon.
So that’s it for today! I’m going to get Night Scape packed up and sent off to Studio E, and then get back into the studio to work on Emergence. I’ve been feeling so bored with quilting fillers over her that I think SOMETHING has to change. Might be weird, but it’ll probably end up being a lot more interesting.
Let’s go quilt!
Leah Day

What exactly happened to the last fabric? (the Damask) Did the red dye overpower the black? How is it that the white remained so bright? Or did you bleach and then use a pale dye mix? Or, dye and then bleach? What happened? 🙂
Thanks for enlightening me! ~ Lynda
I dye fabric all the time, whether it's PFD, regular muslin, linen, sateen, and also fabric I might have bought years ago and now I look at it and say "what was I thinking?". Dyeing gives it a whole new life.
I LOVE your fabrics – it will be really interesting to see what you do with them and what quilts you create with the next batch of fabric you dye.
You Studio E panel is amazing – and I can understand how you'd get bored with using the same filler constantly. I look forward to seeing what you do with Emergence
great posts…i am kind of like you ion the being (why would i do this)… after your post.. i will have to try this.
Your Micheal Miller's piece is my favorite. I would buy 10 yards the way you did it if I saw this in a store – absolutely beautiful.
Your challenge piece is beautiful also.
I noticed that you now have a disclaimer at the bottom of this blog. i hope hope hope that this is because you are being careful and not because somebody has taken advantage of your generosity. Thank you so much for the sharing that you do.
wow, love the dyes, do you just dye in the washing machine? or??
I got your books and used a border design on a customer quilt this week 🙂 plus I have a give away on my blog
Beaquilter – I did a mix of tub dyeing and platter dyeing. I plan to shoot a video to share in a few weeks so you can see how it works. Really just follow the guidelines of the Lazy Dyer and you'll be fine.
Zenstitcher – The liability statement has been up for around a year when I realized we could held accountable to someone's failed project. Ridiculous I know, but might as well keep all bases covered!
Pixelatedtoo – The Damask fabric was first soaked in the soda ash solution, then spread into a plastic storage bin and Royal Blue and Grape Procion dye were squeezed over. It then set overnight and then the next day in warm sunshine, and was then washed out with hot water in the washing machine. Two washes later the dye stopped bleeding and that is what resulted!
Cheers,
Leah Day
Love all your results Leah. It's good that you experimented with fabrics other than PFD. When I first used Procien dyes for my fabric I was amazed by the intensity of the colours. I love to try out different ways of getting colour on to cloth. Thanks for sharing.
Nice! I've never been drawn to dying… but I just dyed some embroidery floss and I couldn't be happier! Nothing better than variegated threads!
~Monika
stitching in Saskatoon
Leah, here's another fabulous resource for dying fabrics. I've used Melissa's instructions and formulas several times.
http://fabricdyeing101.blogspot.com/
Cheers,
Michele