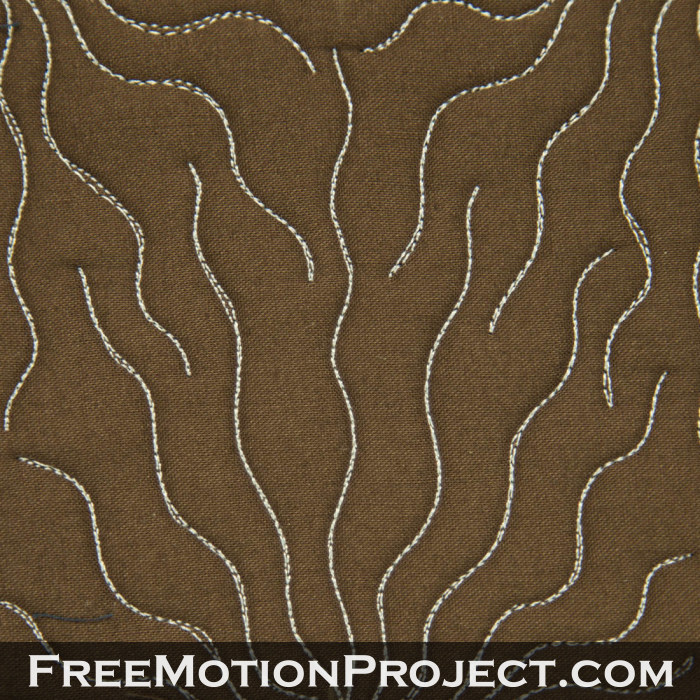
Water Plants Quilting Design Tutorial #223
Today we’re learning a fun quilting design called Water Plants that will give you lots of practice for travel stitching. Side benefit – Water Plants is the foundation for another quilting design called Cobwebs in the Corners!

Traveling is the process of quilting right on top of your quilting lines, and it’s an important technique to master in free motion quilting. By travel stitching through a design you can move easily across your quilt without having to break threads.
I decided to split Cobwebs in the Corners into two quilting designs because there are a lot of steps and this Water Plants design is pretty enough to be quilted all by itself.
This design was created to fit into sashing, almost exactly the way Modern Art fits into and fills to the center of a narrow sashing strip, creating a beautiful texture in even the most narrow places.
To quilt Water Plants into the sashing, you would first start with one side, quilting the wiggly lines into the center (or a bit beyond it) of the space between quilt blocks. Then you’ll probably have to break thread and move to the opposite side, interlocking the next set of water plants with the first set.
So now that you have an idea of where to put this design, let’s learn how to machine quilt it!
Does quilting on your home machine feel like a drag? Find the tools I use to make machine quilting feel easier!
Inspiration – Just wait until you see what this design becomes tomorrow with one tiny extra step added. Let’s just say I was super inspired by Halloween and the idea of making a fall themed table runner / quilt. Not to say that I actually got it done, but I’m certainly thinking about it!
Difficulty Level – Advanced. There is a lot of traveling involved with this design, which can be tricky if you have trouble staying right on the line. If you’re getting frustrated, instead traveling back along the wiggly lines, try stitching just 1/4″ to the side to create more of a wiggly tentacle shape.
The design might look a little different, but it will end up being easier to stitch!
Design Family – Edge to Center. This design set is quickly becoming my favorite for interesting sashing designs. They work right off the edge into the center of the quilting space, then you either travel stitch or break thread to fill the opposite side.
The end result is a set of designs that work easily into the sashing or borders of a quilt without a lot of fuss.
Directional Texture – 2 Directions. Edge to Center designs typically have a very clear horizontal or vertical texture, but really if you fit your Water Plants together tightly, this will probably end up reading as no direction. Either way, it will definitely attract some attention!
Suggestions for Use – Water Plants will be perfect in the sashing! Wouldn’t it be cool to create a water or ocean themed quilt with fish, and quilt water plants in the sashing? I’m sure Josh would love a quilt like that so maybe I should give a try designing it!
Let’s go quilt,
Leah Day

I'm looking forward seeing where the 2nd part of this design goes – pity I'll have to wait until after Halloween, as we'r off to my brothers wedding this weekend, but I'll be patient.
I will definately be using that in the eight inch sashing on my next charity quitl! It is PERFECT. Not too dense for cuddle-ability. You are fabulous!
Love this design. looking forward to tomorrows. I have a hand appliqued fish quilt that needs finishing. Each block is a different blue with an orange fish on it(different shades and designs in the fish). A couple blocks with turtles. Doesn't need a lot of quilting in the blocks, but Water Plant will look fantastic in the sashing. I understand your sketch for the horizontal portion of the sashing. How would you place the motif in the verticle portion?
Hey Roberta – Great question! I've answered it on the followup post at:
http://freemotionquilting.blogspot.com/2010/10/day-224-cobwebs-in-corners.html
Cheers!
Leah