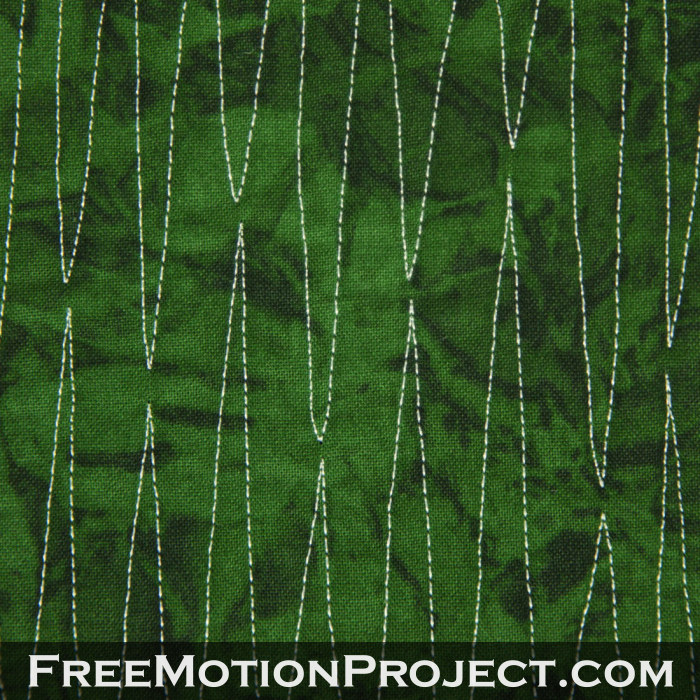
Day 222 – Cave Points
When I was a kid my favorite number was 2, so today is extra special because it’s Day 222!
So on this special day, let’s look back at Modern Art and see if we can make another design that works similarly to this design.
After a bit of thinking, I realized this design could easily be reversed to create Cave Points:

I’d been to Linville Caverns a few years ago and this reminded me of the stalactites and stalagmites that are formed naturally in caves and caverns, and this also added to the inspiration for Cave Points!
Now let’s learn how to quilt this easy design:
Difficulty Level – Beginner. This design is really as easy as quilting a long skinny point! It’s great practice for stitching straight lines and stopping and starting smoothly.
If you find yourself struggling to start quilting without a noticeable weird area marking the area you get started again, consider trying a simple design like this to get the hang of those stops and starts.
Design Family – Edge to Center. This design is worked from one edge into the center of the quilting space, then from the opposite edge into the center so the shapes interlock together to form the design. Scroll down to find more pretty quilting design tutorials that are quilted in a similar way.
Directional Texture – 2 directions. This design creates a nice horizontal or vertical texture that will work perfectly in a narrow sashing or border area.
Suggestions for Use – With Halloween on its way, it’s the perfect time to finish up a spooky themed quilt! Cave Points looks a lot like monster teeth and could be a great way to tie some funky blocks together in the sashing.
Let’s go quilt,
Leah Day

I love the new designs the past 2 days. I especially like the center fill designs. I reviewed the previous water designs: Ocean current & Swirling water. They look similar, but formed completely differently. I am fairly new to your blog, so have been practicing past designs. I have a notebook where I make a sketch of the design and "how to directions" of my favorites, so I have a record to refere back to. I think you did a great job on your book "From Daisy to Paisley". I am looking forward to your next book, which I know you will not be working on for awhile. I think your online shop is really nice, and I placed orders for gifts for members of my quilting group. I found something for everyone. Continue to enjoy your creativity.
Thanks Roberta! I really appreciate your compliments about the project and the store!
As for Maelstrom – I was only referencing other water inspired designs, not designs that were created similarly. I hope that makes sense!
Maybe I should start adding a little caption of similar designs to each post? Hmmmm….
Cheers for the idea!
Leah
Leah
It's so fun to see how just small changes really make an entirely new design. This one reminds me of capital "N's." I have really benefited from "How Do I Quilt This" posts. That seems to be the point at which I sometimes develop "Quilting Paralysis"! What was helpful to me was to think "outside the box" so to speak, the 6" square box that your samples are given in. Taking a design and squeezing it, stretching it out, or just taking the primary motif and using it in sashing for instance really creates a whole new look. I've used modern art and basic spiral in this way just this past week in some sashing and border areas. Modern art especially makes a beautiful sashing quilting motif. I know that your Thursday class will benefit greatly from this helpful information.