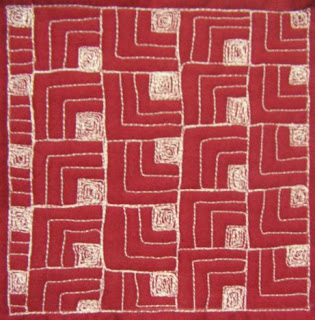
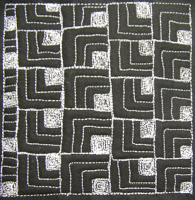
Day 143 – Square Shell
Many of you weren’t around that early on, and if you’re just joining me, hooray! I’m so glad you’re here!
So in honor of it being officially 7 months since the start of this project, let’s make a variation of Echo Shell with squares instead of circles:

Today has been another super cleaning and building day! I built 4 bookcases yesterday and put my desk together today.
After all this is done, I’m installing new lighting in the office and one of my sewing rooms. I really think this is such an important thing that I’m planning on recording a short video on it and will share it later this week.
I have always thought better lighting = more creativity.
Something about clear sunshine streaming in the windows really gets me excited, but the basement doesn’t have a lot of natural light so I make up for it with florescent lights.
Before I run off to drill, hammer, or glue something in place, let’s learn how to quilt Square Shell:
Inspiration – I’ve been thinking a lot lately about the designs I created when I first got started on this project. Looking back at Echo Shell, I realized this would be a really easy design to create multiple variations from.
Difficulty Level – Advanced. This design isn’t super difficult, but you do want to watch your travel stitching and make sure you stay right on the line.
If you have trouble keeping your squares looking like squares, mark them! There’s no rule in the book that says you can’t.
Design Family – Echoing. This design is formed by starting with an initial shape and then echoing that shape repeatedly. Other similar designs include Brain Coral and Pug Eyes.
Directional Texture – All Directions. This design does have a very horizontal and vertical texture (it IS square!), but it’s such an attention getting design, I really feel like it has more of an all over texture.
Suggestions for Use – Definitely show off with a row of Square Shell along the border or in the sashing of your quilt. I really think this is a very sophisticated design that looks a lot more complicated than it is, so play it up and show off your stitching!
 Feel free to use this free motion filler designs in your quilts,
and send in a picture to show it off.
Click here to support the project by visiting our online quilt shop.

If you haven't done your lighting yet think on this:
-Fluorescent lights are not 'true' light and tend to change the way the tones in your fabric appear. It is possible put 2 fabrics together that seem to be fine, but when viewed in natural light or incadescent light, they are awful. Bet this has happened to you after picking out fabrics in a store with fluorescents and then not looking right when you get them home. I check my fabrics when buying them near a window or front door!
-Florescent lights have a 'wave' pattern (ever seen one that is going out wave/pulse slow enough you can see it?). When they are working right, our eyes do not see that but it is still there. When you work under them for long hours, it can effect your vision and even cause headaches and other physical problems. see http://en.wikipedia.org/wiki/Over-illumination#Headaches.2C_fatigue.2C_stress_and_performance_effects
– see http://www.fullspectrumsolutions.com/default.htm or similar sites for more explanations of this and what kinds of bulbs give 'true color'.
I started looking at this when I realized that I only had migranes when sitting under fluorescents.
I enjoy your blog and it's wealth of info…keep up the good work.
Vic
Hi Leah,
If you are doing the lighting in your studio, have a look at day light bulbs (blue light).
They distort colours less and are less tiring on eye site and mood enhancing. They do not have the flicker that flourescent lighting has. Under flourecent lighting I feel blind and tend to get headaches. Having changed to a more natural light has made a big difference.
take care, Ju