
Adding Trapunto…
I find this to be an amazing contraction in the quilting world. Mention “applique” to most quilters and they’ll shrug their shoulders and think “Eh, no big deal!“
But you drop the word “trapunto” and those very same quilters will faint dead with fear and terror.
What is the big deal ??? Trapunto is MUCH EASIER than applique!
I think the reason for all the hysterics is a lack of understanding, so I’m taking it upon myself to educate you all on the ease and simplicity of trapunto.
It’s not complicated, it requires no special abilities other than cutting on line, and it adds so much to your quilt in terms of depth and texture.
Many quilters also assume that Trapunto is still added to a quilt the way it was 100 years ago by creating small holes in the back of your quilt and pushing extra bits of batting into certain areas.
Come on people! You don’t cut out your fabric the way your great-grandmother did with scissors and cardboard templates, so why assume trapunto is still being done in the same way?
Nope, there’s a whole new trapunto method these days that can be easily accomplished before the quilt top is even sandwiched.
So lets learn this method together as I go through the steps of adding Trapunto to this new water goddess’s hair.
Step 1 – Mark your quilt top – You will need to mark the areas where you want the trapunto to go. In this situation, I marked the lines on the hair area with a white Sewline Pencil.
 Try to keep your marks light so they wash or erase easily, but dark enough for you to easily be able to follow the lines.
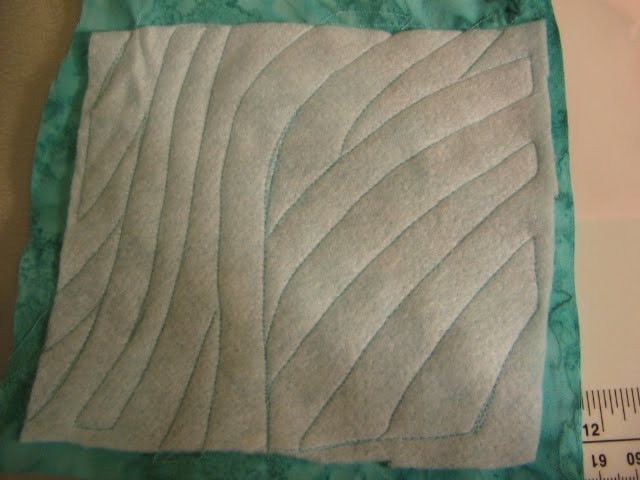
Step 2 – 1st Baste – Layer your quilt top with 1 layer of batting (NO BACKING FABRIC). If you’re doing trapunto over a whole quilt, you’ll want to secure this batting to the top with pins so it stays in place.
I’m using a thicker polyester batting for this layer so it really poofs up the hair. For this quilt I’m using Quilter’s Dream Poly in the Select thickness for the 1st layer of trapunto, and the request thickness for the 2nd layer.
Step 3 – Outline Quilt – Now put thread water soluble thread in the top of your machine and regular thread in the bobbin. You’ll want your regular thread color to match the color of your quilt top.
 Water soluble thread can be finicky, so make sure to take off all the tension from the top of your machine.
Now stitch the outline of your marked lines, being careful to stay RIGHT ON THE LINE. The water soluble thread is holding the batting in place temporarily, but will wash out after the quilt has gotten wet.
BIG QUESTION!!! Why in the world do we bother with this step using Water Soluble thread???
The reason is, in order to stabilize the batting, you need to stitch over these lines a 2nd time after the batting has been clipped.
If you used regular thread in this area, when you go to stitch the second time, your thread will build up greatly over all the outlines of your quilting motifs, making it difficult to stitch and a little messy looking.
So we use water soluble thread so it will temporarily hold the batting in place, but wash out later.
You can use water soluble in both the top and bobbin of your machine if you want to, but it’s not really necessary. As long as your bobbin thread matches the color of your quilt top, you can use regular thread in the bobbin and save yourself some money on water soluble thread.
By the way, you can find water soluble thread in the Day Style Designs online quilt shop right here.
Step 4 – Clip the Excess Batting – Now this is my favorite part! Sit down at your TV or computer, throw in a Dr. Who or Torchwood episode, and start clipping!
 After Clipping
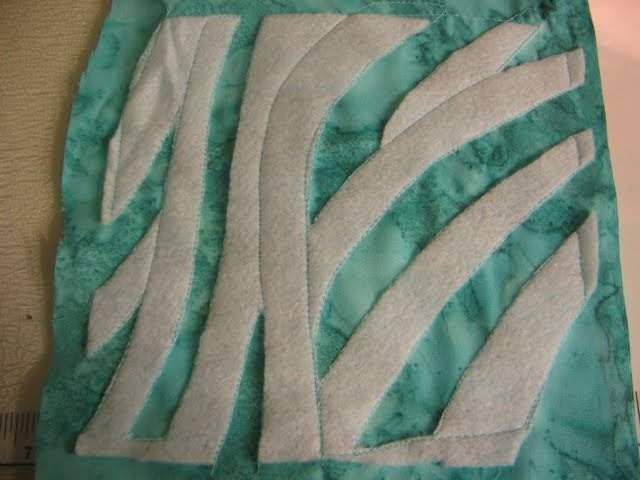 You’ll want to use a pair of comfortable, sharp scissors to clip right along the water soluble thread. Usually I’ll use scissors with a blunt tip for most of the clipping, then a sharp tip for getting in all of the tight spaces.
Be very careful while clipping! You don’t want any batting hanging outside of this stitched boundary line or your trapunto won’t look very neat, and you also don’t want to accidentally clip a hole in your quilt top.
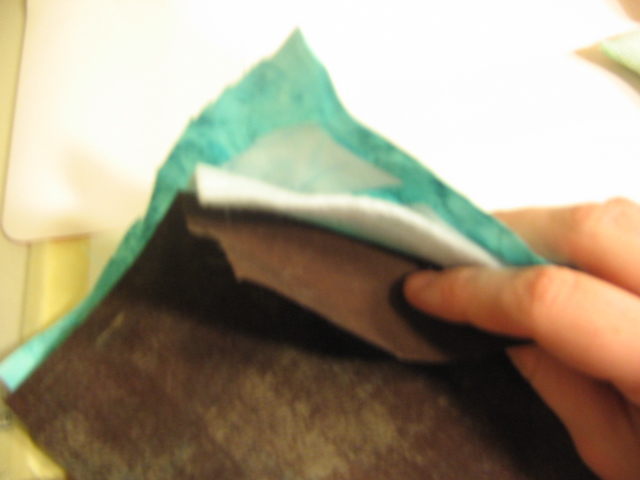
Step 5 – Final Baste – After clipping, you can treat your quilt top just like a normal quilt and baste it with more batting and a fabric backing. Sandwich this together really well with safety pins, and then you’re ready to quilt!
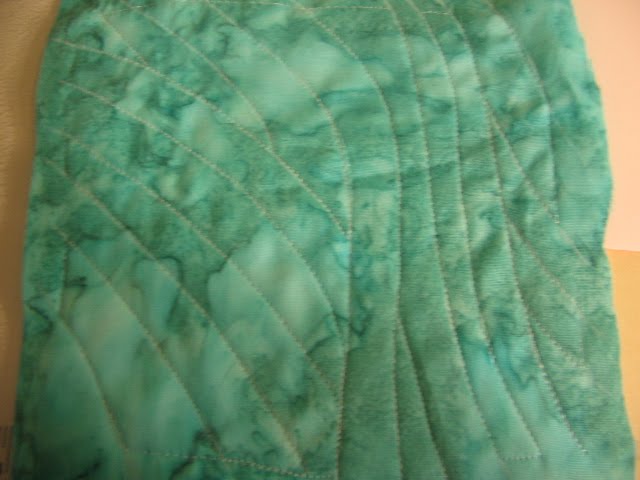
 Step 6 – Quilt it – Thread your machine with regular thread and first quilt the outline of your motif, then to make it stand out really well, densely quilt the background area.
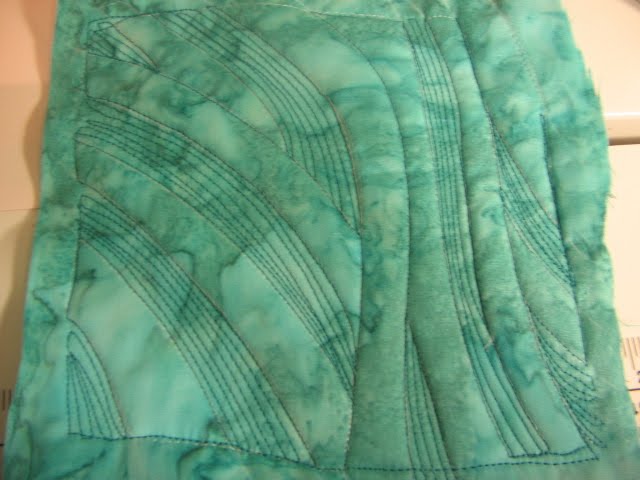 You probably noticed that all the photos are of just another 6″ sample square. I do these samples to test the 2 battings to make sure they’re thick enough to produce a nice poof in the finished quilt.
I’m also testing out thread colors with the sample as well. I’ll do another post on this tomorrow to explain how I’m going to pick out thread colors for this quilt.
Quilting this way with trapunto will make you start looking at the quilt differently. I actually really see quilts as being made up of 2 distinct parts: areas to be made puffy with trapunto, and the areas flattened with dense filler quilting.
Of course, not every quilt needs trapunto, but it does make me so sad when I see a gorgeous appliqued quilt that doesn’t have it.
The extra layer of batting really adds SO much to the quilt that you can’t get with any other method.
Yes, I know there are “cheater” trapunto methods out there. Some quilters will use one single layer of wool batting and quilt super dense around their motifs.
I’ve seen this and it looks good, but honestly, I’m not willing to take the chance that my motifs won’t be puffy enough.
If I want something to stand out, I trapunto it with 2 layers of batting. Of course, everyone is different and we all love to focus on different areas of the quilting process, but if this is a technique you haven’t tried yet, definitely try it on for size with your next quilt.
Let’s go Quilt!
Leah Day
I had never heard of trapunto, but that looks amazing and will really add to my next quilt. Thanks so much for the tutorial. I love your blog.
Thank you Leah. where can I get water soluble thread??
thats really interesting – I'm going to try that too!
Great minds think alike Leah (except mine has a long way to go before I catch up with yours) – I've started a sample block to practice my FMQ – a celtic knot and this is very similar to what I've done, no water soluble thread just a continuous tacking strip across the knot to hold the 1st layer of batting in place – I now need to get cracking with the second layer and quilting – will post photos on my blog of how I get on
this is alot easier than the method I know of – and have not done!! And I laughed when I read that we don't do things like our grandmothers….. that is so true – so your 'new' method is one I will try…. thank-you for teaching me another new thing!!!
Thank you so much for your very helpful step-by-step explanation and pictures. Takes away any excuses for not giving it a try! Now all I have to do is start experimenting on sample squares. It seems like trapunto can add loads of interest, texture and depth to a quilt. Thanks for again encouraging us to "just try it!"
I've used water soluble quite a bit, and never had any trouble with tension whether I had it in the top or bottom. YLI Wash-away is very nice and washes out cleanly and easily and is available at quilt shops.
Questions: why not use it in the top & bottom for the trapunto? Then nothing would be left later. Are you recommending matching thread in the bobbin so that when the quilt is washed the thread left inside the quilt will not be showing?
Thanks Leah. I've done trapunto on my embroidery machine but I am 'up' for trying it with fmq after seeing this. One sample block will be done tomorrow! I don't have water soluble thread yet but you gotta start somewhere 😉