Filler Design Theory
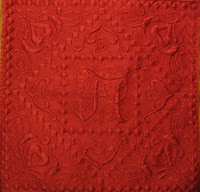
 This quilt has helped me form what I now call my Filler Design Theory (think music theory only for quilting).
I touched on the basis for this theory in the last post on Cracked Eggs, but I know it needs to be explained further.
So here’s the deal: Choosing a filler design can be tricky. Even working with fillers as much as I do, sometimes I catch myself mindlessly flipping through the designs trying to figure out which will work the best for my latest quilt.
Sometimes your choice is largely controlled by what texture you want in your quilt. You may want loads of movement in one area and no movement in another.
You can easily select a design based on the directional movement I’ve determined for each filler.
But this can cause problems. Not all designs are created equally and as I learned in The Scarlet Letter, some fillers absolutely won’t work in small tight areas.
The determining factor for this is not dependent upon directional movement, but the way the designs are formed.
 Take Matrix for example. This is a filler design that has both all direction texture and is flat enough it could also work as a background filler.
But it absolutely won’t work in small tight areas like a true background fill should.
Well, I shouldn’t say absolutely won’t work, it will work with a giant headache, loads of seam ripping, and a general desire to chuck your quilt in the trash.
The reason it’s so difficult is not due to the texture, but the way the stitch is formed.
This is stitched from edge to edge. That means when you’re trying to stitch around a tiny quilting motif, you’ve got to do loads of traveling and visual lining up in order for the lines to stay consistent and even.
So it’s safe to say that all of the designs created in this project can be used expanded over the whole surface of a quilt, but that only certain ones can be used in small, tight background areas.
The whole point of this project is to start using new filler designs on our quilts. I’m realizing that a big step to using these designs is in answering the very important question:
I believe the reason is because stippling is a very unique filler that is perfectly suited to fill all areas of a quilt: large surfaces and tiny nooks and crannies.
Stippling is what I call an Independent Filler because the line is truly independent as it draws the wiggly lines and tunnels, traces back along itself, and fills the area evenly.
 Without even knowing this, I realized recently that I have designed a filler just as versatile and Independent as Stippling. Guess which one? Tree Roots!
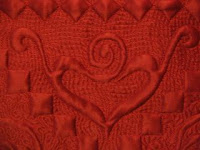
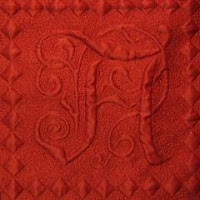
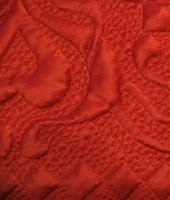
While quilting Tree Roots in the very tight background areas around the central “A” I realized just how easily this filler works in small areas.
It can be expanded to cover a whole quilt or shrunk to fill just these tiny areas and the determining factor that creates this ability is not the shape or texture, but the way it is formed with a single line working in a continuous, ever changing direction.
Let’s learn about some other fillers and how they are formed:
 Stacking Designs– Pebbling falls into this filler type. These types of fillers are created by repeatedly stacking a shape over and over to fill the space.
In the case of pebbling, you’re always returning to the starting point of the circle which makes for starting the next circle in the stack very easy.
Echo Designs – Echo Shell and Echo Rainbow are both easy to fill in small areas because again they are formed in a stacking manner, but it’s even easier because after stacking the shape, it’s simply echoed several times until you’re ready to move on to the next shape.
Pivot Designs – Paisley and Flame Stitch are formed by pivoting off a central starting point. You’re stacking an initial shape like a teardrop and echoing it several times, but unlike echo designs, your stitches are always working back to that initial starting point.
These also work great in small areas because they can be easily pivoted in any direction.
Branching Designs – McTavishing and Lightning Bolt are created slightly differently from all of the above designs, but they still work equally well in small areas.
In this situation branches flow out, are echoed, and then more branches flow from them. It may take more practice to fill in the weird tiny areas evenly with this filler, but the rich texture is worth it.
Even In Stitches would count as a Branching Design and could be used in small ares, but not very easily.
Center Fill Designs – These designs like Poinsettia are a wild card. Yes, they could probably work in small tight areas, but because they’re formed from the center out, they require breaking your thread to start in the center.
I can admit honestly that I haven’t even scratched the surface with center fill designs and plan to devote many more days to playing with these fillers.
Edge to Edge Designs – Examples of these designs are Matrix, Sea Algae, Sea Oats, and Television Ariel just to name a few.
There’s been a lot more of these than the other types of fillers and you can easily find them by looking for designs with two directions.
Stitching from edge to edge gives the design a definite horizontal or vertical look, but it also makes it very difficult to stitch in small places, unless you like banging your head against a wall!
Designs like these should be used in open areas like sashing or borders, or expanded to cover large areas very quickly.
This list of filler design types is by no means complete. I will never suggest that there are only 7 ways to form a design, but will continue to add to this list as I discover more.
What I hope you will take from this book long lecture is that choosing a design should be less about the shape and more about how that shape is stitched: where it starts, where it stops, and how much trouble it takes to get to the beginning of the next shape.
From now on all the posts will have a short explanation of the filler design type and how this will effect how the design is stitched. Hopefully this will make picking your designs and using them in your quilts much easier!
Let’s Go Quilt!
Leah Day

When you have the year done, could you put the 365 video designs on a DVD for sale. I would love to have a copy that I can look at and go throught and look for designs and how they are done. The short video's you do are wonderful, because I am a visual person, it works for me.
Great info.
Actually I'm currently working on a DVD collection. It's going to be sets of 40 designs each for a total of 9 DVDs.
I'm also working on a set of downloadble ebooks that will also feature 40 designs for a total of 9 volumes.
Trust me, you guys will be the first to know when it's all done – I SWEAR!!!
Let's Go Quilt!
Leah Day
I will be one of the first in line for your DVD and your books. You are a fantastic quilter and teacher!
Maggie in E. Central Illinois
Thank you for your lovely tutorials! the way you do it, it seems so easy. I have never tried it, but looking at this, I think I should.